Mittens – Basic With a Perfect Thumb – Worsted-Weight
Claim This Plus Every Other Pattern On Knitfreedom.com When You Claim The Offer Below
[convertkit form=1628930]Already have an account? Log in here.
A basic Magic Loop mitten pattern designed for worsted-weight yarn – featuring the World’s Best Mitten Thumb and a snug ribbed cuff with an invisible cast-on edge. Mittens can be knitted one-or two-at-a-time on Magic Loop.
Pattern Details
- Sizes: Small, Medium, Large
- Finished Measurements: Fits a hand 7 ½ (8, 8 ½) inches around the palm of the hand (right above where the thumb branches off) and 6 ¾ (7 ¼, 7¾) inches long from base of hand to tip of middle finger
- Yarn Weight: Worsted (9 wpi)
Materials
- Yarn: 140 yards of worsted-weight wool
- Needles: 1 pair circular needles, 47" for two-at-a-time, 40-47" for one-at-a-time
- Needle size: US 7 - 4.5 mm or size required to get gauge (5 sts/in)
- Notions: Stitch markers, scissors, tapestry needle, waste yarn
Gauge
- 5 sts/in in St st
Shown: 2.2 skeins Rowan Lima in 891 La Paz.
Pattern Notes
KnitFreedom's list of standard abbreviations and techniques can be found here.
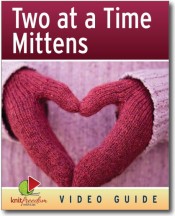
Recommended Course: Two-at-a-Time Mittens

Mittens are fast project that you can often do with one skein of yarn. And you'll be surprised at how easy it is to knit them two-at-a-time.
Learn to knit a pair of mittens two-at-a-time on Magic Loop - no previous Magic Loop experience required. This guide takes you step-by-step through everything you need to know to succeed.
Related Free Knitting Patterns:
Video Tutorials for This Pattern
Related Blog Post: How To Knit The Ultimate Mitten Thumb, & Two New Free Mitten Patterns
 By Liat Gat – Founder / Mittens, New Patterns, World Travels / July 7, 2012 / 69 Comments
Ever since I designed my first pair of mittens, I’ve tried to achieve the perfect mitten thumb. The key is picking up extra stitches around the thumb and then decreasing quickly. The included video tutorial shows you how.
Read Post »Published July 16, 2018
Last Updated: - Current Version: 4.1
Update notes:


I am using your worsted weight miittens for magic loop pattern. Rnd 1 on decreasd for top of hand. Is this instruction for 2 rounds? Do you not decrease on both sides of the mitten? I am not understanding the word TWICE. Thanks
Hi Kate,
Sorry for the delay in replying!
Yes, you decrease on both sides of the mitten. Another way to write this would be *(K1, SSK, k to last 3 sts on needle, k2tog, k1), repeat from * to end. This will give you 4 decreases around the mitten.
Hi dears,
Here is how to modify this mitten for child sizes. We have tech-edited the numbers but we have not test-knitted all the sizes, so if you try this out, please leave us a comment and let us know how it goes!
Sizes: Toddler (2-3 years) [Child (4-5 years)]
Finished Measurements: Fits a hand 5.5, 6 inches around the hand at the widest point; 4, 4.75 inches long from base of hand to tip of middle finger.
Cuff
CO 18 (20) sts using the Long-Tail Cast-On or any preferred cast-on. Try the Italian Cast-On for an invisible edge.
Divide sts evenly for working in the round on Magic Loop.
Next 8 (10) rnds: *(K1, p1), rep from * around [18(20) sts].
Increase for Hand
Rnd 1: K [18(20) sts].
Rnd 2: (K3, M1L) 3 times, K3, (M1L, K3) twice, M1L, K0 (2). [24 (26) sts].
Next 5 Rnds: K [24 (26) sts].
Thumb Gusset
Note: Directions apply to both mittens unless specified.
Rnd 1: Mitten 1 (Right Mitten): K3, PM, M1L, k1, M1L, PM, k to end. Mitten 2 (Left Mitten): K until 4 sts remain, PM, M1L, k1, M1L, PM, k 3 rem sts [26 (28) sts, 3 sts between markers].
Rnd 2: K [26 (28) sts].
Rnd 3: K to marker, SM, M1L, k to next marker, M1L, SM, k to end [28 (30) sts, 5 sts between markers].
Next 4 (6) Rnds: Repeat Rnds 2-3 two (three) times [32 (36) sts, 9 (11) sts between markers].
Next 5 (7) Rnds: K [32 (36) sts].
Remove Sts for Thumb
Next Rnd:
Mitten 1 (Right Mitten): K to marker, remove marker, slip next 6 (8) sts onto waste yarn, k to end. Remove second marker when you come to it.
Mitten 2 (Left Mitten): K to marker, remove marker, k3, slip next 6 (8) sts onto waste yarn, remove marker, k to end [26 (28) sts].
Tie ends of waste yarn together. Do not pull the waste yarn so tight around the thumb stitches that you can’t get your thumb through if you need to try on the mitten.
Hand
Work even for 14 (16) rnds or until work covers the tip of the pinkie finger.
Tip: Place a marker in a stitch on the first round to make it easy to count how many rounds you’ve done since the first one.
Decrease for Top of Hand
Rnd 1: (K1, SSK, k to last 3 sts on needle, k2tog, k1) twice [22 (24) sts].
Next 3 Rnds: K [22 (24) sts].
Next Rnd: Repeat Rnd 1 [18 (20) sts].
Next 2 Rnds: K [18 (20) sts].
Toddler Size Only
Next Rnd: (K1, SSK, k2, SSK, k to last 3 sts on needle, K2tog, k1) twice (12 sts).
Child Size Only
Next Rnd: (K1, SSK, k3, S2KP, k2, K2tog, k1), twice (12 sts).
All Sizes
Next Rnd: K (12 sts).
Next Rnd: Repeat Rnd 1 [8 (8) sts].
Next Rnd: K [8 (8) sts].
Next Rnd: Repeat Rnd 1 [6 (6) sts].
Finishing – Hand
Cut yarn, leaving a 12-inch tail. Thread yarn onto tapestry needle and thread twice through remaining stitches, removing the needles at the end. Pull yarn tight.
Thumb
Place 6 (8) thumb sts onto circular needle and divide for knitting in the round on Magic Loop. Join yarn and p/u and k 4 (6) sts along inside of thumb [10 (14) sts].
PM for BOR.
Rnd 1: K0 (1), [K2tog, K3 (2)] 2 (3) times, K0 (1) [12 (12) sts].
Next 5 (9) Rnds: K (or work until thumb sts just cover tip of thumb) [12 (12) sts].
Next Round: K2tog around [6 (6) sts].
Finishing – Thumb
Cut yarn, leaving a 12-inch tail. Thread yarn onto tapestry needle and thread twice through remaining stitches, removing the needles at the end. Pull yarn tight.
Do you really only put 10 increase stiches on when 13 are between the markers?
Hi there!
This is Mary Claire, the KnitFreedom knit expert here to help with your question. I’m assuming you’re talking about the increases for the thumb gusset? The reason you’ll end up with 13 stitches as opposed to 10, is because your count starts with 3 stitches already between the gusset markers.
Hope this was helpful, thanks for the great question! :)
thanks ever so much for this pattern. had searched everywhere for adult size mitt pattern.
You are so welcome! I hope you enjoy it. You can post here in the comments if you need any help knitting the pattern. I also offer a full video guide to knitting mittens (two-at-a-time if you desire), which you can find here: Mittens Video Class. Thanks!