Ch. 18 Project - Frog Dishcloth
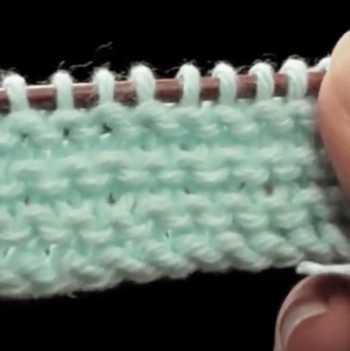
 We’re going to make a square dishcloth instead of a diamond one this time.
To do so, we’re going to strategically place some purl stitches on the knit side (or “right side,” abbreviated “RS”) of the dishcloth to make a design in relief.
You have a few choices for the image that you’d like to put on your dishcloth – in the video, I’ll be doing the frog design – here is the link to that pattern and a few more to choose from.
Please browse and print out one or several of these free dishcloth patterns with images:
- Frog (the design I’ll be showing you in the video)
- Dragonfly
- Snowflake
- Spider
- Dolphin
- Kitten
- Maple Leaf
- Swan
- More free dishcloth designs
Pattern-Reading Tips for the Frog Dishcloth
Let’s take a look at the frog pattern (you’ll have to follow the link on Ravelry to the designer’s blog and then scroll down to the dishcloth with the frog).
You’ll notice a few new abbreviations – namely “RS” and “WS.”
“RS” means “right side” and “WS” means “wrong side.”
Now, there really is no right or wrong in knitting, and we wouldn’t want to make one of the knitted sides feel bad about itself, but on non-reversible projects there is aways a side that is meant to be showing (the “right side”) and a side that is not (the “wrong side”).
You may also notice a few inconsistencies from the standard pattern format I’ve been teaching you.
I can’t re-write the pattern for you here, because it doesn’t belong to me, but let’s just say that “Row 8: (WS) K4 then P29, then K4” can be written as “Row 8: K4, P29, K4.”
You’ll also notice that every even-numbered row is the same as Row 8: “K4, P29, K4.”
While there’s nothing wrong with writing this out, many designers will simply let you know this using the following abbreviation the first time: “Row 8 and all other WS (or even-numbered) rows: K4, P29, K4.”
After that they’ll leave out any mention of even-numbered rows, which is why you should always read through the pattern carefully before you start.
We’ll talk more about what’s happening on the even-numbered rows, and how to save yourself some time and effort on them, once we get going.
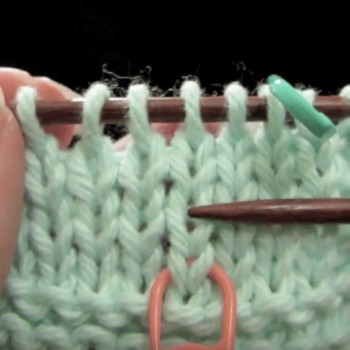
One last point: counting your stitches and rows and knowing whether you’ve knit or purled is going to be crucial on this project, and great exercise for your knitting neurons as well.
Frog Dishcloth – First Rows
Work with me together as we follow along with the instructions in the pattern, and I’ll walk you through fixing any mistakes as well.
One easy way to keep track: make sure to cross off your rows on your printed pattern as you do them. The next four videos will guide you through this project, including a lot of troubleshooting and mistake-fixing.
Here are the first few rows. I also discuss some pattern-reading shortcuts.
Restricted Video
![]()
![]() This video is available to members of Knitting Superstar University or the following classes:
This video is available to members of Knitting Superstar University or the following classes:
If you own this class, please LOG IN to watch.
First Pattern Rows – Dishcloth

Now let’s work the first few rows of the pattern, reading the directions together.
Restricted Video
![]()
![]() This video is available to members of Knitting Superstar University or the following classes:
This video is available to members of Knitting Superstar University or the following classes:
If you own this class, please LOG IN to watch.
Recognize Where You Are in the Row
Work along with this video to practice recognizing where you are in the row by looking at what you’ve done. We’ll also learn how to count rows, and some special tricks for making it really easy.
Restricted Video
![]()
![]() This video is available to members of Knitting Superstar University or the following classes:
This video is available to members of Knitting Superstar University or the following classes:
If you own this class, please LOG IN to watch.
Now just keep following along with the pattern, crossing off rows as you come to them, until you finish and bind off. All that’s left is to weave in your ends and block your dishcloth – instructions ahead.
Weaving in Ends on Stockinette Stitch
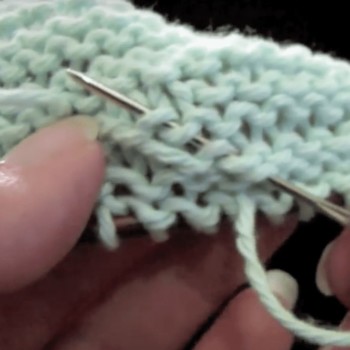
Here’s how to weave in your ends on Stockinette stitch (it’s really easy):
Restricted Video
![]()
![]() This video is available to members of Knitting Superstar University or the following classes:
This video is available to members of Knitting Superstar University or the following classes:
If you own this class, please LOG IN to watch.
Blocking Your Dishcloth

The final touch for most knitting projects is blocking.
Soaking your project in warm water with a little soap and then laying it out to dry is all it takes to make your edges and stitches more even and to cover up any inconsistencies in your tension.
Now, here’s one last trick to make your dishcloth look its best. It’s called blocking, and it’s the secret to making knitted projects look professional, flat, and even.
I haven’t mentioned it before, because for projects like the ribbed scarf and the garter-stitch dishcloth, the springy shape is part of the design – you don’t want or need it to flatten out.
However, because this dishcloth has an image knitted into it, it will look its very best if it’s flat and even – especially if you want to photograph it to put it on Ravelry, or if you want to give it as a gift.
In that case, it’s time to learn about blocking.
Blocking
Eek! Sometimes, when a project comes off the needles, no matter how hard you’ve worked to knit perfectly even, it’s going to look all bunchy and funky and not like the pretty photograph in the pattern.
The reason for this is that the fibers have been through a lot on its way to your project — sheared off the sheep, carded, dyed, spun, plied, twisted into hanks and wound into skeins.
And that’s all BEFORE being manipulated into thousands of little interlocking loops on your knitting needles. After being kinked and spun so much, there’s no way the project is going to look as good as it could without this magic final step.
To help the knitted items look perfectly even and gorgeous, the fibers need to relax into their new shape, and to do that, they need help from water and soap. In the video below, I show you how to block a small knitted swatch, but it’s the same process for blocking anything.
You don’t need to pin out your dishcloth by any means – just lay it flat to dry and straighten the edges with your fingers.
Free Video for Subscribers
![]()
![]() This video is available to anyone with a free subscription. Sign up for free below.
This video is available to anyone with a free subscription. Sign up for free below.
Already a member? Log in here to watch.
That’s it, you’re all done.
Make sure to take a pretty photograph and link it to whichever pattern you used on Ravelry.
