Starting Out
Reviewing the Very Basics
If you haven’t worked through my free Learn-to-Knit video course, please navigate to the class and bookmark it. In it, I teach some foundations that are worth reviewing.
They are (links go to the corresponding video in the Learn-to-Knit online class):
- A beginner cast-on
- Tensioning your yarn
- The knit stitch
- Switching to a new ball of yarn
- Binding off
- Weaving in ends
- and, Reading a simple pattern
Please review these videos if it’s been a little while since you’ve knitted, or if you’ve learned to knit from a friend who didn’t show you how to do all of the above.
The skill that we are going to be building on the most is pattern reading. In the Learn-to-Knit e-book, we covered some basic abbreviations that we’ll be coming back to, again and again.
They are:
- CO = “cast on”
- K or k = “knit”
- st or sts = “stitch” or “stitches”
- BO = “bind off”
We also reviewed the standard layout for how a knitting pattern is written, with the materials and yarn needed, the patten and finishing instructions, and any special notes.
I go completely in-depth on reading a knitting pattern in my Become a Knitting Superstar course, but here as we learn different stitches and techniques, I’ll introduce you to their abbreviations and we’ll practice reading the pattern together for each project.
Remember, knitting patterns are the written language of knitting, and the better you “speak” knitting, the more you can enjoy its delights. Just follow along with me – by the time you’re done with this course, you’re going to be fluent!
Intro to Yarn
Before we can start knitting, let’s take a trip to your local yarn store (LYS). Visit Ravelry’s yarn shop search engine or Google yarn stores in your area. If chain craft stores or shopping online are your only options, don’t worry – I’ll also give you links to options that will work great for your projects. Let’s talk about some basics now so that when you go into your yarn store, you’ll know what to look for and what to ask about.
Yarn Fibers
Yarns are made out of different kinds of fibers spun together in different thicknesses.
Natural fibers can come from animal hair: that of sheep (called wool of course), goat (hello, cashmere!), llama, alpaca, and angora rabbit are the most common. They can be plant- or animal-product based: silk (from silkworms), cotton, and even corn, soy, and bamboo.
They can also be synthetic: made from petroleum or man-made substances, giving us acrylic, polyester, and nylon. Just like wine grapes, different fibers have different properties – in the case of yarn, they have different durability, drape, texture, and so on. Blended together, the fibers share properties and result in something that can be greater than the sum of their parts. You’ll find natural fibers in their pure form as well as mixed with other fibers in your LYS.
At large craft chain stores, you’ll find the more inexpensive synthetic blends (acrylic), perhaps mixed with a percentage of wool. The most common fibers you’ll come across are wool and acrylic, and they are pretty much doppelgangers, although sometimes they play nicely together. Wool is natural, supports sheep farmers, bounces, takes dye beautifully, smells good, and feels good to knit. It is also more expensive.
Acrylic is uniform, made in a lab from synthetic materials, is soft yet lacks character, dyes evenly, and is less expensive. Just keep this information in mind – it as well as your own experiences moving forward will help you make better-informed decisions at the yarn store.
Yarn Thicknesses
Yarns come in a wide variety of thicknesses. For the projects in this e-book, we’ll be sticking in the middle range of what’s available – this will mean that your projects won’t take too long, but they will also be subtle and wearable in all weathers, that is, not overly chunky.
Selecting a Yarn For Your First Project
For your first project, we’ll be shopping mainly for a soft wool or wool-blend yarn that is fairly bulky, to make a simple but elegant ribbed scarf.
Your yarn store may be organized by yarn weights, or thicknesses, which will be helpful, but either way, please ask an employee to help you find a soft, bulky- or aran-weight yarn (definitions coming up) with enough yardage to make a scarf.
Soft fibers that you may want to try are alpaca, merino wool, or more economically, a merino-acrylic blend. It’s up to you to decide what you feel comfortable purchasing, but as I give you a few choices let me encourage you to select something you’re really going to enjoy feeling in your fingers as you knit.
[column width=”30%” padding=”5%”]  [/column][column width=”55%” padding=”0%”]Berroco Comfort Chunky is an inexpensive synthetic yarn in the bulky thickness. It has an even color throughout and is quite soft. It runs $6.50 for 150 yards (100 g). Note: The words “bulky” and “chunky” are used interchangeably in knitting terminology.[/column][end_columns]
[column width=”30%” padding=”5%”]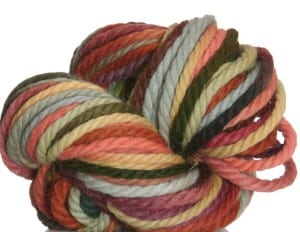 [/column][column width=”55%” padding=”0%”]At the other end of the scale, Misti Alpaca Hand Paint Chunky is a 100% alpaca yarn that is hand-dyed, costs a fortune, and feels like it, too. For 108 yards (100 g) it runs $15.20 for the solid colors and $23.00 for the hand-painted colors. This is what I’ll be using for the video demonstrations, so you’ll get to see how it looks in action even if you don’t buy it.[/column][end_columns]
[column width=”30%” padding=”5%”]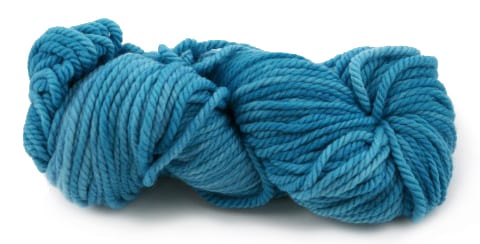 [/column][column width=”55%” padding=”0%”]In between is a great yarn called Malabrigo Chunky which is a 100% merino wool yarn that is kettle-dyed for subtle color depth. It runs $11.60 for 104 yards (100 g).[/column][end_columns]
If you’re lucky, your local yarn store will have all these choices and everything in between. Just set your budget and ask for enough yarn to make a scarf (usually 3 skeins* or balls).
Your first scarf calls for either bulky OR aran-weight yarn – depending on how bulky you like your scarf (and how fast you want the project to go – the thicker the yarn, the faster it goes).
Aran-weight yarn is just one step thinner than bulky. I give you directions for either thickness of yarn.
*Some Yarn Terminology
Yarn is sold in different forms – it can be wound into a ball (called a skein), or twisted into a pretzel (called a hank).
[column width=”45%” padding=”5%”] 
a skein (ball) of yarn[/column][column width=”50%” padding=”0%”]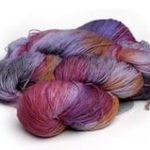
a hank of yarn[/column][end_columns]
However, be forewarned – at your yarn store your are more likely to hear balls called balls, and anything else called skeins.
Also, any hank of yarn needs to be wound into a ball before you can use it. Just ask the employees at your yarn store or wind it by hand at home (a slower option).
Yarn Labels
In the US, companies are required to list the fiber content of the yarns by percentage. They also usually categorize the thickness of the yarn with names and numbers.
[column width=”45%” padding=”5%”] For example, bulky or chunky would have a label that looks like this:
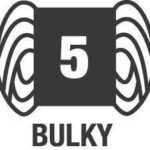 [/column][column width=”50%” padding=”0%”]Whereas an aran-weight yarn would have a label that looks like this:
 [/column][end_columns]
This isn’t a perfect system by any means, and there are other ways to be sure about what thickness of yarn you have, which we’ll go over later in this course.
For now, you can ask your LYS employee to help you with the thicknesses.
My recommendation for our first project would be three skeins of Malabrigo Chunky or Malabrigo Twist (an aran-weight option), but, keep in mind, I have your knitting pleasure and the look of the finished product more in mind than your pocketbook – you’ll have to make the price decision yourself.
A Note About Color

Since we will be mainly working with and learning about texture in this course, you’ll want to chose a yarn in a color that will show off the textures that you are knitting, and also make it easy for you to see what you’re doing.
Just remember that the more color-changes that there are in a yarn, the more difficult it will be to see the texture pattern. Kettle-dyed yarns are great – they have a solid color base, but the lightness and darkness of the color varies throughout the skein.
Solid-color yarns with flecks of color, as well as heathered or tweed yarns, also work nicely for patterned stitches and scarves. Here’s a video I filmed in Santiago, Chile that will help you choose the kind of yarn you want to look for.
Restricted Video
 This video is available to members of Knitting Superstar University or the following classes:
If you own this class, please LOG IN to watch.
Intro to Needles

You’ll also want to pick up a pair of US size 9 (5.25 mm) or 10 ½ (6.5 mm) knitting needles, preferably bamboo or birch wood (as opposed to plastic – your stitches will stay on your needles easier, and it’ll be a more pleasant experience overall).
Buy a pair of 9s if you’re knitting with aran-weight yarn, and 10 ½s if you’re knitting with chunky yarn.
Restricted Video
 This video is available to members of Knitting Superstar University or the following classes:
If you own this class, please LOG IN to watch.
Knitting Needle Size Conversion Chart
Refer to the chart below if you need to convert between US and metric needle sizes. The most common sizes are in bold.[column width=”30%” padding=”3%”]
0 – 2.0 mm
1 – 2.25 mm
2 – 2.75 mm
3 – 3.0/3.25mm
4 – 3.5 mm
5 – 3.75 mm
6 – 4.0 mm
[/column][column width=”30%” padding=”3%”]
US #7 – 4.5 mm
US #8 – 5 mm
US #9 – 5.5 mm
US #10 – 6.0 mm
US #10½ – 6.5 mm
[/column][column width=”30%” padding=”3%”]
11 – 8.0mm
13 – 9.0 mm
15 – 10.0 mm
19 – 15.0 mm
35 – 20.0 mm
50 – 50.0 mm
[/column][end_columns]
Other Notions to Buy
While you’re at the yarn store, pick up a gauge checker (or you can use a simple ruler or tape measure) and a pair of small, sharp scissors you can put in your knitting bag.
You may also want to select a good-quality blunt metal tapestry needle (as opposed to the blue plastic ones you may have bought before).
If you’ve purchased yarn that comes in a skein (a ball of yarn that is pre-wound), you’ll want to find the end of the yarn that’s tucked in the middle of the ball, so that you can pull it straight out from the center and prevent a rolling-all-around-the-floor-cat-bait scenario.
If the employees wind your yarn for you at the yarn store, they should hand it to you with the end that comes from the middle sticking out and the outside strand tucked nicely out of the way. Again, just pull from the middle. 
The Long-Tail Cast-On

I’m going to introduce you to the cast-on that will become your main workhorse for almost all of your projects to come. It’s much sturdier than the beginner cast-on I teach in the Learn-to-Knit course, since it uses two pieces of yarn to create the edge instead of just one.
It’s also nice and stretchy (if you do it properly). It’s called the Long-Tail Cast-On and it uses (you guessed it), a long tail of yarn to create the stitches.
To do it, you’ll have to estimate the amount of tail you’re going to need – there are a few tricks to this that I’ll explain in the video and below. For now, grab your needles and your yarn, and work along with me as I show you the steps for the long-tail cast-on.
Restricted Video
 This video is available to members of Knitting Superstar University or the following classes:
If you own this class, please LOG IN to watch.
Just so you know – it doesn’t matter if the tail yarn goes over your thumb or over your finger. Either way is fine.
Estimating How Much Tail You’ll Need

Here’s how to estimate how much tail you’ll need, depending on the number of stitches you cast on.
Don’t worry – you’ll start to develop an automatic feel for this as you cast on for more projects. Just keep in mind – it’s better to have too much tail than too little.
In this video I also show you a little trick, based on what you’ve already learned, that you can use in emergencies when you run out of tail (for example on a big project where you wouldn’t necessarily want to start over).
Restricted Video
 This video is available to members of Knitting Superstar University or the following classes:
If you own this class, please LOG IN to watch.
Refresher – A Quick Long-Tail Cast-On Video
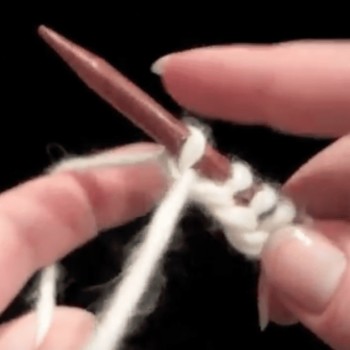
Since you won’t be casting on more than once for every project, it takes a while to learn this cast-on by heart. That’s okay.
The video below is a quick review of the technique that you can watch when you need a reminder.
Restricted Video
 This video is available to members of Knitting Superstar University or the following classes:
If you own this class, please LOG IN to watch.
Wonderful. Practice casting on a few more times until the stitches feel even and the edge is stretchy but not loose.

