Ch. 2 Tips for Successful Fair-Isle Knitting
Keep working along with the chart as I teach you the different pitfalls to watch out for and the tricks that will make your Fair-Isle knitting easier. The main topics I’ll cover are:
- Making sure you don’t mess up on the chart
- What to do if you notice a mistake
- How to tension your floats correctly
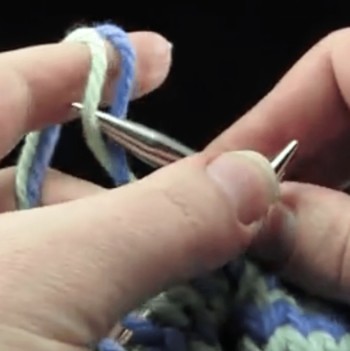
- How to get used to knitting with two strands of yarn over your finger
- How to switch between colors consistently
- How to prevent tangling yarn
I’ll then move on to show you a few tips that may not necessarily apply on this project, but that you’ll need to know for future Fair-Isle projects and that we can practice here.
Starting with the first tip and Round 2, let’s learn how to…
Follow the Chart Correctly and Learn to Fix Mistakes
We’ll begin with following the chart correctly. Work round 2 of the pattern and take a look at the stitches as you make them, to make sure you aren’t messing up the chart. Here I’ll show you what to do if you make a mistake and catch it while you’re still on the row:
Restricted Video
![]()
![]() This video is available to members of Knitting Superstar University or the following classes:
This video is available to members of Knitting Superstar University or the following classes:
If you own this class, please LOG IN to watch.
Maintain An Even Tension
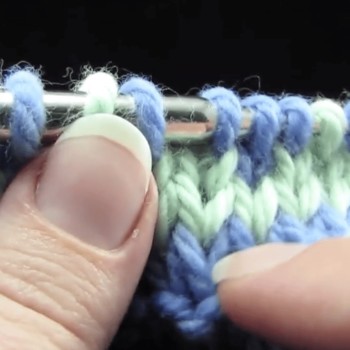
The most important thing to be aware of in Fair-Isle knitting apart from following the chart correctly is getting the right tension, both in your stitches and in your floats.
Incorrect stitch tension can come from psychological causes (e.g. you’re worried your knitting will come out too loose) or physical causes (e.g. you’re still not used to handling the two yarns easily).
Here’s what correct stitch tension looks like and how to achieve it.
Restricted Video
![]()
![]() This video is available to members of Knitting Superstar University or the following classes:
This video is available to members of Knitting Superstar University or the following classes:
If you own this class, please LOG IN to watch.
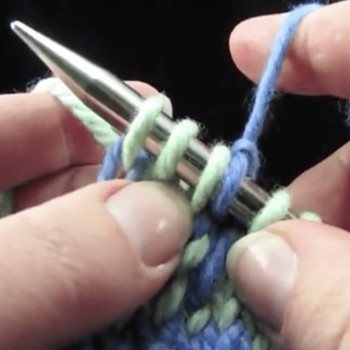
Pulling Your Floats Too Tight
This is a very common problem for Fair-Isle knitters, and I’m going to show you how to fix it right now.
So that you’re motivated to get this bit right, I will tell you that, in my opinion, tight floats are the #1 cause of ugly Fair-Isle projects, and that fixing the float tension is the #1 thing you can do to make your Fair-Isle project look great.
Don’t worry too much, though – the felting process will conceal any funny bits you may have while you practice getting this right.
Restricted Video
![]()
![]() This video is available to members of Knitting Superstar University or the following classes:
This video is available to members of Knitting Superstar University or the following classes:
If you own this class, please LOG IN to watch.
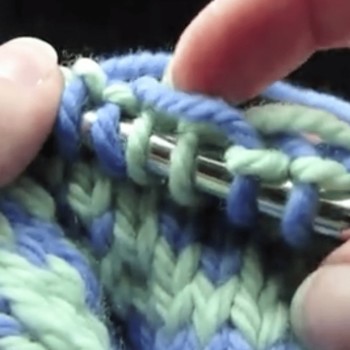
Fix Mistakes Even If You Don’t Notice Them Until Later
Earlier in this tutorial, I made a mistake in the chart so that I could show you what to do if you knit a stitch in the wrong color but don’t notice it until later.
All you have to do is work over to the knit column that contains the messed-up stitch, then drop the stitch down to the row of the original mistake, correct the mistake, and then pick the stitches back up the column according to the chart.
You can practice this along with me even if you haven’t made a mistake. Here’s how to do it:
Restricted Video
![]()
![]() This video is available to members of Knitting Superstar University or the following classes:
This video is available to members of Knitting Superstar University or the following classes:
If you own this class, please LOG IN to watch.
Finish working all the way around this round, and we’ll talk about switching colors correctly as we work through the next few rounds.
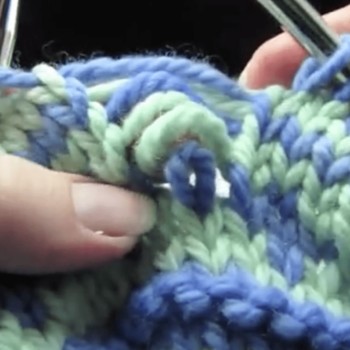
Switch Colors Consistently
You want to make sure that you are switching between colors in a consistent way. I like to always pick up one color from the bottom, and the other color from the top, so that my yarn doesn’t get tangled.
How you switch yarns has an effect on how the finished fabric looks and how the finished stitches appear, although if you are inconsistent here, it won’t be noticeable after you felt the bag. But it’ll be important on any non-felted project.
Here’s how to switch between colors consistently.
Restricted Video
![]()
![]() This video is available to members of Knitting Superstar University or the following classes:
This video is available to members of Knitting Superstar University or the following classes:
If you own this class, please LOG IN to watch.
To prevent your balls of yarn from tangling, make sure that they are not sitting next to each other in the same knitting bag – place them on either side of you instead.
