Ch. 1 Beginning Fair-Isle Knitting
Project: Fair-Isle Felted Bag
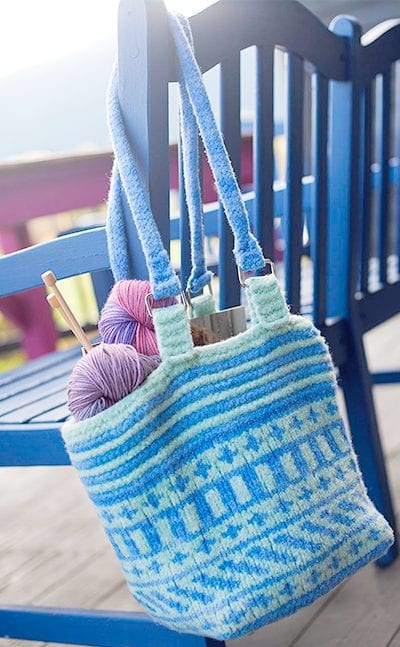 This felted bag is an ideal project on which to learn Fair-Isle knitting. It covers all the major skills, and it’s fast and super-cute.
If you’re a guy and/or not really into super-cute, you can give it as a gift – just consider it one Christmas or Hanukah present that you won’t have to make later.
This project is going to help you quickly and efficiently learn the Fair-Isle technique. Once you’ve mastered the skills I teach you here, you’ll be able to choose and knit any Fair-Isle project you want.
First download and print out the Fair-Isle Felted Bag Pattern.
You can add the pattern to your Ravelry queue here.
Below, I’ll walk you through the materials to buy and the choices you have.
Choose Your Materials
Needles: We’ll be knitting this bag in the round, so you’ll need a set of circular needles.
Needle length: You have a few choices here, depending on your budget, your knitting style, and what needles you already have. I will be demonstrating the project on a 24-inch-long circular needle, and teaching regular circular knitting on this project.
If you don’t know how to knit in the round, follow along with me and use a 24-inch circular needle.
You can buy one at your local yarn store (LYS) or online. If you feel comfortable knitting in the round on Magic Loop, you can knit the entire project using a 40- or 47-inch-long circular needle.
Although I teach most of the bag on 24-inch needles, I will show you tips for doing Magic Loop on this bag as well. If you don’t know what the heck Magic Loop is and you’re curious, you can learn more here.

Needle size: Use either US size 11 (8mm) or US size 13 (9mm) needles. It doesn’t really matter which size you choose – it’s a bag: your gauge (the size of your stitches) is not critical.
If you knit tight, I’d recommend the larger size, and vice versa.
Optional needles: If you have them or want to buy them, you could use straight needles for the bottom of the bag, which is knit flat, and double-pointed needles (DPNs) for the i-cord handles.
Or you can use the same circular needle you are using for the body of the bag. I’ll demonstrate both techniques.
Yarn: Choose a bulky, 100%-wool yarn in two contrasting colors – you’ll need 150 yards of each color.
Some suggestions are: 2 skeins of Brown Sheep Nature Spun Chunky, 4 skeins of Malabrigo Chunky (which is what I use in the videos), or 4 skeins of Brown Sheep Lamb’s Pride Bulky.
Other materials: You’ll need a stitch marker, a pair of scissors, and a tapestry needle for weaving in yarn ends and sewing on the handles.
You’ll also need purse hardware: rectangle rings and purse feet).
If you don’t like the look of felted i-cord handles, you can buy leather, metal, or vintage resin handles online (here’s one option) or at your LYS, thrift store, or yard sale. Ready to start knitting? Let’s go.
Pattern Walk-Through

Here is an overview of how this bag is knit:
Restricted Video
![]()
![]() This video is available to members of Knitting Superstar University or the following classes:
This video is available to members of Knitting Superstar University or the following classes:
If you own this class, please LOG IN to watch.
Knit The Base Of The Bag

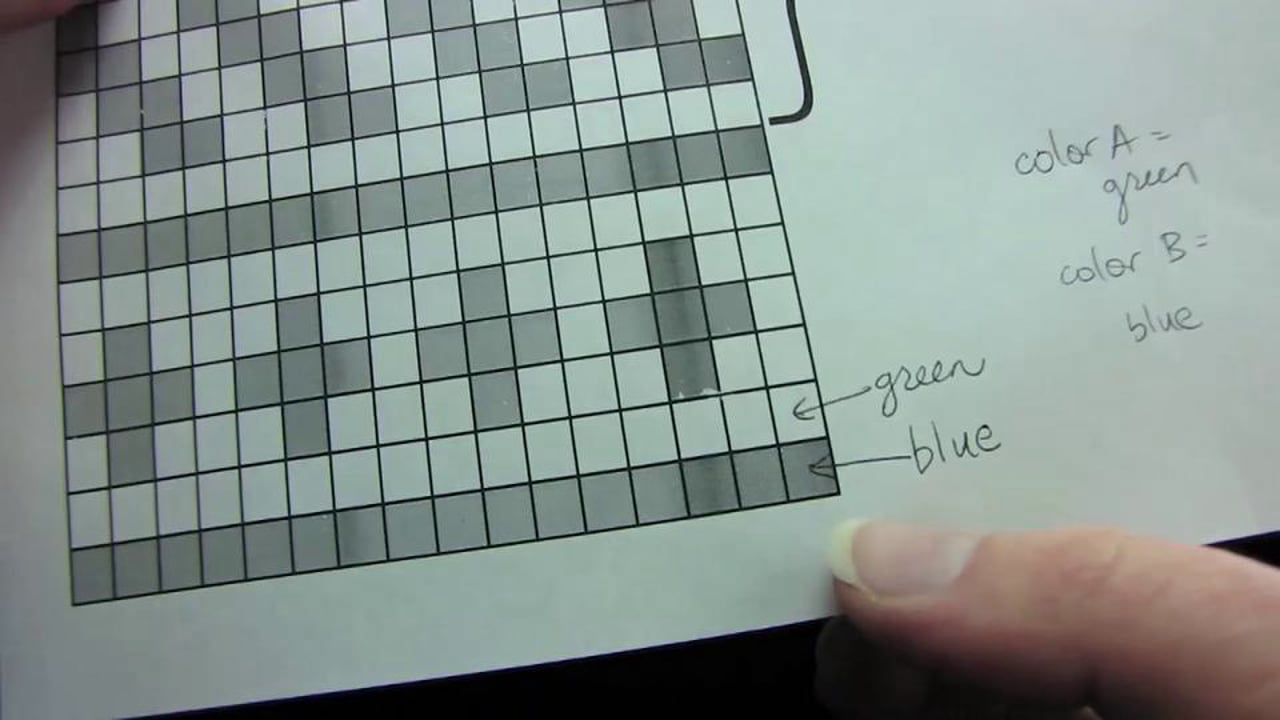
Decide which of your yarns you will call color A and which will be color B. Write down which is which on your chart.
For me, color A is my light green.
You can use your circular or straight needles for this part. I’ll show you both ways.
Cast On
Following the video, cast on 24 stitches in color A. Then, work in Stockinette stitch for 2 rows.
Restricted Video
![]()
![]() This video is available to members of Knitting Superstar University or the following classes:
This video is available to members of Knitting Superstar University or the following classes:
If you own this class, please LOG IN to watch.
Join Color B To Start Making Stripes

Don’t cut color A.
With color B, work in Stockinette stitch for 2 more rows. Then, pick up color A and work 2 more rows in Stockinette stitch.
Restricted Video
![]()
![]() This video is available to members of Knitting Superstar University or the following classes:
This video is available to members of Knitting Superstar University or the following classes:
If you own this class, please LOG IN to watch.
Knit The Striped Bag Bottom

Repeat the stripe sequence until you have 9 stripes in color B.
Work one last stripe in color A, then bind off.
Restricted Video
![]()
![]() This video is available to members of Knitting Superstar University or the following classes:
This video is available to members of Knitting Superstar University or the following classes:
If you own this class, please LOG IN to watch.
Pick Up And Knit Around The Base

If you weren’t using them before, switch to using your circular needles now.
With the right-side (RS) of the work facing you and using color B, pick up and knit around the bottom of the bag. Pick up 24 stitches on each short side and 28 sts along each long side.
Count your stitches to make sure you have 104, and mark the beginning of the round by placing a round stitch marker on the right-hand needle.
Restricted Video
![]()
![]() This video is available to members of Knitting Superstar University or the following classes:
This video is available to members of Knitting Superstar University or the following classes:
If you own this class, please LOG IN to watch.
Begin Knitting In The Round

You are now going to be knitting in the round, which is really easy. Follow along with me to work 2 rounds (rnds) in garter stitch (knitting the first row and purling the second row).
Restricted Video
![]()
![]() This video is available to members of Knitting Superstar University or the following classes:
This video is available to members of Knitting Superstar University or the following classes:
If you own this class, please LOG IN to watch.
Learn To Read A Chart

Now it’s time to start following our chart.
If you’ve never worked from a knitting chart before, you may be wondering why we don’t just use a pattern that says “k3 sts with A, k 2 with B,” etc.
In fact, it just takes a little getting used to, and then a chart is much easier to read from than a written pattern.
A chart is a visual representation of the pattern. Even the most complex fair-isle design looks clear and organized on a chart, whereas a written pattern would become wordy and difficult to follow.
Grab a highlighter and watch this video where I explain how to read a Fair-Isle chart.
Fair Isle - How to Read a Chart
Begin Fair-Isle Knitting

Now it’s time to join color A and learn how to knit from a chart using two colors. I demonstrate four options for holding your yarn, depending on how you like to knit.
Restricted Video
![]()
![]() This video is available to members of Knitting Superstar University or the following classes:
This video is available to members of Knitting Superstar University or the following classes:
If you own this class, please LOG IN to watch.
If you want to try holding one yarn in each hand but you’ve never knitted with the yarn in your left hand before (Continental knitting), this may be a great motivation for you to learn.
You can learn to knit Continental here. You can also switch back and forth between any of the four styles as you practice, learn, and grow.
