Stretchy Long-Tail Cast-Ons
The cast-ons in this section work well for fabric that needs to stretch. They all look great with ribbing and many of them have an almost invisible edge that blends perfectly with the stitches.
Alternating Long-Tail Cast-On
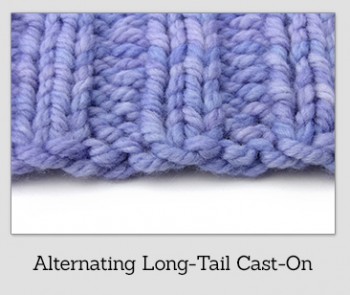
The Alternating Long-Tail Cast-On is an easy cast-on for any combination of knit and purl stitches.
The “knit version” is the regular Long-Tail Cast-On you’ve already learned. The “purl version” is the opposite movement, and creates a purl cast-on stitch.
You can alternate 1 knit and 1 purl to prepare for 1×1 rib, or you can alternate 2 knits and 3 purls to prepare for 2×3 rib, etc.
Restricted Video
 This video is available to members of Knitting Superstar University or the following classes:
If you own this class, please LOG IN to watch.
Tips:
- Remember that the slipknot counts as your first stitch, so if you’re setting up for 1×1 rib, your first cast-on stitch should be a purl stitch.
- Cast on an even number of stitches and end with a purl cast-on stitch. That way, your first stitch when you go to work the first row will be a knit stitch, and you’ll start the row off in the expected way of “knit 1, purl 1…”
Alternating Old Norwegian Cast-On/Twisted German Cast-On
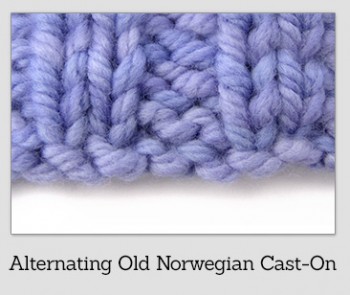
The Old Norwegian cast-on is a slightly complicated long-tail cast on that is very sturdy and stretchy and has a pretty, double-twisted edge.
It can be used for stockinette stitch as well as ribbing. To use it for stockinette stitch, just do the knit version.
Restricted Video
 This video is available to members of Knitting Superstar University or the following classes:
If you own this class, please LOG IN to watch.
Tips:
- For the knit version, pull the thumb yarn to tighten. For the purl version, pull the index-finger yarn to tighten.
- For ribbing, cast on an even number of stitches and end with a purl cast-on stitch. That way, your first stitch when you go to work the first row will be a knit stitch, and you’ll start the row off in the expected way of “knit 1, purl 1…”
More Info:
To do the cast-on for ribbing as shown in the picture, do the knit and purl versions in whatever combination your ribbing is in (1×1, 2×3, etc.).
Double-Start (Estonian/Latvian) Cast-On
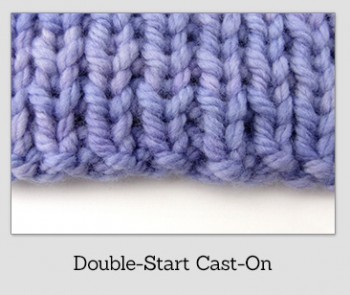
The Double-Start Cast-On is a relatively fast and easy way to cast on for 1×1 rib.
It is based on the long-tail cast-on and creates pairs of stitches as you cast on. This cast-on works best for 1×1 rib only, not other combinations of ribbing.
Restricted Video
 This video is available to members of Knitting Superstar University or the following classes:
If you own this class, please LOG IN to watch.
Tips:
Because this technique creates pairs of cast-on stitches plus the slipknot at the beginning, it will result in an odd number of stitches if you repeat the technique for the whole cast-on.
If you need an even number of stitches, add one more long-tail cast-on stitch at the end.
Channel Island Cast-On
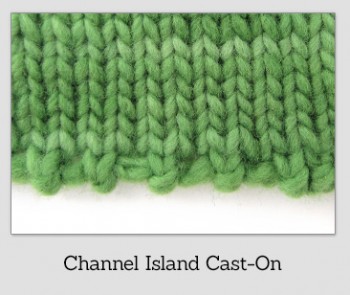
The Channel Island cast-on is decorative cast-on for stockinette or ribbing.
It creates a small knot every other stitch and, because it is created with a double strand of yarn, the edge is very sturdy and won’t get stretched-out. It is traditionally used to cast on for gansey sweaters.
Restricted Video
 This video is available to members of Knitting Superstar University or the following classes:
If you own this class, please LOG IN to watch.
Italian Tubular Cast-On for 1×1 Rib
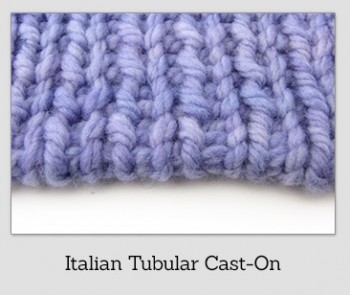
The Italian Tubular Cast-On creates a true invisible ribbed cast-on edge for 1×1 rib. The stitches flow from the front to the back with no discernible edge.
There are two steps to this cast-on: the Italian cast-on and 2 or 4 tubular set-up rows.
Doing 4 set-up rows makes the cast-on edge a little more rounded.
Restricted Video
 This video is available to members of Knitting Superstar University or the following classes:
If you own this class, please LOG IN to watch.
Tips:
1. End the cast-on with a long-tail cast-on stitch, an Old Norwegian cast-on stitch, or a half-hitch, so that the last stitch doesn’t fall off the needle.
2. For the two tubular set-up rows, work the first and last stitches, and slip the purl stitches with the yarn in front and knit the yarnovers.
3. At the end of the first tubular set-up row, work the double-loop that is the first cast-on stitch together to make it one stitch.
4. If you want to use this cast-on in the round, I recommend that you work the cast-on and tubular set-up flat like I show in the video, then divide your stitches and join for working in the round. Use your tail yarn to sew up the little gap created by working the first rows flat.
5. This cast-on can also be used for 2×2 rib – just follow the directions here and then adjust the stitches according to the instructions for the Italian Tubular Cast-On for 2×2 Rib.
More Info:
Matching bind-off: Invisible Ribbed Bind-Off for 1×1 Rib.
Italian Tubular Cast-On for 2×2 Rib

To do the Italian Tubular Cast-On For 2×2 Rib, use the Italian cast-on for 1×1 rib to cast on the number of stitches your pattern calls for and then complete the two tubular set-up rows.
Once you have done the cast-on and tubular set-up rows, you will rearrange the knit and purl stitches as you work your first row to create the k2, p2 pattern.
Restricted Video
 This video is available to members of Knitting Superstar University or the following classes:
If you own this class, please LOG IN to watch.
Tips:
1. To work the first row after the tubular set-up: K1, *insert left-hand needle into front of the next knit stitch. Remove next 2 sts from left-hand needle, replace the purl stitch onto the left-hand needle, then place the knit stitch on the left-hand needle. K1, p2, k1, rep from * to end.
2. If you learn how to do this, you’ll also basically know how to do cables without a cable needle. Bonus!
3. If you want to use this cast-on in the round, I recommend that you work the cast-on and tubular set-up flat like I show in the video, then divide your stitches and join for working in the round. Use your tail yarn to sew up the little gap created by working the first rows flat.
More Info:
This cast-on is special in that it has a matching bind-off: the Kitchener Double-Rib Bind-Off.

