Stretchy Short-Tail Cast-Ons
Use the cast-ons in this section to add stitches in the middle of ribbed projects or any project where you need a very elastic edge.
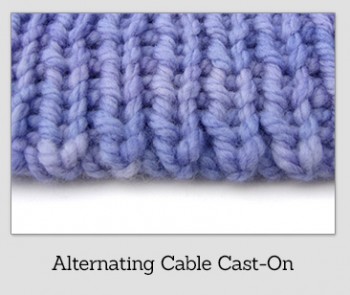
Alternating Cable Cast-On

The Alternating Cable Cast-On is a very stretchy and almost invisible cast-on for any combination of knit and purl stitches.
As with the alternating long-tail cast-on, the “knit version” of the alternating cable cast-on is the regular cable cast-on you’ve learned, and the “purl version” is the opposite movement.
You can alternate 1 knit and 1 purl to prepare for 1×1 rib, or you can alternate 2 knits and 3 purls to prepare for 2×3 rib, etc.
Restricted Video
 This video is available to members of Knitting Superstar University or the following classes:
If you own this class, please LOG IN to watch.
Tips:
1. To make the last cast-on stitch look just as good as the rest of them, bring your yarn between your needle tips to the other side of your work after creating the last stitch but before placing it on the left-hand needle.
2. Because you don’t have to turn your work after doing this cast-on, take care to start with a purl stitch and end with a knit stitch so that when you start working into the cast-on, your first stitch will be a knit stitch, and you’ll start the row off in the expected way of “knit 1, purl 1…”
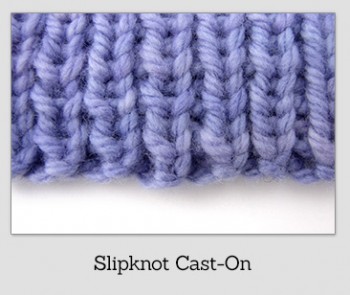
Slipknot (Buttonhole/Jeny’s Stretchy Slipknot) Cast-On

The Slipknot Cast-On is a reversible and very elastic short-tail cast-on that can be used to add stitches to stockinette or ribbing.
This cast-on is simply a series of slipknots done with the working yarn.
Restricted Video
 This video is available to members of Knitting Superstar University or the following classes:
If you own this class, please LOG IN to watch.
Tips:
The key to success for this cast-on is to keep all the slipknot stitches very close together, and pull each stitch tightly to secure it. The cast-on is so elastic that you can’t afford to leave any slack in the yarn.
Tillybuddy’s Cast-On

Tillybuddy’s Cast-On (invented by Tillybuddy on Ravelry) is a very sturdy and stretchy short-tail cast-on that can be used for 1×1 or 2×2 rib.
The cast-on uses loops and twists to create pairs of stitches on the needle.
Restricted Video
 This video is available to members of Knitting Superstar University or the following classes:
If you own this class, please LOG IN to watch.
Tips:
1. Work the first row close to the needle-tips so the cast-on doesn’t get stretched-out.
2. The cast-on creates pairs of stitches so, combined with the initial slipknot, it results in an odd number of stitches. If you need an even number of stitches, remove the slipknot once you get to it at the end of the first row.
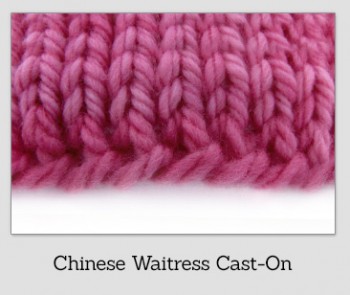
Chinese Waitress Cast-On

The Chinese Waitress Cast-On is a beautiful, reversible, and stretchy short-tail cast-on.
It was taught to knitting author Cap Sease’s friend by a waitress in a Beijing restaurant, hence the great name.
Not only is this cast-on very stretchy, it also doesn’t curl on stockinette, and it creates a reversible double-chain effect along the bottom edge that is very pretty.
I recommend this cast-on for Garter stitch as well.
For an in-depth guide to this great cast-on, including shortcuts, crochet and continental versions, and matching bind-off, see the {REAL} Chinese Waitress Cast-On Masterclass.
To Do the Chinese Waitress Cast-On:
- Place a slipknot on the left-hand needle. Leave a short tail (6″). The slipknot does not count as a cast-on stitch and will be removed later.
- Cross the right-hand needle behind the left-hand needle, to the right of the slipknot.
- Tension the yarn in your right hand.
- Bring the yarn up and over the left-hand needle, then around the back of the right-hand needle in a figure-8 motion.
- Pull the stitch on the right-hand needle through the two loops on the left-hand needle.
**SHORTCUT:**
6. Twist the right needle down and to the left, away from you, and then bring it back up to cross under the left needle.
**REGULAR VERSION (NON SHORTCUT)**
6. Remove the right-hand needle from the stitch.
7. With your fingers, un-twist the stitch towards you so that the right side of the loop is the one coming from the working yarn.
8. Re-insert the right needle into the stitch from front to back, crossing it behind the left-hand needle.
**ALL VERSIONS**
9. Bring the yarn up and over the left-hand needle, then around the back of the right-hand needle in a figure-8 motion (this is the same as step 4).
10. Pull the stitch you just made between the two loops on the left-hand needle and, in the same movement, through the stitch already on the right-hand needle.
11. Repeat steps 6-10 until you have cast on one less than the number of stitches required for your project, not counting the slipknot.
12. Slip the stitch that is on the right-hand needle to the left-hand needle. The left needle should go in from front-to-back. This is your last cast-on stitch.
13. You have completed the cast-on. When you knit the first row and come to the slipknot, remove it from the left-hand needle and give the tail yarn a tug. The slipknot will undo.
More Info:
For a perfectly matching bind-off, use the Double-Chain Bind-Off.


