Tips and Tricks
This chapter contains several tricks you'll use over and over again in your crochet projects. We'll practice them together in the main projects, but I wanted to teach you here separately so it would be easy for you to refer back to these videos later.
Switching Colors and Making Stripes
To start crocheting a row with a new color, you’ll actually change colors on the last stitch of the previous row.
We’ll be practicing this technique shortly in the Coffee Cozy practice project and in the Striped Hat main project.
Restricted Video
![]()
![]() This video is available to members of Knitting Superstar University or the following classes:
This video is available to members of Knitting Superstar University or the following classes:
If you own this class, please LOG IN to watch.
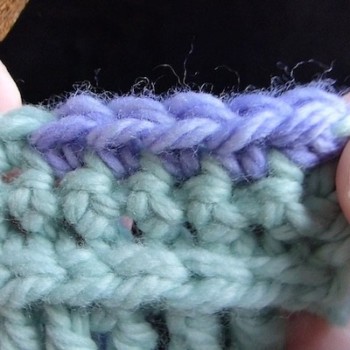
To make a stripe when working flat (working in rows), start on the last stitch of the previous row. Work all but the last step of the last stitch in the original color. Then for the last yarn over of the last stitch, drop the old yarn, tension the new yarn, yarn over, and pull the new yarn through to complete the stitch. Work the turning chain and next row in the new color.
To make stripes in the round, work the last yarn over of the last stitch in the round in the new color as described above. Then slip stitch to join to the beginning of the round in the new color. Work the turning chain and next round in the new color.
Sandwich Tail Yarns
To avoid having to weave in lots of ends, you can use a great trick to “sandwich” your tail underneath your crochet stitches. You can use this technique every time you change colors or yarns or have any ends nearby to weave in.
We’ll practice this many times on the Coffee Cozy practice project. Watch the video below to learn how to do it.
Restricted Video
![]()
![]() This video is available to members of Knitting Superstar University or the following classes:
This video is available to members of Knitting Superstar University or the following classes:
If you own this class, please LOG IN to watch.
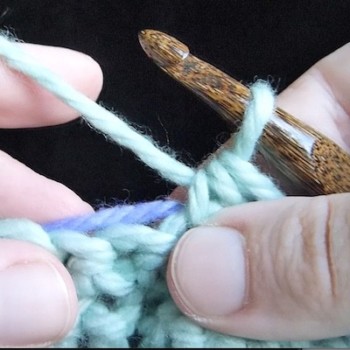
To sandwich yarn tails, lay the tail or tails over the top of the stitches to be crocheted. Insert your hook into the stitch as usual, keeping the tail over the stitches. Yarn over and complete the rest of the stitch. The tail yarn will be sandwiched inside the stitch. Work for 2 inches or so and then cut tail yarn.
Magic Ring

The Magic Ring is a way to start the beginning of a circular project with a ring that tightens up and disappears. I love this method and encourage you to do it any time your project starts with a circle.
By the way, the traditional way to start a circle is to crochet a base chain of 4-12 stitches, join it into a circle using a slip stitch, and then crochet into the circle. But the Magic Ring is just so much more fun.
“Magic Ring” is abbreviated “MR.”
Restricted Video
![]()
![]() This video is available to members of Knitting Superstar University or the following classes:
This video is available to members of Knitting Superstar University or the following classes:
If you own this class, please LOG IN to watch.

Make a loop with the tail so that the loop of tail crosses behind the working yarn as shown at left. Pinch the crossing point with the fingers of your left hand. Insert your crochet hook into the circle, yarn over, and pull up a loop.
Create the turning chain for whatever stitch you are going to do into the circle, then begin to crochet into the circle as many stitches as called for in your pattern. You’ll be sandwiching the tail yarn as you go.
When you are done, pull the tail yarn and watch the circle disappear.
Great job! These three tricks are going to help your project look more professional with less effort. Now let’s put together what you’ve learned on three fast projects you can do with bulky yarn.
