“Become A Knitting Superstar” Premium Video Knitting Library > Fair-Isle Knitting
Fair-Isle Knitting for Fanatics
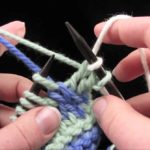

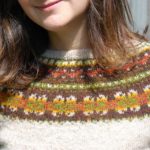

Table of Contents
Fair-Isle Felted Bag
Stripes
Knitting in the Round
Fair-Isle Knitting From a Chart
Fixing Mistakes in Fair-Isle Knitting
- When You Didn’t Follow the Chart Correctly
- Pulling Floats Too Tight
- Fixing Mistakes Far Down in Your Knitting
- Preventing “Corners” on Fair-Isle Knitting in the Round (Magic Loop and DPNs)
Fair-Isle Tips and Tricks
- How to Achieve All-Important Correct Stitch Tension for Fair-Isle Knitting
- How to Consistently Switch Colors for Even Tension
- Twisting Strands to Prevent Long Floats
- Trick: No-Purls Garter Stitch in the Round (Wrap and Turn)
Finishing the Fair-Isle Bag
- Decrease Round and Final Steps
- Weaving in Ends on Fair-Isle Knitting
- I-Cord Handle
- Assembling the Bag
Advanced Fair-Isle Knitting
- Flat Fair-Isle Knitting (It’s a Little Harder)
- Knitting With Three Colors in One Row
- Beautiful 2-Color Fair-Isle Ribbing
Appendix
Fair-Isle Knitting for Fanatics
Fair-Isle knitting is the art of knitting with more than one color in a row to make knitted color designs in your projects.
Fair-Isle knitting is a useful intermediate color-knitting technique that is not only steeped in history but also looks beautiful in today’s designs.
This hands-on guide is going to teach you everything you need to know about how to do Fair-Isle knitting, step-by-step.
A note about the videos in this course: each of the embedded videos on this page was filmed in full-screen high-definition. You can click the “full screen” icon in the lower right-hand corner of each video to make the video as large as your computer screen. Enjoy!
What You’ll Learn In This Course
 First, I’ll clarify exactly what Fair-Isle is and what kinds of projects it is used for.
I’ll also show you the differences between Fair-Isle and Intarsia (another common type of color knitting). Then we’ll begin to learn the step-by-step skills involved in Fair-Isle knitting.
Everything about Fair-Isle knitting that confuses a new knitter or frustrates an experienced one is covered here.
First I’ll teach you how to easily read charts (a key skill for color-knitting projects and one that often scares away newer knitters).
Then I’ll show you ways to hold the yarn comfortably whether you’re an American-style or Continental-style knitter, and I’ll teach you what you can do if you’re comfortable with both styles (or feeling adventurous and want to learn a new style).
We’ll start by learning Fair-Isle knitting in the round, and I’ll cover all the tips and tricks that go with that style. We’ll cover Magic Loop, DPNs, reading charts in the round, and tensioning tricks.
I’ll then teach you how to knit Fair-Isle on a flat project, which you’ll be able to use to knit patterned throw pillow covers, for example.
Along with these main skills, I’ll teach you tons of supplementary knitting techniques to help make your Fair-Isle projects a success, like i-cords, picking up stitches, and tricks for garter stitch in the round.
I’ll cover in-depth every aspect of the biggest bugaboo of Fair-Isle knitting: getting your tension right. From floats to twists to consistency to tangling yarn, I’ll give you examples of how it can go wrong, and I’ll teach you how to do it right.
You’ll also learn how to recognize and fix mistakes in Fair-Isle knitting, so you can feel confident trying projects even if they look hard.
The Project You’ll Be Knitting
 The project that we’re going to make together as we learn all of these skills is a felted bag.
Not only does it require you to learn and practice all the major skills involved in Fair-Isle knitting, it is ideal because it’s quick and forgiving.
Because it’s made with bulky yarn, you’ll knit it fast, and the felting obscures any problems you may have as you work on perfecting your tension.
To help you keep practicing and improving on your own, I’ve put together a list of patterns for you try as well as recommendations for books and stitch-motif collections that you may want to add to your library.
Introduction to Fair-Isle Knitting
Fair-Isle knitting is the best technique for making small or repeating color designs in your knitting.


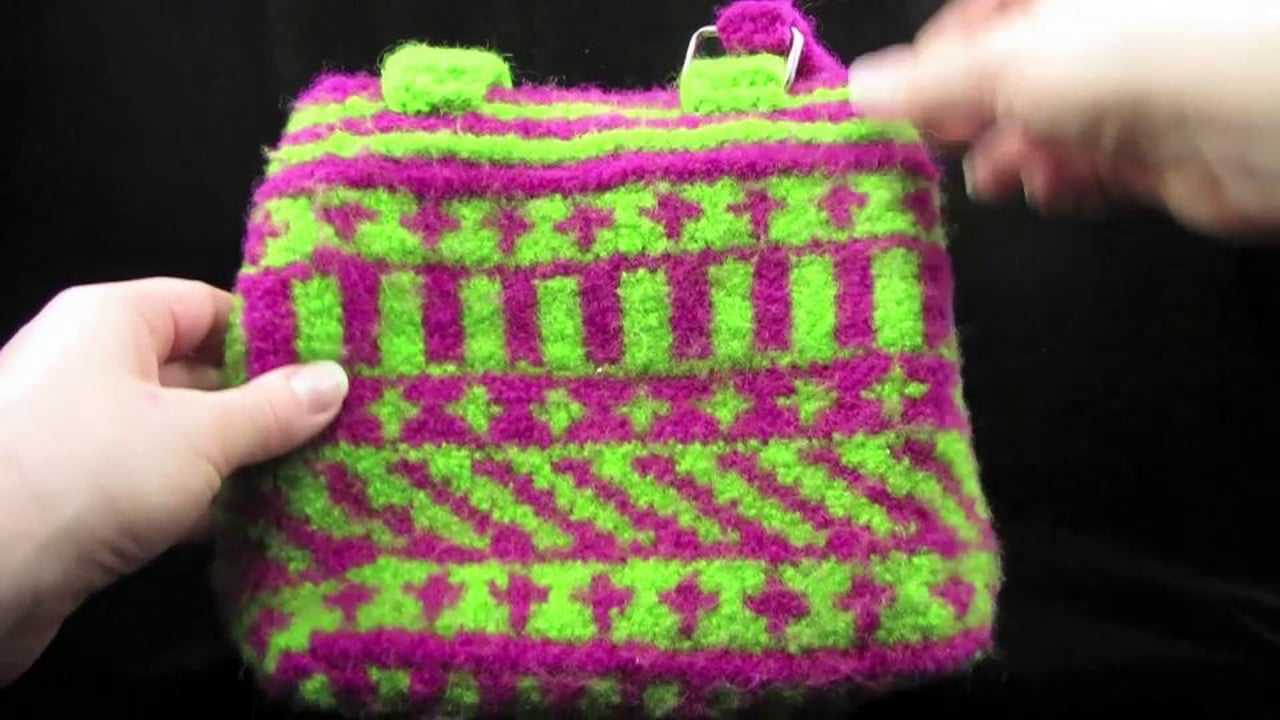
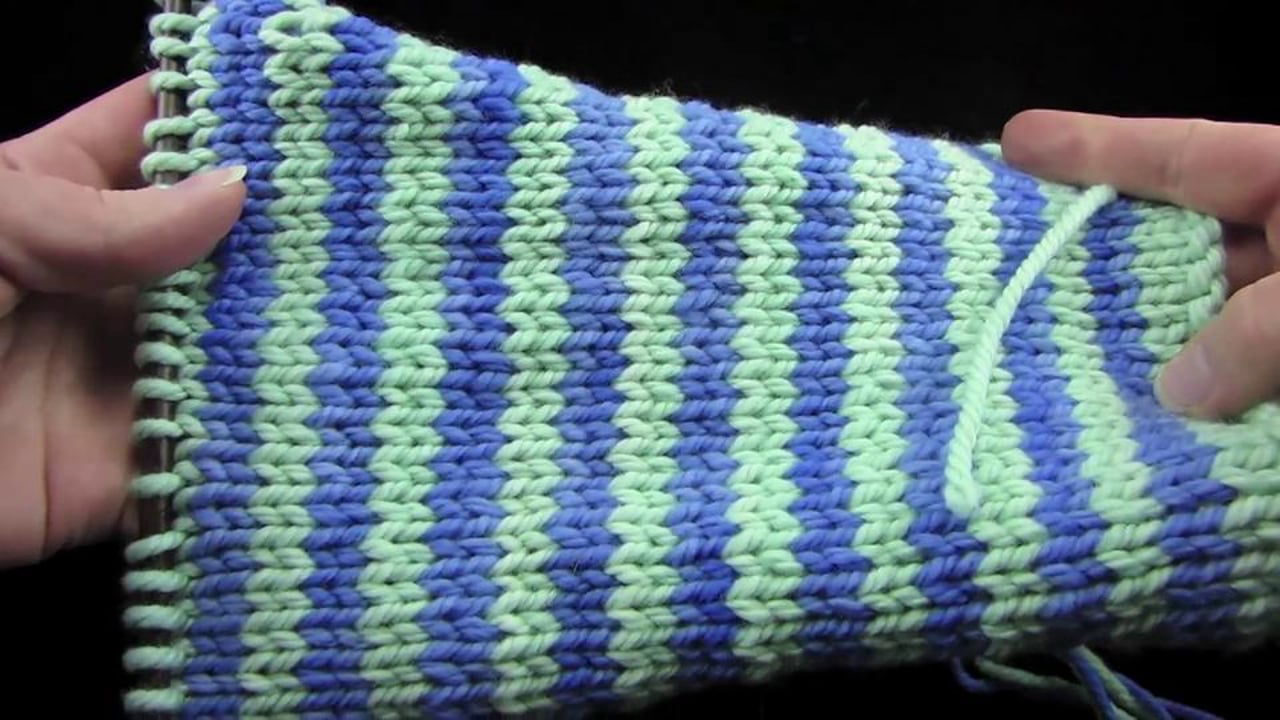
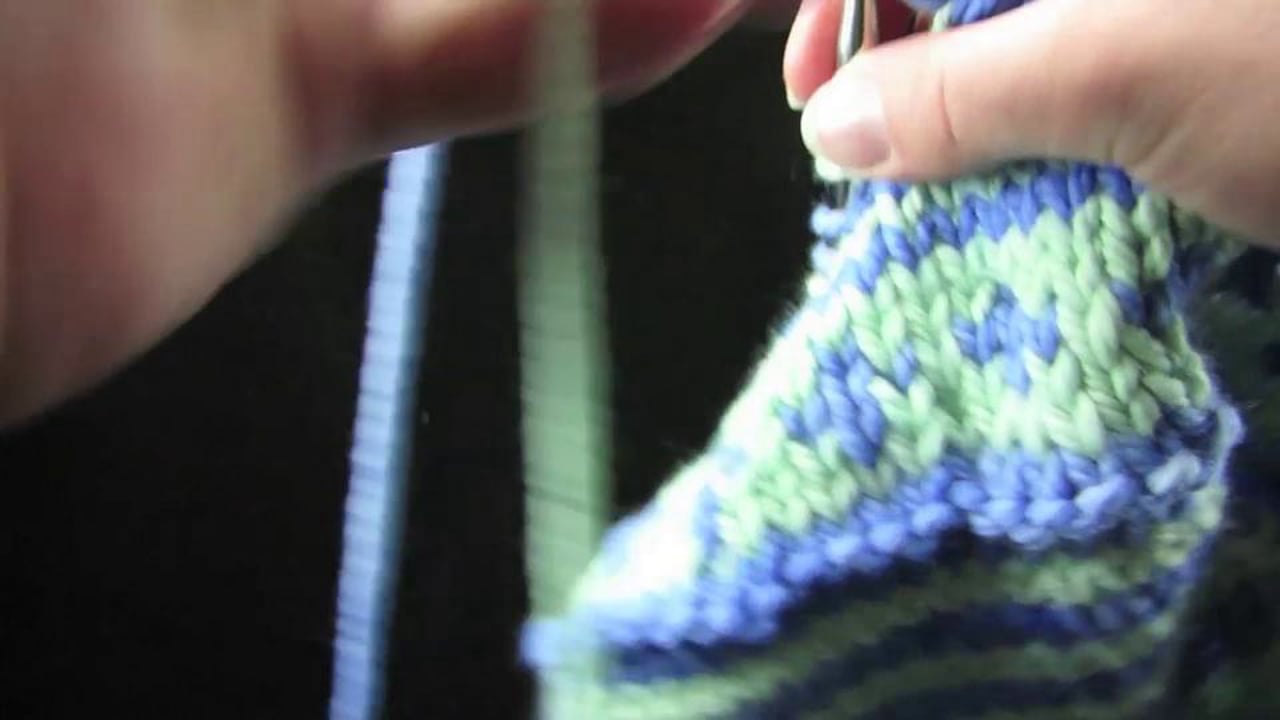
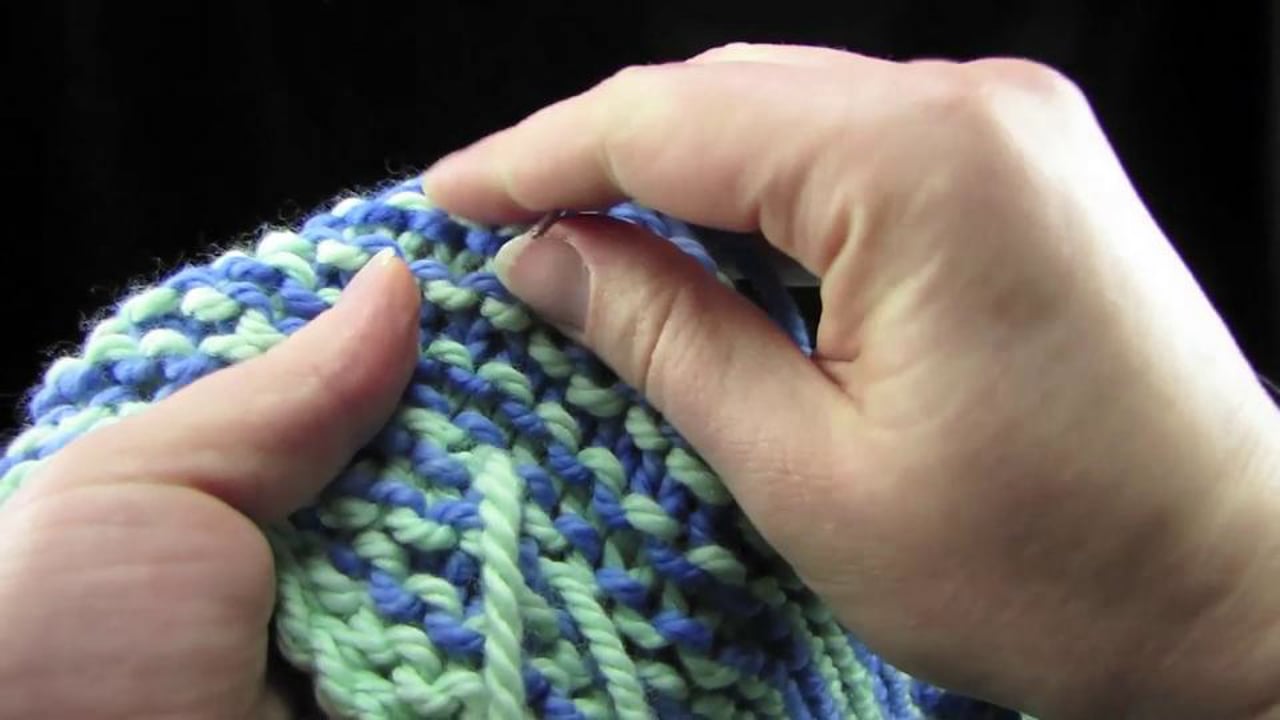
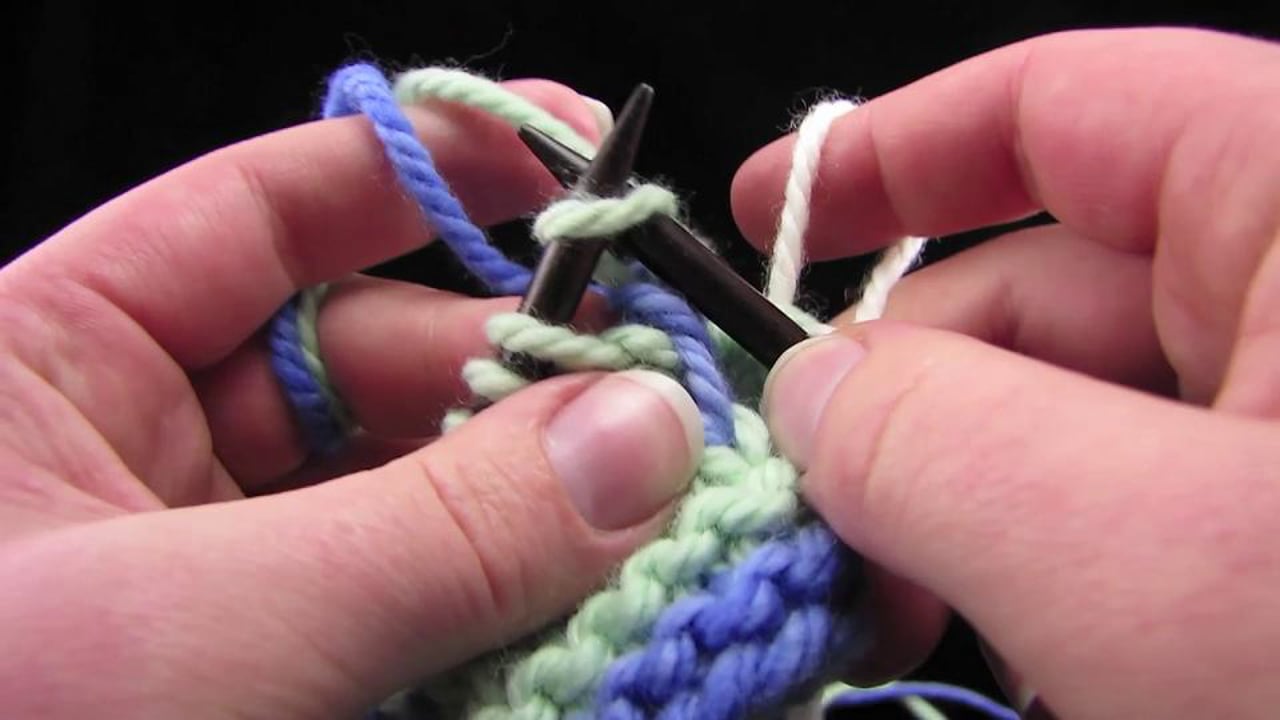
Even though Fair-Isle designs often involve more than two colors (like the pattern above left), they almost always require you to knit with no more than two colors in one row, which you’ll see if you look at this close-up photo:

To make the different color stitches, you knit a few stitches with one color, leaving the other color to stretch across the back of the work in what’s called a “float.” Then you switch colors, and knit a few stitches in the new color.  The floats across the back of the work add a second layer of thickness of the fabric, making it extra-warm. But because the floats are visible on the “wrong side” of the work, Fair-Isle projects aren’t really reversible.
If you want to make colored designs on a reversible project, like a scarf, you’ll want to try Double Knitting.
Also, long floats can easily catch and snag on jewelry, which is why patterns that call for more than 10 or 20 stitches of one color in a row (therefore leaving the other color in a large float across the back) are best left to other techniques.
There is a way to prevent long floats on patterns like these, which I will teach you, but it’s not a common issue that you come across in most well-designed Fair-Isle patterns.
Once you know how to do Fair-Isle knitting, you’ll be able to knit Fair-Isle sweaters, hats, mittens, bags, socks, and throw pillows. You’ll be able to knit simple and subtle color-flecks, traditional Fair-Isle tams and sweaters, and everything in between.
The Difference Between Fair-Isle and Intarsia Knitting
In Fair-Isle knitting, both yarns are carried across the whole row, and each yarn is used in different stitches throughout the row.
Because of this, you almost always find Fair-Isle knitting used with in-the-round projects like hats, mittens, or sweaters, where you want the color patterns to go all the way around.
In Intarsia knitting, different pieces of yarn are used to knit separate blocks of color of any size, for example, a yellow duck on the front of a blue baby sweater. When an image appears in just one place on the garment, as in the baby sweater, there’s no need (and, indeed, it’s quite messy) to carry both colors around the whole sweater.
So the color is only used when it is needed, and left hanging when it’s not, ready to be picked up on the way back across the row. Intarsia projects are almost always knit flat (back-and-forth).
Ready to Fair-Isle knit? Let’s get started.
Project: Fair-Isle Felted Bag
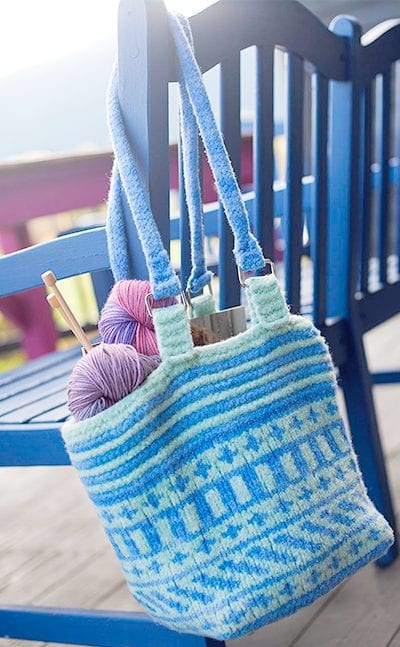 This felted bag is an ideal project on which to learn Fair-Isle knitting. It covers all the major skills, and it’s fast and super-cute.
If you’re a guy and/or not really into super-cute, you can give it as a gift – just consider it one Christmas or Hanukah present that you won’t have to make later.
This project is going to help you quickly and efficiently learn the Fair-Isle technique. Once you’ve mastered the skills I teach you here, you’ll be able to choose and knit any Fair-Isle project you want.
First download and print out the Fair-Isle Felted Bag Pattern.
Below, I’ll walk you through the materials to buy and the choices you have.
Choose Your Materials
Needles: We’ll be knitting this bag in the round, so you’ll need a set of circular needles
Needle length: You have a few choices here, depending on your budget, your knitting style, and what needles you already have. I will be demonstrating the project on a 24-inch-long circular needle, and teaching regular circular knitting on this project
If you don’t know how to knit in the round, follow along with me and use a 24-inch circular needle.
You can buy one at your local yarn store (LYS) or online. If you feel comfortable knitting in the round on Magic Loop, you can knit the entire project using a 40- or 47-inch-long circular needle.
Although I teach most of the bag on 24-inch needles, I will show you tips for doing Magic Loop on this bag as well. If you don’t know what the heck Magic Loop is and you’re curious, you can learn more here.

Needle size: Use either US size 11 (8mm) or US size 13 (9mm) needles. It doesn’t really matter which size you choose – it’s a bag: your gauge (the size of your stitches) is not critical.
If you knit tight, I’d recommend the larger size, and vice versa.
Optional needles: If you have them or want to buy them, you could use straight needles for the bottom of the bag, which is knit flat, and double-pointed needles (DPNs) for the i-cord handles.
Or you can use the same circular needle you are using for the body of the bag. I’ll demonstrate both techniques.
Yarn: Choose a bulky, 100%-wool yarn in two contrasting colors – you’ll need 150 yards of each color.
Some suggestions are: 2 skeins of Brown Sheep Nature Spun Chunky, 4 skeins of Malabrigo Chunky (which is what I use in the videos), or 4 skeins of Brown Sheep Lamb’s Pride Bulky.
Other materials: You’ll need a stitch marker, a pair of scissors, and a tapestry needle for weaving in yarn ends and sewing on the handles.
You’ll also need purse hardware: rings (here are some at Joann’s) and purse feet (here are some silver ones).
If you don’t like the look of felted i-cord handles, you can buy leather, metal, or vintage resin handles online (here’s one option) or at your LYS, thrift store, or yard sale. Ready to start knitting? Let’s go.
Overview
Here is an overview of how this bag is knit:
Fair Isle – Overview
Knit The Base Of The Bag
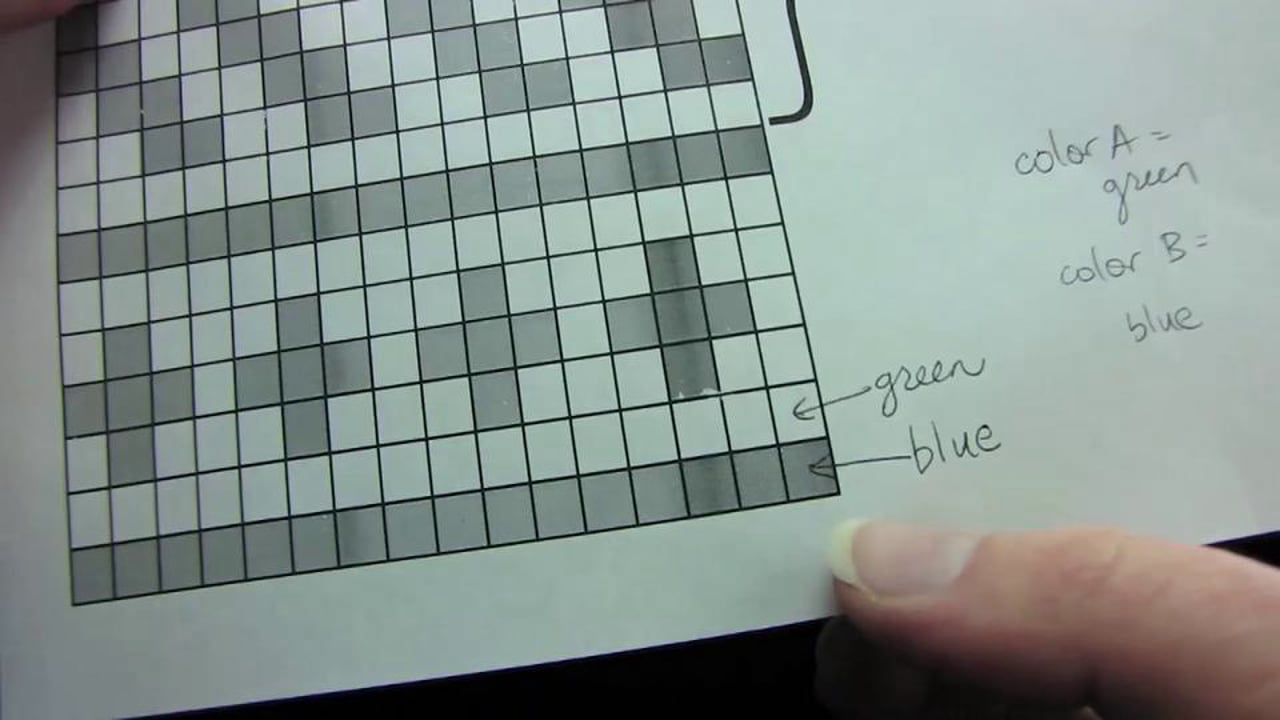
Decide which of your yarns you will call color A and which will be color B. Write down which is which on your chart.
For me, color A is my light green.
You can use your circular or straight needles for this part. I’ll show you both ways.
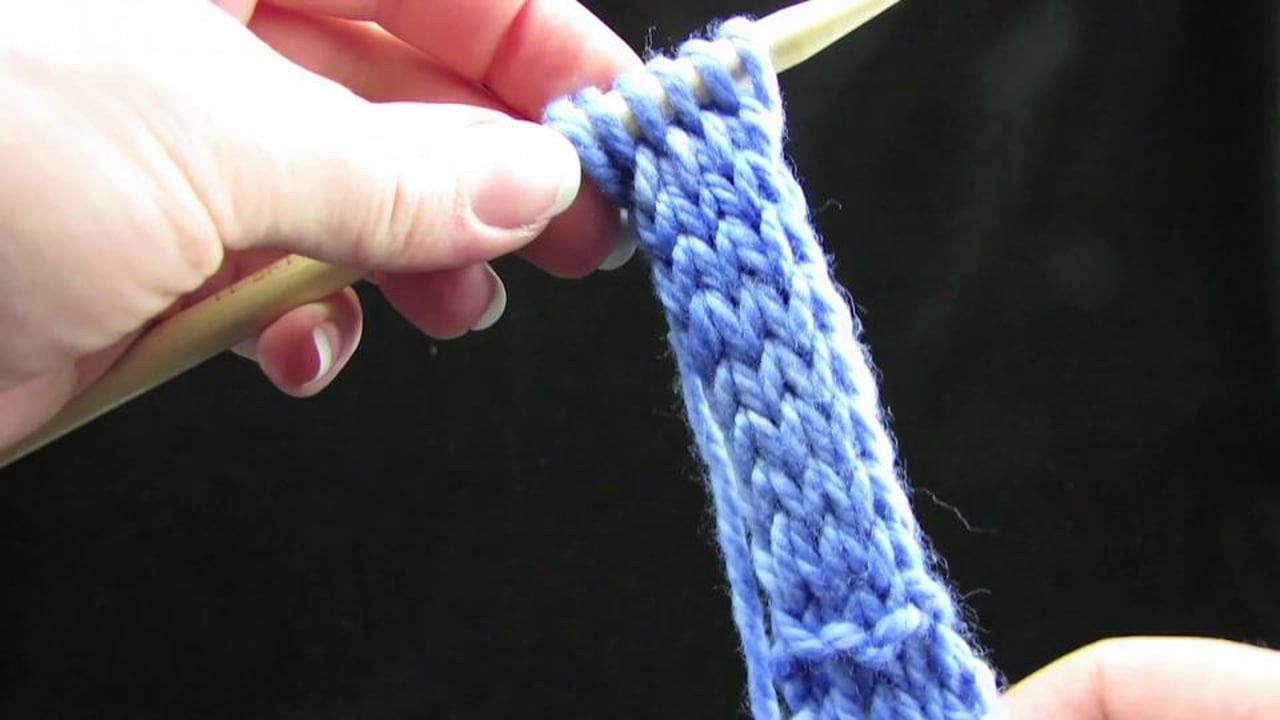
Cast On
Following the video, cast on 24 stitches in color A. Then, work in Stockinette stitch for 2 rows.
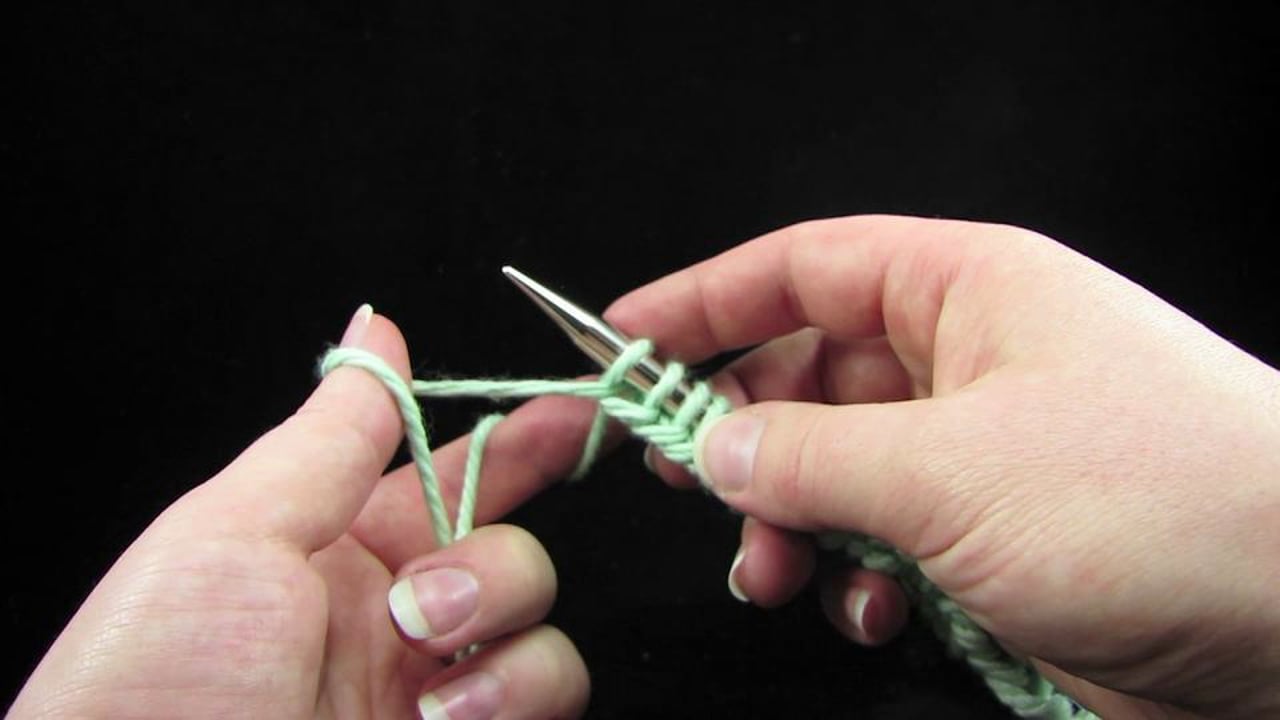
Fair Isle – Cast On
Join Color B To Start Making Stripes
Don’t cut color A.
With color B, work in Stockinette stitch for 2 more rows. Then, pick up color A and work 2 more rows in Stockinette stitch.
Fair Isle – Start Stripes
Knit The Striped Bag Bottom
Repeat the stripe sequence until you have 9 stripes in color B.
Work one last stripe in color A, then bind off.
Fair Isle – Count Stripes
Knit The Body Of The Bag
If you weren’t using them before, switch to using your circular needles now.
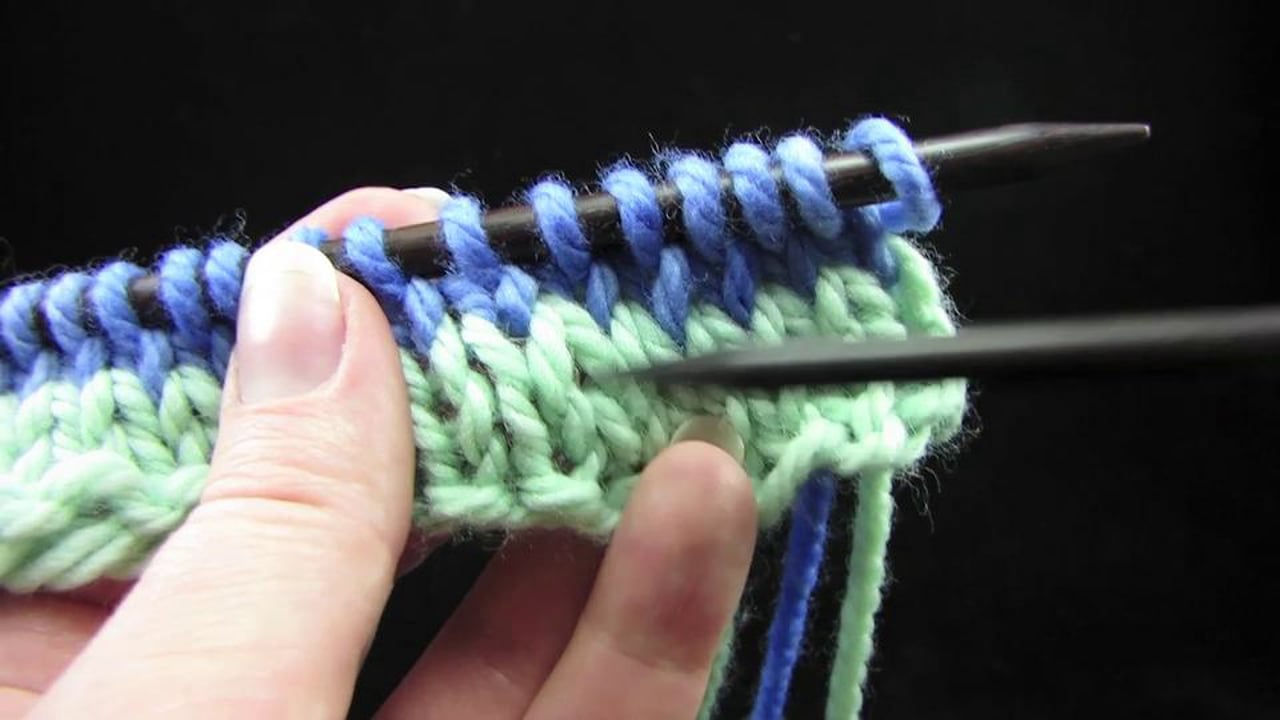
Pick Up And Knit Around The Base
With the right-side (RS) of the work facing you and using color B, pick up and knit around the bottom of the bag. Pick up 24 stitches on each short side and 28 sts along each long side.
Count your stitches to make sure you have 104, and mark the beginning of the round by placing a round stitch marker on the right-hand needle.
Fair Isle – Pick Up and Knit
Begin Knitting In The Round
We are now going to be knitting in the round, which is really easy. Follow along with me as we work 2 rounds (rnds) in garter stitch (knitting the first row and purling the second row).
Fair Isle – 2 Rnds Garter St
Learn To Read A Chart
Now it’s time to start following our chart.
If you’ve never worked from a knitting chart before, you may be wondering why we don’t just use a pattern that says “k3 sts with A, k 2 with B,” etc.
In fact, it just takes a little getting used to, and then a chart is much easier to read from than a written pattern.
A chart is a visual representation of the pattern. Even the most complex fair-isle design looks clear and organized on a chart, whereas a written pattern would become wordy and difficult to follow.
Grab a highlighter and watch this video where I explain how to read a Fair-Isle chart.
Fair Isle – How to Read a Chart
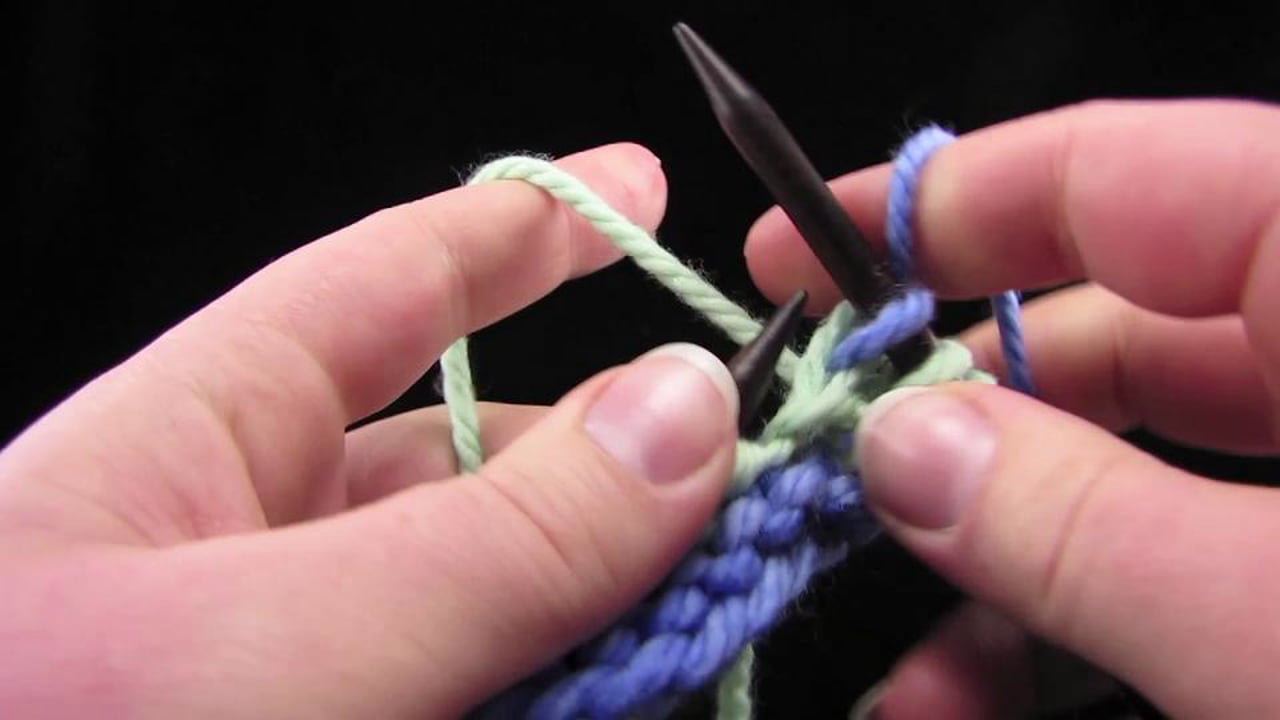
Begin Fair-Isle Knitting
Now it’s time to join color A and learn how to knit from a chart using two colors. I demonstrate four options for holding your yarn, depending on how you like to knit.

Fair Isle – Fair Isle Basics
If you want to try holding one yarn in each hand but you’ve never knitted with the yarn in your left hand before (Continental knitting), this may be a great motivation for you to learn.
You can learn to knit Continental here. You can also switch back and forth between any of the four styles as you practice, learn, and grow.
Tips for Successful Fair-Isle Knitting
Keep working along with the chart as I teach you the different pitfalls to watch out for and the tricks that will make your Fair-Isle knitting easier. The main topics I’ll cover are:
- Making sure you don’t mess up on the chart
- What to do if you notice a mistake
- How to tension your floats correctly
- How to get used to knitting with two strands of yarn over your finger
- How to switch between colors consistently
- How to prevent tangling yarn
I’ll then move on to show you a few tips that may not necessarily apply on this project, but that you’ll need to know for future Fair-Isle projects and that we can practice here.
Starting with the first tip and Round 2, let’s learn how to…
Follow The Chart Correctly And Learn To Catch And Fix Mistakes
We’ll begin with following the chart correctly. Work round 2 of the pattern and take a look at the stitches as you make them, to make sure you aren’t messing up the chart. Here I’ll show you what to do if you make a mistake and catch it while you’re still on the row:
Fair Isle – Fixing Mistakes 1
Maintain An Even Tension
The most important thing to be aware of in Fair-Isle knitting apart from following the chart correctly is getting the right tension, both in your stitches and in your floats.
Incorrect stitch tension can come from psychological causes (e.g. you’re worried your knitting will come out too loose) or physical causes (e.g. you’re still not used to handling the two yarns easily).
Here’s what correct stitch tension looks like and how to achieve it.
Fair Isle – Stitch Tension
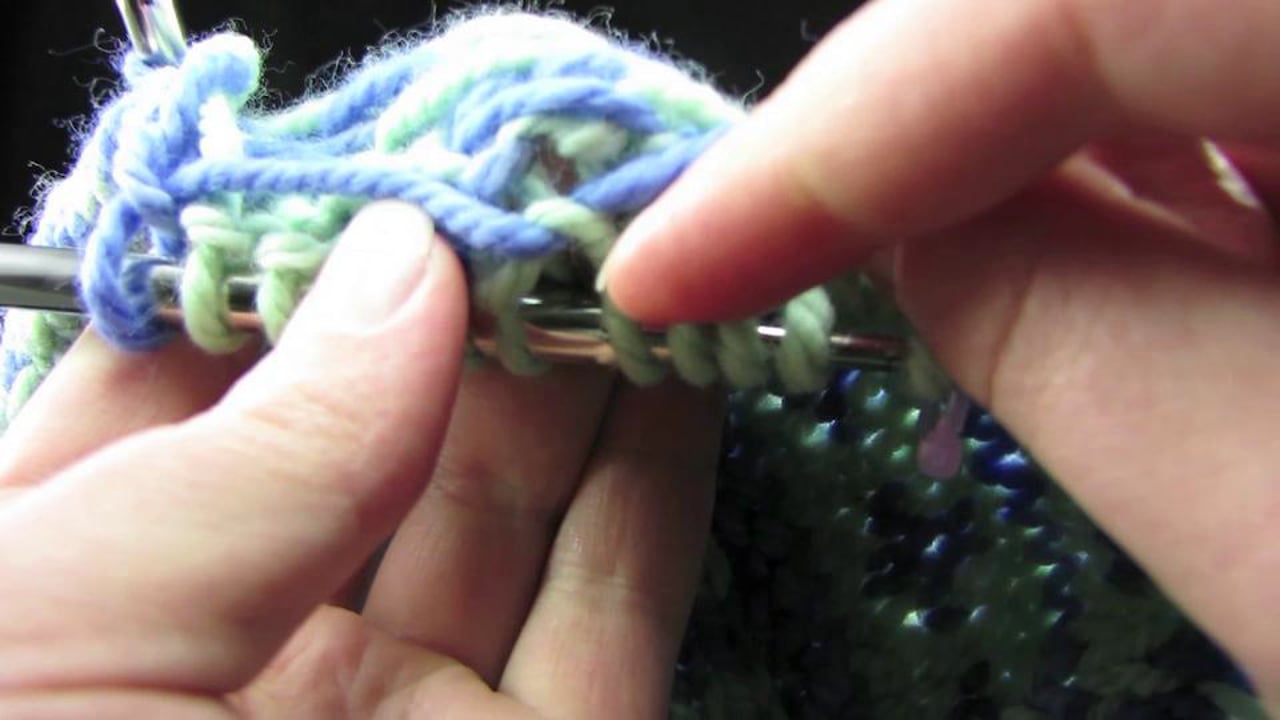
Pulling Your Floats Too Tight
This is a very common problem for Fair-Isle knitters, and I’m going to show you how to fix it right now.
So that you’re motivated to get this bit right, I will tell you that, in my opinion, tight floats are the #1 cause of ugly Fair-Isle projects, and that fixing the float tension is the #1 thing you can do to make your Fair-Isle project look great.
Don’t worry too much, though – the felting process will conceal any funny bits you may have while you practice getting this right.
Fair Isle – Float Tension
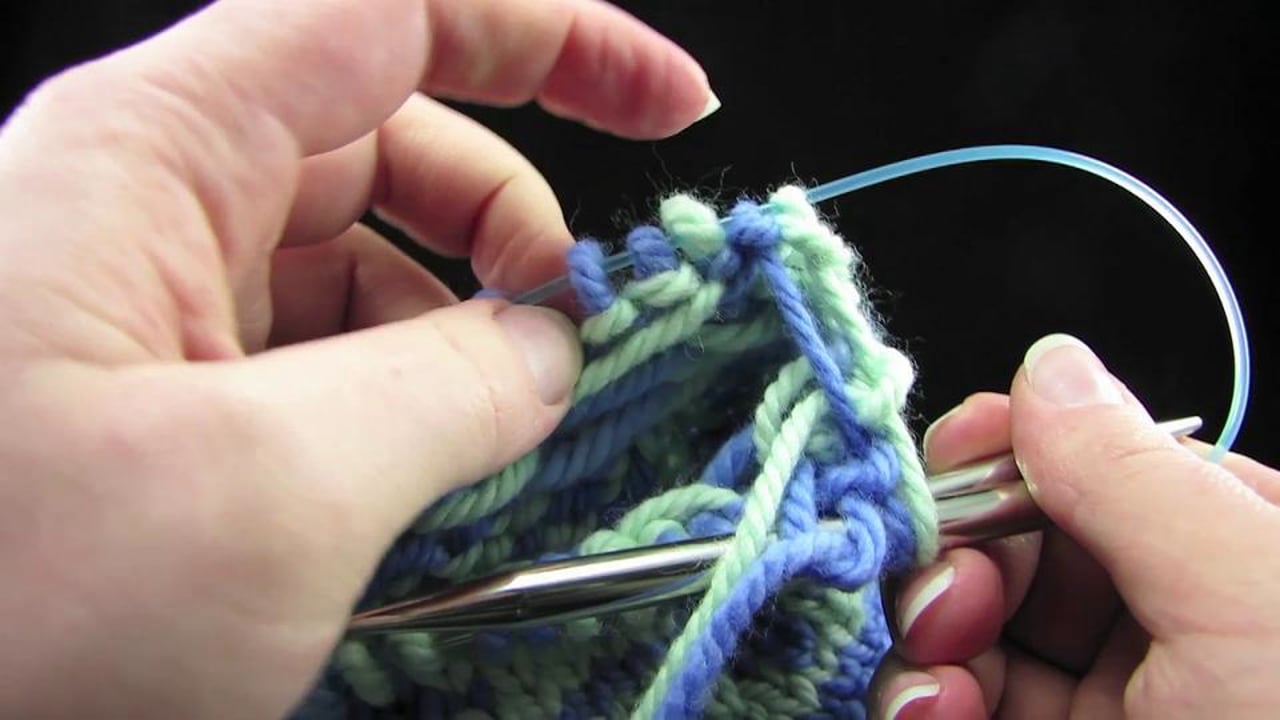
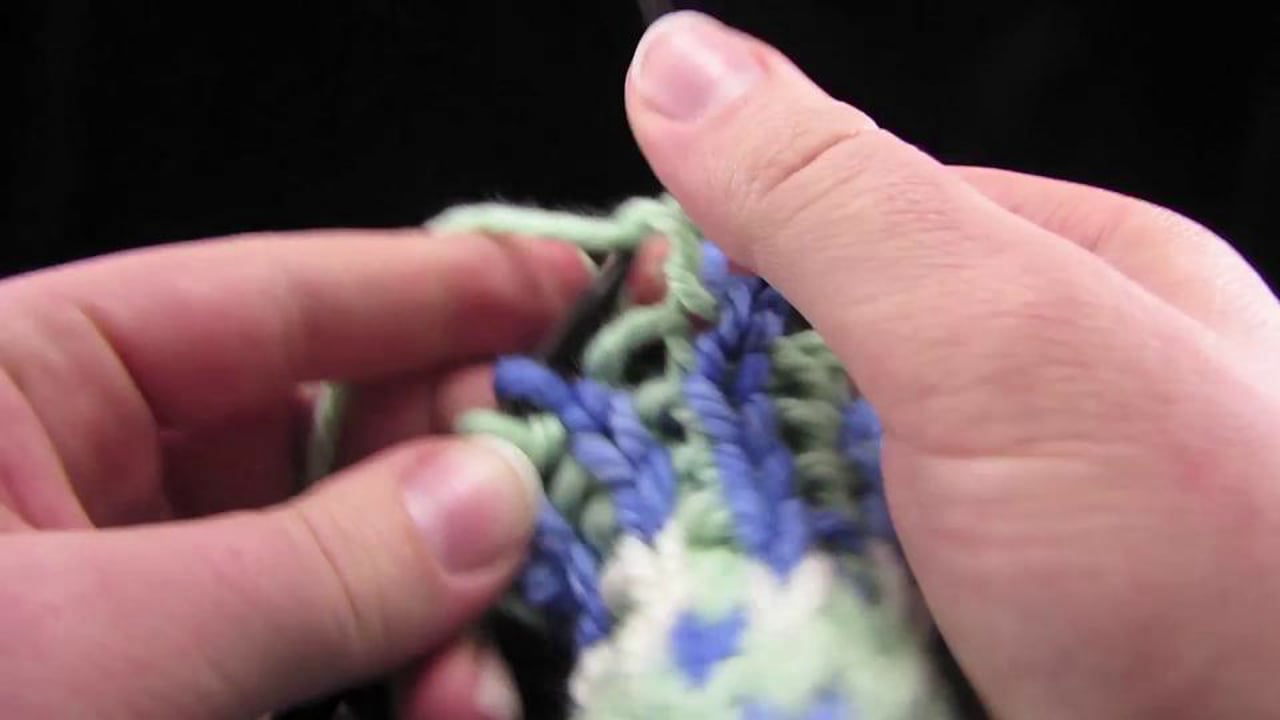
Fix Mistakes Even If You Don’t Notice Them Until Later
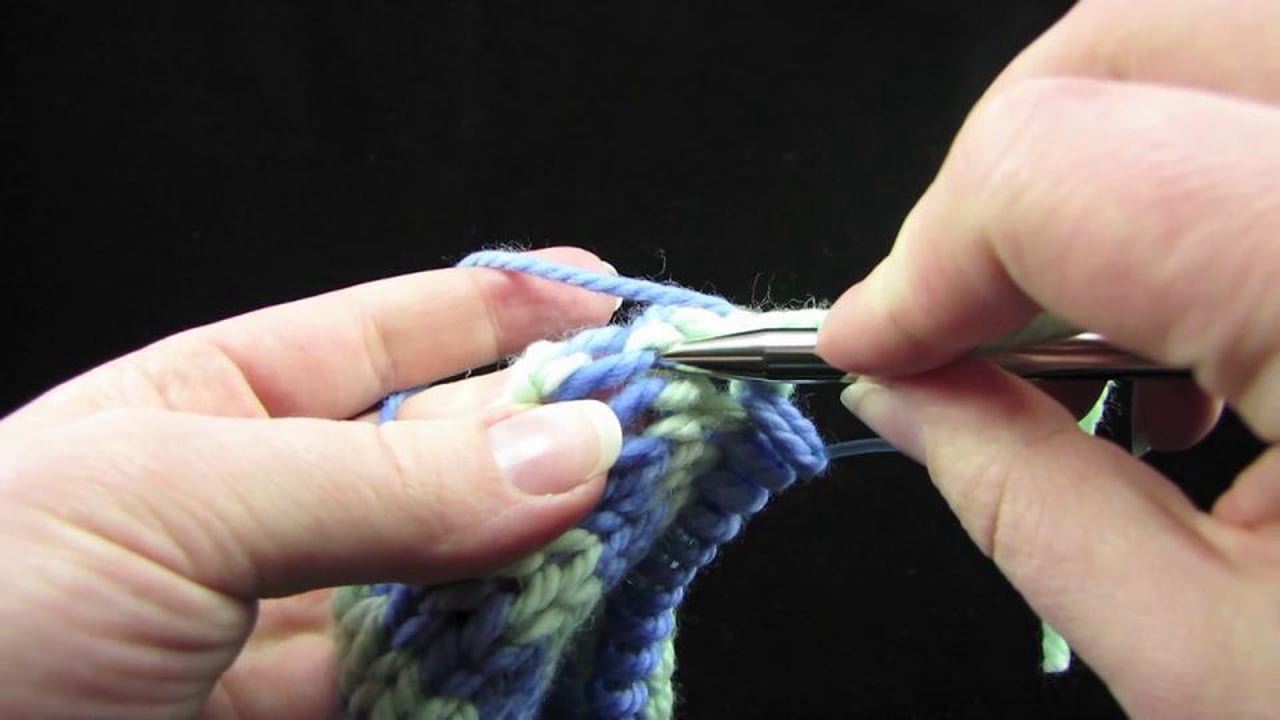
Earlier in this tutorial, I made a mistake in the chart so that I could show you what to do if you knit a stitch in the wrong color but don’t notice it until later.
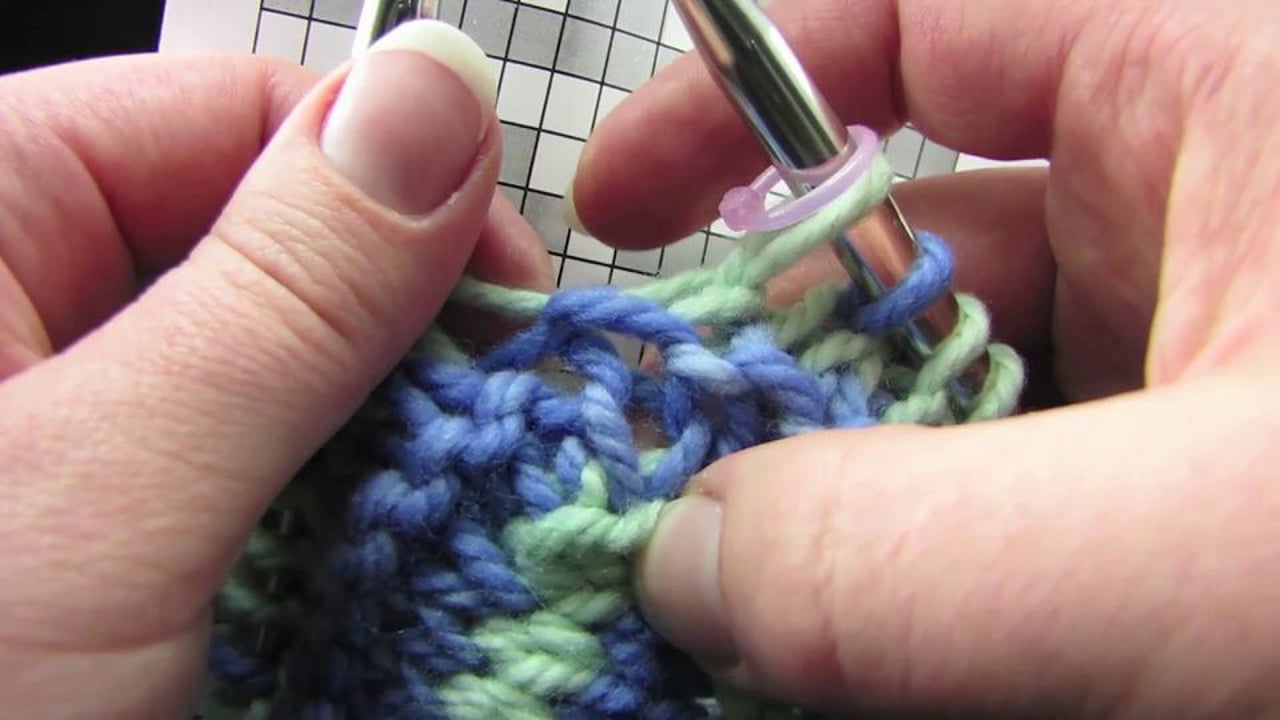
All you have to do is work over to the knit column that contains the messed-up stitch, then drop the stitch down to the row of the original mistake, correct the mistake, and then pick the stitches back up the column according to the chart.
You can practice this along with me even if you haven’t made a mistake. Here’s how to do it:
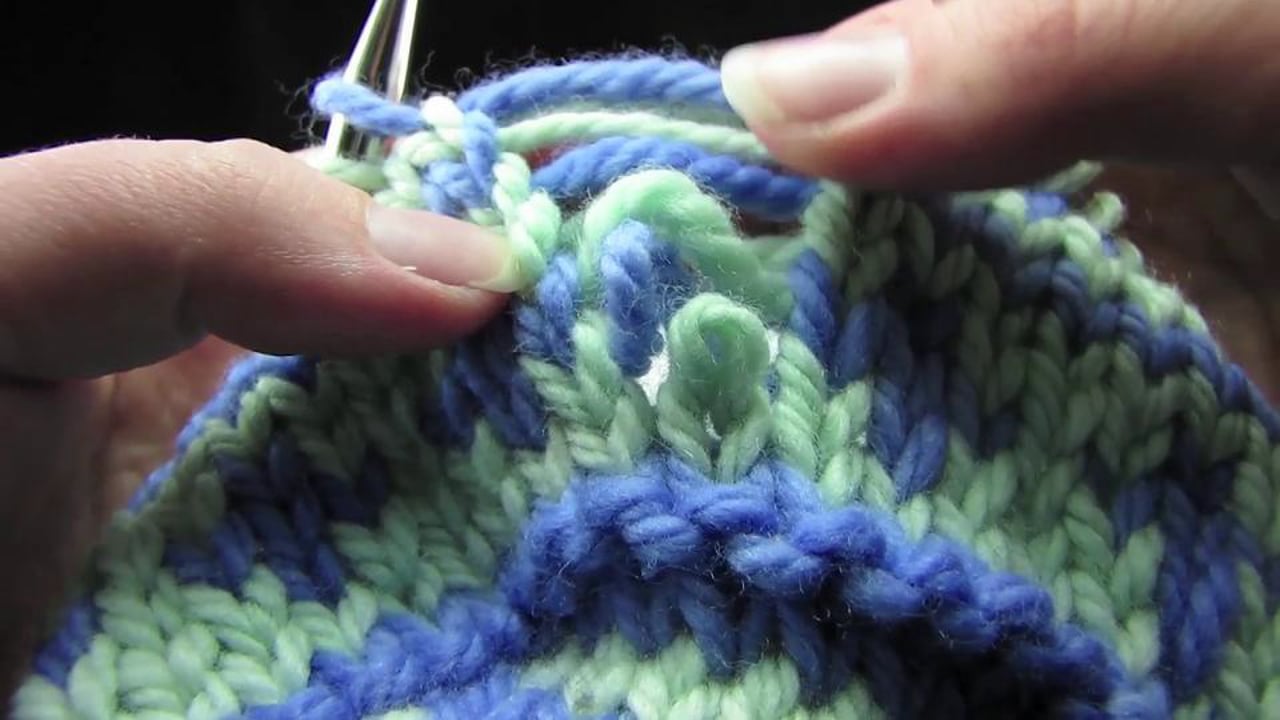
Fair Isle – Fixing Mistakes 2
Finish working all the way around this round, and we’ll talk about switching colors correctly as we work through the next few rounds.
Switch Colors Consistently
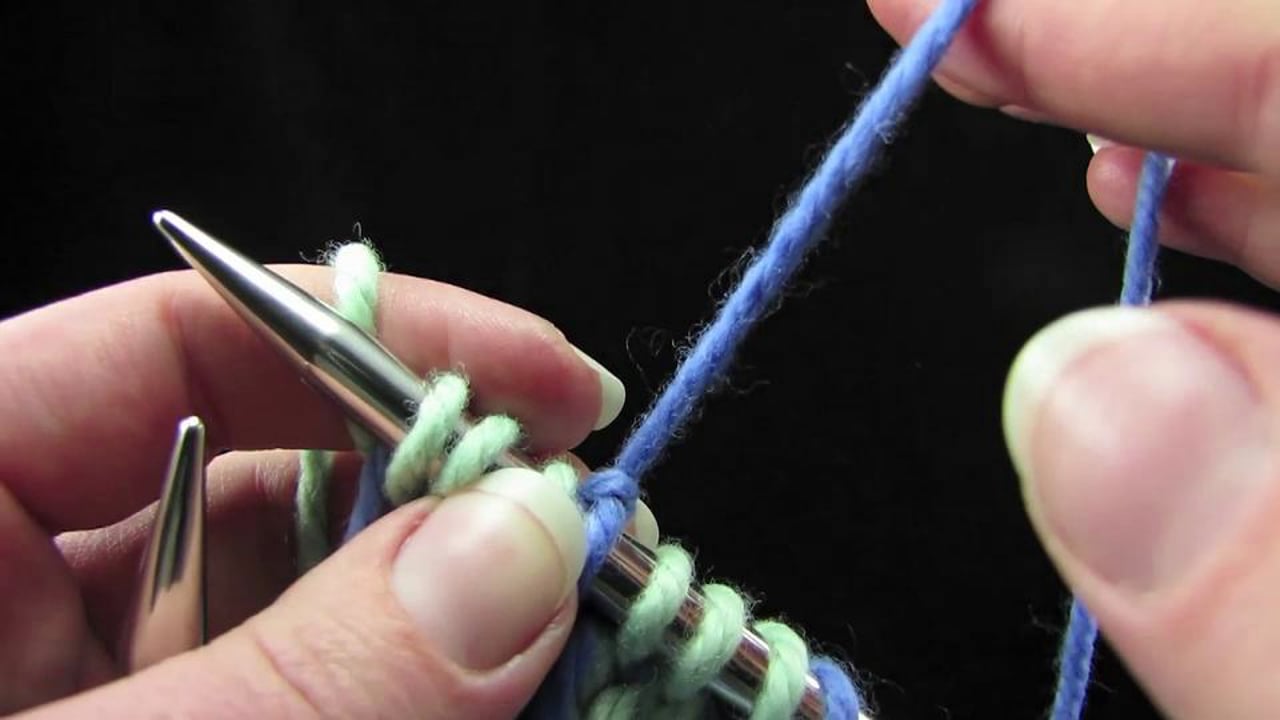
You want to make sure that you are switching between colors in a consistent way. I like to always pick up one color from the bottom, and the other color from the top, so that my yarn doesn’t get tangled.
How you switch yarns has an effect on how the finished fabric looks and how the finished stitches appear, although if you are inconsistent here, it won’t be noticeable after you felt the bag. But it’ll be important on any non-felted project.
Here’s how to switch between colors consistently.
Fair Isle – Switch Colors
To prevent your balls of yarn from tangling, make sure that they are not sitting next to each other in the same knitting bag – place them on either side of you instead.
Things to Watch Out For in the Future
You may not need to know all of the following tips on this project, but I want you to be aware of them for the future. If you are using Magic Loop to knit this bag, some of these tips will apply right now. I’ll mainly talk about:
- What you can do to avoid long floats
- Tips for Fair-Isle on Magic Loop and on DPNs
Twist Your Yarns To Prevent Long Floats
In the future, you may come come across a Fair-Isle design that requires you to knit for more than five stitches without switching colors.
There’s nothing wrong with this, but you should watch out, because the longer you go before switching colors, the longer your float is going to be and long floats are easy to snag.
To prevent long floats, learn to twist one strand of yarn around the other every 5 stitches or so.
I’m going to pretend that the chart calls for me to knit 15 stitches in color A, and I’ll show you what to do to keep the floats short:
Fair Isle – Long Floats
Watch The “Corners” When You Are Fair-Isle Knitting On Magic Loop Or DPNs
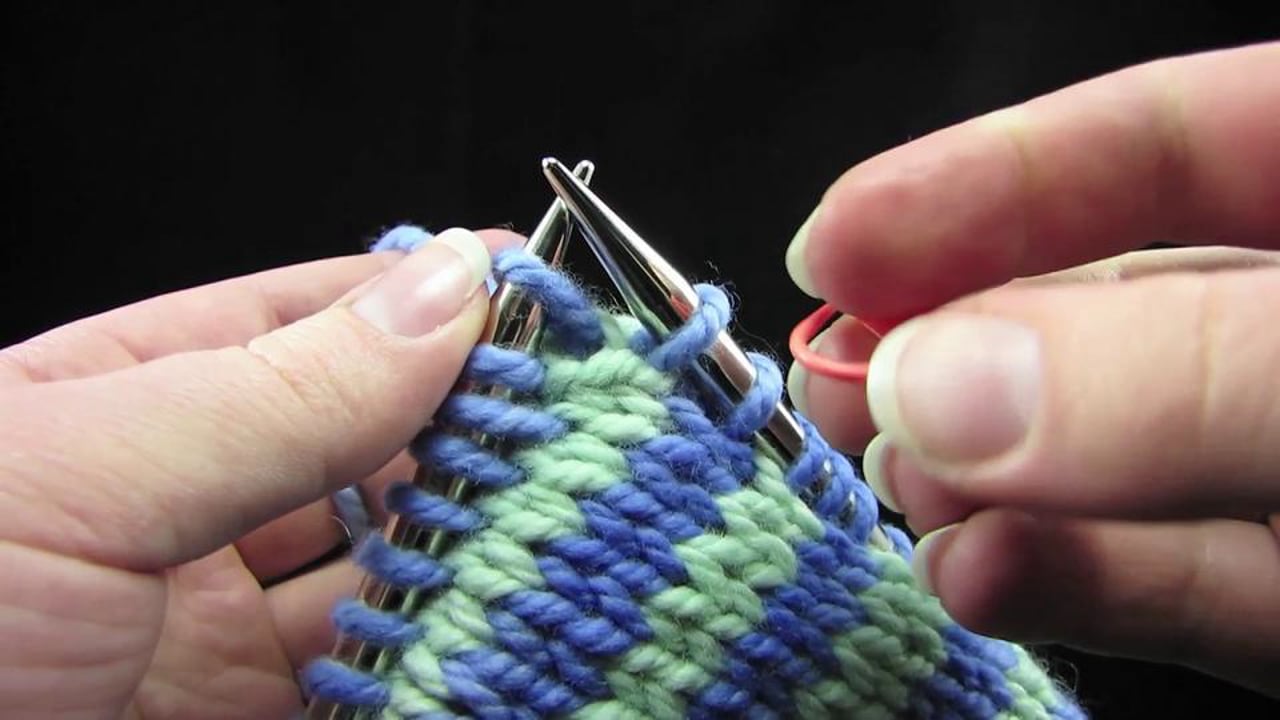
If you are using Magic Loop to knit this bag, you’ll have one or two loops of cable sticking out between your stitches at certain points in your knitting (what I call “corners”).
Magic Loop is great because you can avoid having to buy lots lengths of circular needles and having to use DPNs on small-circumference projects. It can also cause tangles, puckered edges, and general confusion when it comes to Fair-Isle.
If you know how to do it, you can definitely combine Magic Loop and Fair-Isle knitting, and I absolutely recommend doing it for small-circumference projects like mittens (the alternatives being DPNs or super-short circulars).
For the following video, I transferred my stitches to a 47-inch-long needle to show you what you need to know about managing the two colors and the loops of cable when combining Fair-Isle with Magic Loop.
For those of you who knit with DPNs, this video has tips for you as well.
Fair Isle – Magic Loop
One last note about Magic Loop and Fair-Isle knitting: I do not recommend that you use the two-at-a-time technique with Fair-Isle.
In my experience, the trouble of managing four balls of yarn and four loops of cable all going in the round at once is not worth the time you save by knitting two-at-a-time.
I tried it once on some Fair-Isle cuffs on a sweater I was making – it wasn’t worth it. But you can always try it for yourself and find out. Maybe you’ll feel differently.
Checking Back In With Your Tension
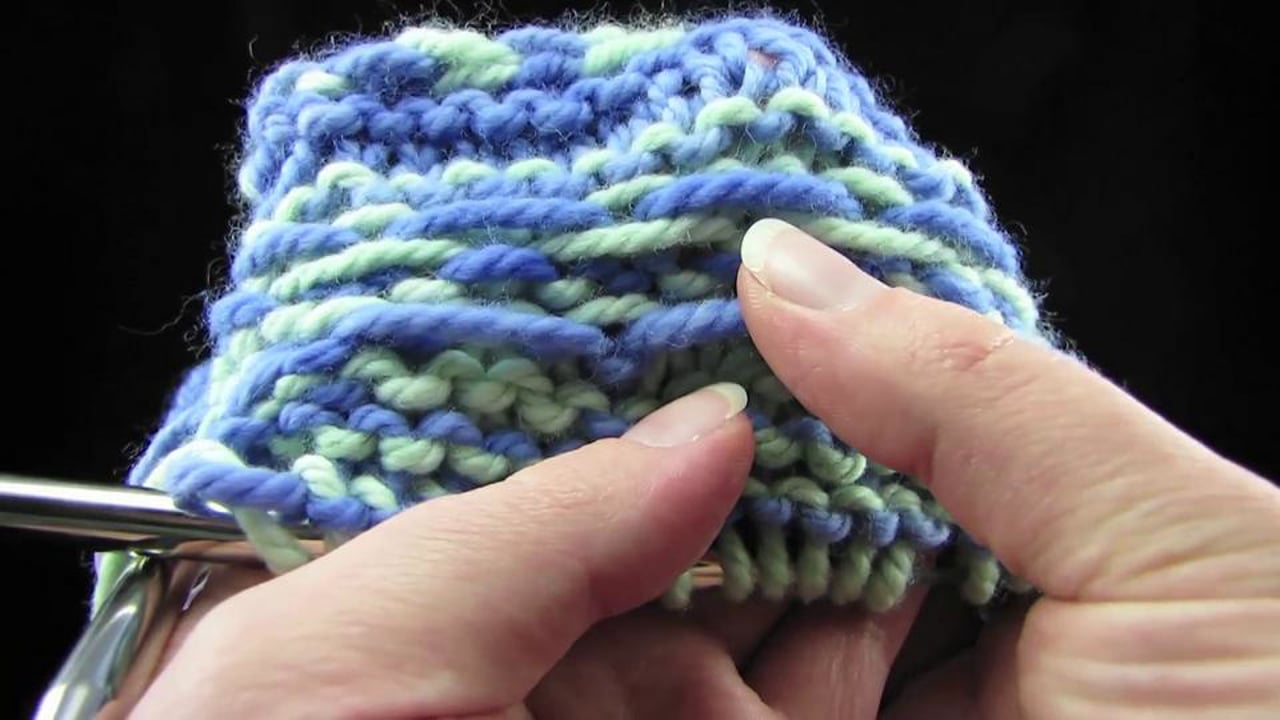
Before I leave you to finish the rest of your bag on your own, I want you to take a look at your stitches one more time.
I know we are going to be felting the finished product, but how your stitches look is going to be important on future, non-felted projects, so take this opportunity to notice what you do and don’t like about how your stitches look and feel.
- You shouldn’t be having trouble getting your needle into the stitches to knit them – this would be a sign that you are pulling the working yarn too tight.
- You also shouldn’t be able to see the background yarn peeking through between the stitches – this would be a sign that you are pulling your floats too tight or that you are not switching colors consistently.
- Lastly, the fabric should not look bumpy or puckered – this would be a sign that you are pulling your floats too tight or that you are not switching colors consistently.
Finish Knitting the Bag and Handles
You now know enough tips and tricks to keep you occupied and knitting correctly through the rest of the chart.
Keep following the chart, reviewing the videos if you need to, and move on to the next videos when you’ve finished the entire chart.
A Note About Felting
You can actually make the bag as tall as you want to – if you want to alter the height of the bag, just know that when you felt a knitted piece, it always shrinks more noticeably in the up-and-down direction than it does in width or circumference.
So you’ll want to make the bag taller compared to the other dimensions that you’ll want it to be when it’s finished.
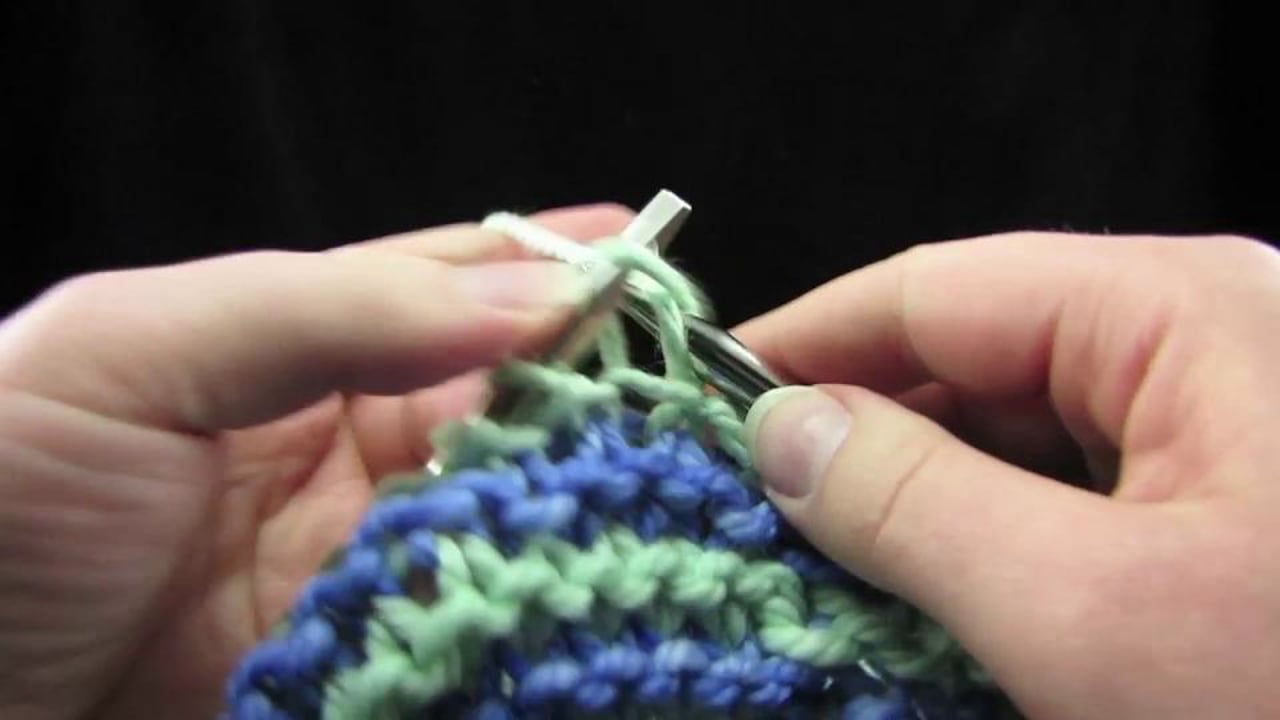
Garter Stitch in the Round Without Purling
We are again to work garter stitch in the round, but this time I’m going to teach you a trick.
Following along with your pattern and the video below and starting with color B, work in Garter stitch stripes for eight rounds (4 stripes of each color).
When you knit garter stitch in the round, you normally need to alternate between knit and purl rounds.
I use a special trick called the wrap-and-turn so that I don’t ever have to purl when I do garter stitch in the round. Here’s how to do it.

Fair Isle – Garter in the Round
Final Rounds
It’s time to finish the top of the bag. Here I demonstrate the decrease round and final steps.
Fair Isle – Decrease Round
Weave Ends
Now, weave in your loose ends. This step doesn’t have to be perfect – just secure the ends on the wrong side (WS) of the work.
Fair Isle – Weave In Ends
Make The I-Cord Handles And Purse Handle Loops
You can use your circular needles or your DPNs to make these i-cord handles.
If you’ve never made an i-cord before, it’s just a skinny tube that you make by not turning your work. I’ll also take this opportunity to teach you another skill you will be able to use in the future: how to count rows on Garter stitch.
Here’s how to make an i-cord and count rows on Garter stitch.
Fair Isle – I-Cord
To make the loops that will attach the bag to the handles, you get to practice counting rows on garter stitch once again. Make four “hardware attachment loops” according to your pattern,
Felt and Assemble the Bag
Felt the Bag
This step is really simple.

Put all the knitted pieces into a pillowcase and throw them in the washing machine with the temperature set to hot. Use detergent.
If you have a top-loading washer you are in luck, because it’s easy to stop the cycle and check on how the felting is going. Top-loading washers also use more agitation, which is one of the key ingredients in the felting process.
If you don’t have a top-loader, that’s okay too – just set the cycle to regular or heavy wash, use hot water and detergent, and throw in some towels or jeans for extra friction.
You’ll want to continue the washing cycle until you can’t see the individual stitches in the purse anymore.
Once you get to this point, stop, because if you keep going, the purse will keep shrinking, and the shrinking happens faster once the stitches disappear.
One regular wash cycle should do it – it might take two if you have a gentle washing machine.
When you take the knitted pieces out of the wash, lay the small bits and the i-cord handles out flat to dry, adjusting their shape with your fingers.
I recommend that you put the bag over a box to dry – this will ensure that the bottom and sides are nice and flat.
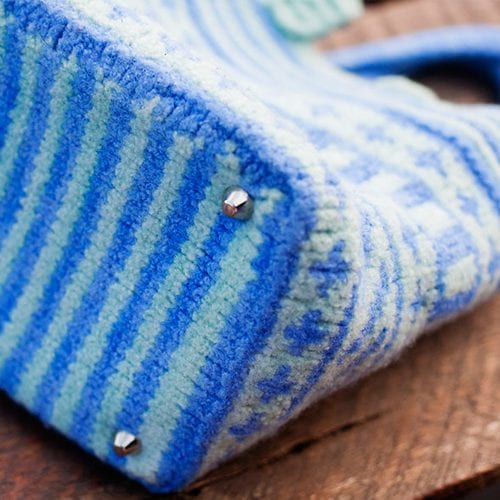
Assemble The Bag
Insert the handle attachment loops through the purse rings.
Using a tapestry needle, sew the handle attachment loops onto the top edge of the bag and then fold and sew the i-cord handles onto the purse rings. Attach the feet to the bottom of the bag.
Here are the final purse-assembly steps.
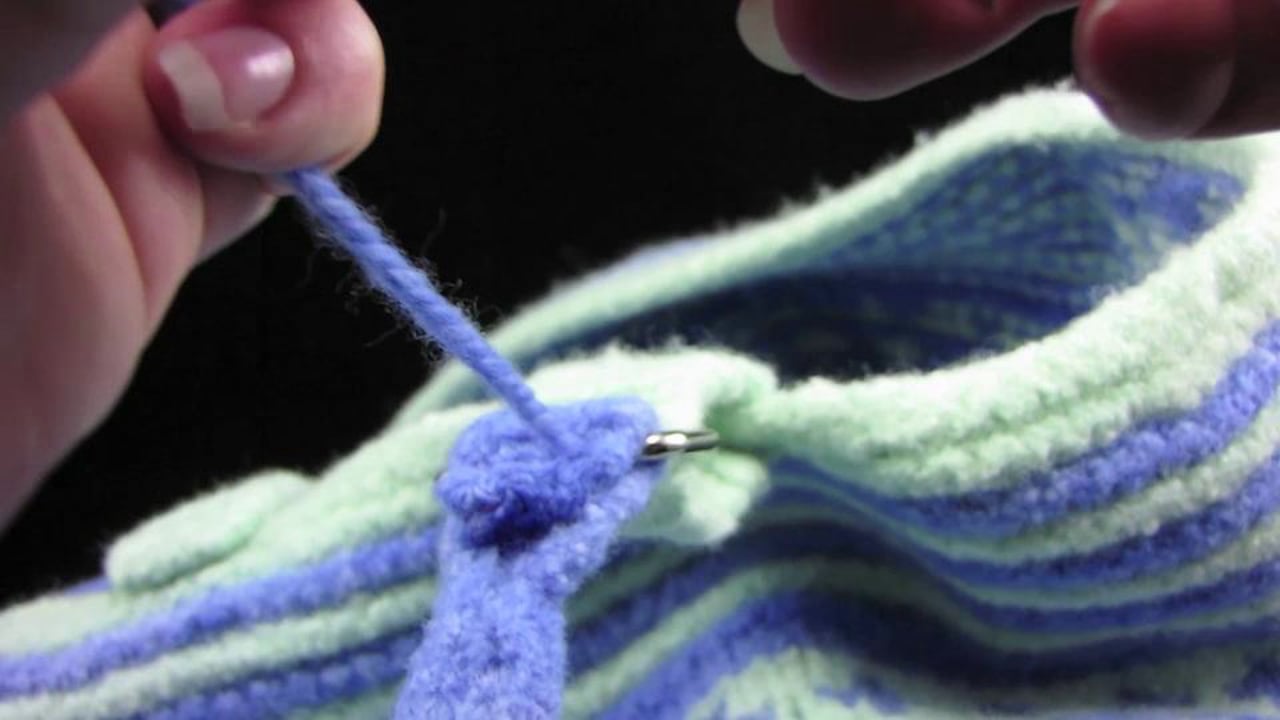
Fair Isle – Assemble Bag
You did it! Not only did you learn Fair-Isle in the round, you learned to knit garter stitch in the round without purling, make an i-cord, count your rows on garter stitch, felt projects in the washer, and do Fair-Isle on Magic Loop or DPNs. Great work.
Intermediate Fair-Isle Knitting
Tips for Fair-Isle on Other In-The-Round Projects
You can now go on to try other Fair-Isle projects that are knitted in the round, like hats, mittens, legwarmers, and, of course, Fair-Isle sweaters.
All these projects use the same concepts and skills that you learned on the felted bag.
As you move forward and apply what you’ve learned to other projects, keep these tips in mind: 
- Tension is even more important if you are not going to felt the finished project, so make sure to switch colors consistently and leave long-enough floats.
- You can use a self-striping yarn like Noro as one of your “colors,” to make a very simple 2-color Fair-Isle project look impressive, like Brittany did in this hat at right from “A Family of Hats” by Catherine Shields. The yarn changes colors for you and does all the work.
- Choose yarn colors from the same line. To be safe, choose two of the same yarn in different colors, instead of trying to pair two different yarns. Yarn colors in the same line look good together.
- 100% wool is a good bet for your first few Fair-Isle projects. Some of the washable merinos out there like Debbie Bliss or Malabrigo machine-washable yarns are almost too springy and are therefore easy to pull too tight. I would stick with straight-up 3- or 4-ply non-washable wool yarns, until you feel comfortable with your tension.
More Fair-Isle In-The-Round Projects for You to Try
While almost any Fair-Isle project is now within your reach, I can suggest a few patterns for you to try:
- “A Family of Hats” by Catherine Shields, available in the Interweave Store
- Any of the beautiful Fair-Isle berets on Ravelry
- The “Fair-Isle Yoke Pullover” by Elizabeth Zimmerman (here’s my version)
- The “Adelaide Yoke Pullover” (so beautiful) from Vintage Modern Knits
- “Norwegian Snail Mittens” by Adrian Bizilia, in The Knitter’s Book of Yarn
Remember – you know how to catch and fix your own mistakes in Fair-Isle now, so don’t be afraid. Try anything you want. If you want to try a Fair-Isle mitten pattern but you don’t know how to knit mittens yet, you can learn here.
You can practice on some other projects now and then come back to this course, or you can read to the end now, but make sure to watch the last few videos in this book so that your Fair-Isle knowledge is truly complete. We’ll start with…
Knitting With More Than Two Colors
Many Fair-Isle patterns will call for you to use anywhere up to five or six colors in one design, like this five-color Adelaide Yoke Pullover.

While these patterns still call for you to use only two colors in one row, you’ll be switching between colors A, B, C, D, and E as you follow the different rows of the chart.
This isn’t too difficult, especially if you write down on your chart which color is which.
All that remains is to switch between the yarns at the ends of the rounds.
When you come to the beginning of the round, just drop the yarn that you are done with and pick up the color that you’ll need for the next row.
You’ll have little vertical floats running up the inside of the garment at the beginning of the round, so make sure to tension them loosely and evenly, just like your regular horizontal floats
Advanced Fair-Isle Knitting Skills
These are the last tips that you need to know to be truly prepared for anything and everything Fair-Isle.
Fair-Isle On Flat Projects
Sometimes, you’ll want to knit Fair-Isle back-and-forth on a flat project.
Anything that has an all-over color design just on the front (for example, a throw pillow) is perfect for this technique. Here’s an example of a beautiful throw pillow project that is knit flat. It’s a favorite of mine: the Regal Frost Cushion by Jo Sharp, published in Handknit Holidays.

To learn to knit Fair-Isle back-and-forth, let’s just practice on a swatch, using the same bulky yarn you used for the felted bag.
We’re also going to use the same chart we used for the felted bag.
You can use the same circular needles that you used for the felted bag project, but if you have straight needles it will be easier, because you won’t have the loop of cable coming towards you and getting in the way.
The main thing that differentiates this project from what we’ve done with Fair-Isle in the round is that you’ll be purling on the wrong-side, and the yarns and floats are going to be facing you.
Work along with me on the chart, and I’ll show you how to do it.
Fair Isle – Flat Fair Isle

You can make your own cushion cover designs by picking your favorite Fair-Isle charts out of a motif book (here’s one suggestion), or drawing up your own charts by coloring in graph paper.
Speaking of striking out on your own, a great resource to have by your side is the Book of Fair-Isle Knitting, a recent and much-lauded book by famed Fair-Isle yarn- and knitwear designer Alice Starmore.
Knitting With Three Colors in One Row
Some patterns call for you to hold and knit with three colors in one row.
The key is to use the last option for Fair-Isle knitting that I taught you – holding one yarn in each hand – only this time you’ll hold two yarns in one hand and one yarn in the other.
Fair Isle – 3-Color Fair-Isle
You can work up to being comfortable with this style by practicing with just one yarn in each hand. Again, this type of pattern is not very common, so don’t stress if you can’t get the three yarns to behave right away.
Fair-Isle Ribbing

A beautiful detail that some patterns include on cuffs is a Fair-Isle rib.
While this isn’t too much harder than what we’ve done in this book, it does incorporate knitting and purling with two yarns in the same row – a worthwhile skill to practice together before you strike out on your own.
Fair-Isle ribbing, which is almost always worked in the round, calls for the knit stitches to be one color and the purl stitches to be the other color.
This makes it easy in that you don’t have to look at a chart to see what color to use.
Follow along with me as I knit a small swatch in Fair-Isle rib.
Fair Isle – Fair-Isle Ribbing
You Did It!
Congratulations on working through this entire Fair-Isle knitting course.
You’ve added a great new set of skills to your knitting repertoire, and I know you’re going to love being able to knit all the patterned projects you can make now.