“Become A Knitting Superstar” Premium Video Knitting Library > Mittens
Two-at-a-Time Mittens on Magic Loop


Table of Contents
Two-at-a-Time Mittens on Magic Loop
- Pattern Overview/Walkthrough of Finished Project
- Pattern 1: Bulky-Weight Mittens for Magic Loop
- Pattern 2: Worsted-Weight Mittens for Magic Loop
Getting Started
Cuff
- Twisted Rib
- Keeping Track of the BOR (Beginning of Round)
- Easily Count Rounds of Knitting
- How to Keep Balls of Yarn from Tangling
Hand – Part 1
Thumb – Part 1
- Increase for the Thumb
- Slipping Markers
- Final Thumb Increases
- How to Tell If it’s Time for an Increase Round
- Separating the Thumb Stitches onto Waste Yarn
Hand – Part 2
- Knitting the Hand
- Count Plain Rounds Easily
- Decreasing for the Hand
- Count Decrease Rounds Easily
- Final Hand Decreases
- Finishing the Top of the Hand
Thumb – Part 2
- Placing Thumb Stitches on Needle
- How to Knit the Ultimate Mitten Thumb
- Knitting the Thumb
- Finishing the Thumb
- Weaving in Ends
Two-at-a-Time Mittens on Magic Loop
Yay! Let’s make mittens. You’ll want to be familiar with the Magic Loop technique of knitting in the round before you start this course, although if you are adventurous, I do show you every step here, so you could start here and see how it goes.
I’ll be showing you how to make these basic mittens two-at-a-time, so you’re done all at once.
Download the Bulky Mittens for Magic Loop Pattern here
There is also a worsted-weight version of the pattern that you can use if you feel comfortable not having the same number of stitches as me in the videos. Download the Worsted-Weight Mittens for Magic Loop Pattern here
Choose Your Materials
You’ll need:
100 yards of bulky-weight yarn, spun into two separate balls. I really love Malabrigo Chunky – one skein will make a pair of mittens.
1 pair of 47-inch-long circular needles, US size 9 or whatever size allows you to get the correct gauge, which is 3 stitches per inch in Stockinette stitch.
Next, measure your hand to decide which size you need to make.
Here are your options:
Sizes: S(M,L) Women’s Small (Women’s Large, Men’s Large)
Measurements: fits a hand 7 ½(8,8 ½) inches around the hand at the widest point; 6 ¾(7 ¼,7¾) inches long from base of hand to tip of middle finger.
Check Your Gauge in the Round
Here’s how to check your gauge. Be sure to knit a swatch in the round on Magic Loop, because that is how we will be knitting. Your gauge should be 3 stitches per inch in Stockinette stitch.

KNITFreedom – How To Measure or Check Your Gauge in Knitting
Following Along With Your Pattern
I highly recommend that you highlight or circle each number in the directions that corresponds to your size, so that you don’t get messed up later on.
I’ll be making the medium size in these videos, but be sure to use the numbers that correspond to your size. You’ll also need scissors, a tapestry needle, and a scrap of waste yarn for each thumb.
Let’s get started. You’ve got the pattern (with your numbers circled), a set of 47-inch-long circular needles, and two equal-sized balls of chunky yarn, right? Awesome.
Pattern Overview
Here’s a quick walk-through of what to expect when knitting this project.

Two-at-a-Time Mittens – Project Overview
Cast On For Two-at-a-Time
Please remember to cast on loosely. The cuffs of these mittens are snug as it is – you want to be able to get them on your hands.
Two-at-a-Time Mittens – Cast On
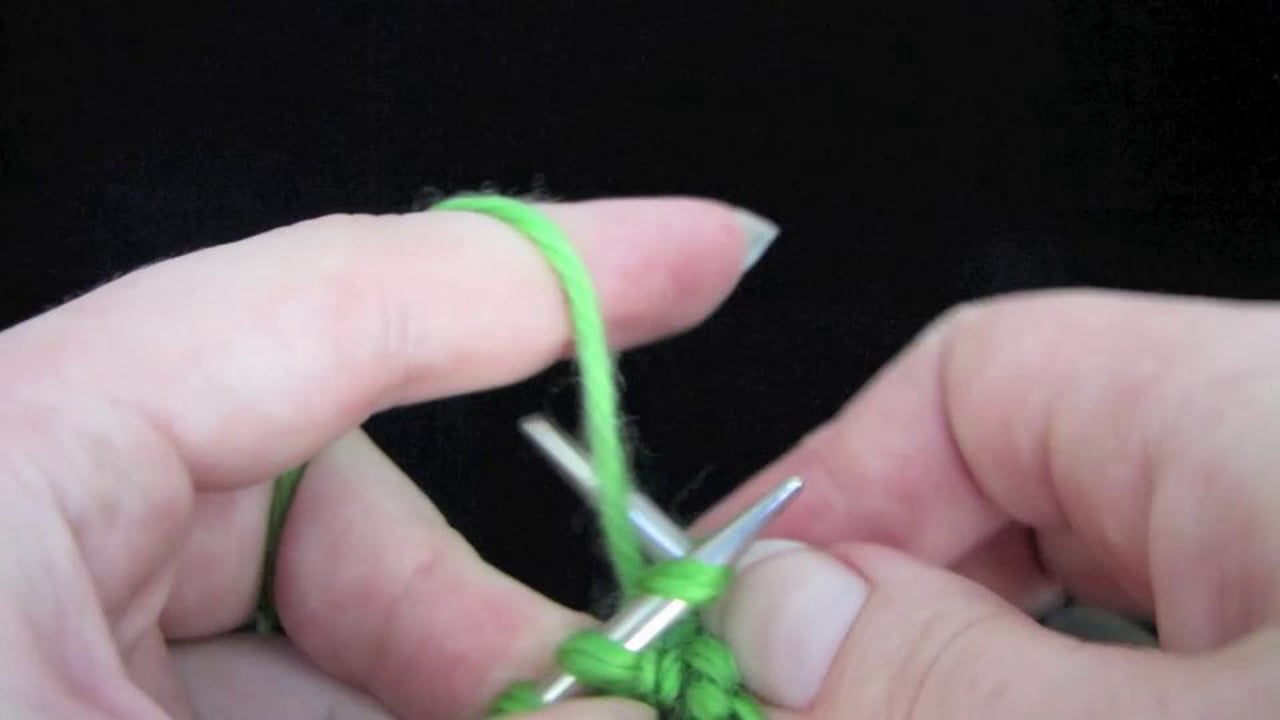
Work In The Round In 1X1 Twisted Rib

Two-at-a-Time Mittens – Ribbing
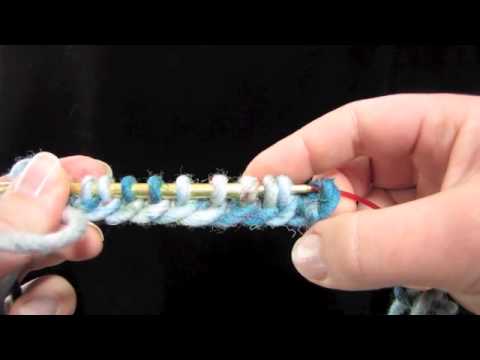
Work In 1X1 Twisted Rib For 8(8,10) Rounds
Here’s what it looks like to work in twisted rib. You’ll know when you’ve done one whole round, because your cast-on tail serves as a marker for the beginning of the round.
Two at a Time Mittens – Ribbing Round 2
How To Count Your Rounds Easily

Two at a Time Mittens – How to Count Rounds
Make sure to stop and check after a few rounds that you can get your hand though the cuff opening.
How to Keep Your Yarn From Tangling

Two at a Time Mittens – Keeping Yarn From Tangling
Work One Round Even
Just knit every stitch.

Two-at-a-Time Mittens – Plain Round After Ribbing
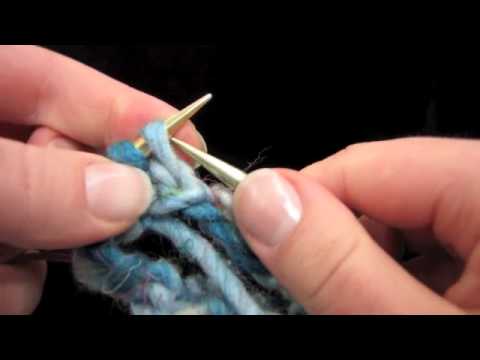
Increase For the Hand
Space 4 M1s around the base of each hand as follows:

Two-at-a-Time Mittens – 1st Increases
Increase For the Thumb
We begin increasing for the thumb, and we’ll keep track of where we are by placing markers on the needles. For some reason I skipped recording the first thumb, so here is the second – don’t worry. They’re both the same.

Two-at-a-Time Mittens – Increase For Thumb
Slip Markers As You Increase For the Thumb

Two-at-a-Time Mittens – Slipping Markers
Continue Increasing For the Thumb

Two-at-a-Time Mittens – Increases for rest of thumb
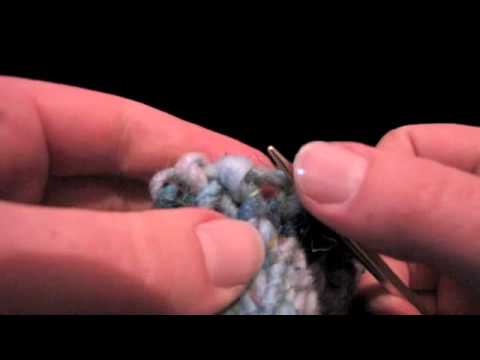
Easily Tell If It’s Time For an Increase Round
You don’t have to count or write anything down. Here’s how to know exactly when it’s time to increase.

Two-at-a-Time Mittens – How to tell if it's time for a M1
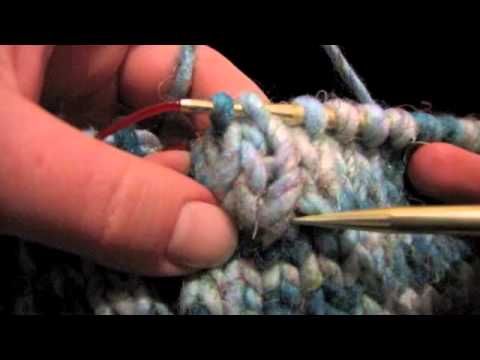
Remove Thumb Stitches
Thread a tapestry needle with scrap yarn and thread 9 thumb stitches onto it for later, removing the markers and knitting one round as you do so.

Two-at-a-Time Mittens – Thumb Stitches
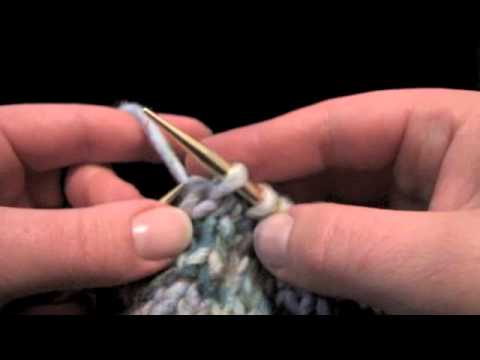
Knit the Hand

Two-at-a-Time Mittens – Start Hand
Count Your Rounds Easily
You can place a marker in the very first knitted round to help you count for later on. Make sure you have the right number of stitches on the needles (21, 23, or 25) before you get too far.

Two-at-a-Time Mittens – Count Rows for Hand
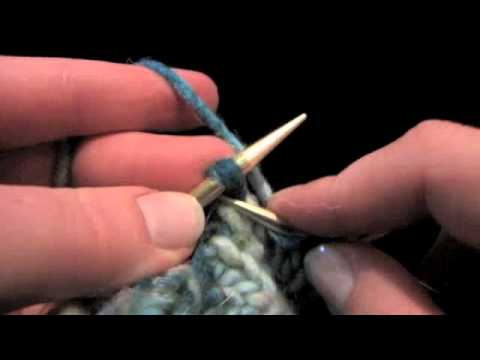
Decrease For The Top Of The Hand
Decreasing for the hand uses the decreasing techniques of SSK, k2tog, and CDD. I’ll show you how to do each one.
Two-at-a-Time Mittens – Start Hand Decreases
Count Your Rows Easily After The First Decrease Round
Two-at-a-Time Mittens – How to count rows after a decrease
Finish the Hand Decreases
Make sure that you know the numbers for your size.

Two-at-a-Time Mittens – Decreasing for top of hand
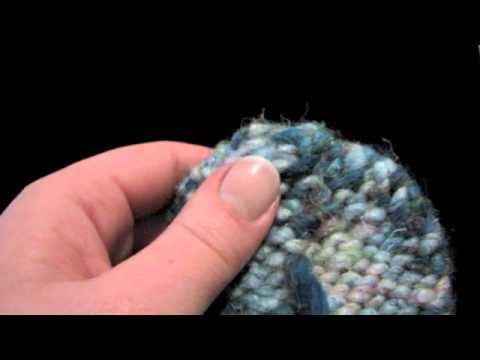
Finish the Top Of the Hand
Break your yarn, leaving a 15-inch tail, and thread it twice through the remaining stitches, and pull tight.

Two-at-a-Time Mittens – Finish Top of Hand
Learn All About the Ultimate Mitten Thumb (Extra Credit)
This thumb technique, introduced to me by Brittany Simmonds, makes the world’s most comfortable mitten thumb. Although I go over it in the videos that follow, I made this extra video specifically to teach about what makes this thumb special.
How To Create The Perfect Mitten Thumb
Place Thumb Stitches on Needle
We’ll just do the thumbs one at a time. Place the thumb stitches onto your needle, and divide them as specified in the pattern.
We’ll be picking up and knitting a few stitches along the thumb gap, as well as joining a new piece of yarn to begin.
Two-at-a-Time Mittens – Starting Thumb
Knit Thumb
This won’t take long.
Two-at-a-Time Mittens – Pick up sts and join yarn for thumb
Finish Thumb
On the last round, we decrease by a few stitches, and then finish off the thumb.

Two-at-a-Time Mittens – Finish Thumb
Weave in Ends
It’s a dirty job but someone’s got to do it. Don’t worry, it won’t take long.
Two-at-a-Time Mittens – Weaving in Ends
That’s it. Wear and be fabulous!