Knitting in the Round on Magic Loop


Table of Contents
Project: Basic Slouchy Hat for Magic Loop
Learning to Knit in the Round on Magic Loop
Tips for Success with Magic Loop
- Keeping Both Loop of Cable the Right Size
- Don’t Pull the First Stitch Too Tight
- Preventing Accidental Yarnovers
- How to Purl Correctly on Magic Loop
Fixing Mistakes on Magic Loop
- How to Undo Knitting Stitch-by-Stitch on Magic Loop
- If Your Knitting Gets Turned Inside Out
- When You See Purl Bumps on the Outside of Your Work
- Prevent Crazy Loops of Cable From Bothering You
Advanced Magic Loop
- When You Don’t Have Enough Stitches on One Side (How to Redistribute Stitches)
- When You Just Have Enough Cable for One Loop: The Traveling Loop Method
Magic Loop Extras
- Recommended Needles for Magic Loop
- Illustration: How to Knit in the Round on Magic Loop
- Tips for How to Adapt Any In-the-Round Pattern to Magic Loop
Knitting in the Round on Magic Loop
It’s time for you to start knitting in the round.
Since you’re an intermediate knitter, I’m going to assume that you have made a scarf, or a dishcloth, or something flat, with two needles.
Intermediate knitters have a wide range of experience – you may have made a hat, or a mitten, or you have even made socks already, using double-pointed needles, two circular needles, or the Magic Loop.
Wherever you are in your knitting journey, I’m here to catch everybody up to speed, and mastering knitting in the round, after learning how to read a pattern, is the second step to becoming a Knitting Superstar.
What is knitting in the round? Knitting in the round simply means knitting a tube instead of a flat piece of fabric. The stitches go around and around in a spiral and there are no “edges.”
You can also make a tube by knitting a flat piece of fabric and then sewing it up, but knitting in the round (also called “round knitting”) is the easiest and fastest way to make a seamless tube.
What Is Magic Loop Used For?
People use round knitting to make sweaters, socks, gloves, hats, mittens, arm warmers, iPod cozies, coffee-cup sleeves, finger puppets… the list goes on. Basically anything that can be made up of tubes.
Unfortunately, people don’t knit in the round nearly as often as they should. This is because some patterns don’t call for it, or they shy away from patterns that do call for it because they don’t know how or don’t feel comfortable doing it.
I am going to solve both problems for you. First, I’ll teach you the easiest and fastest way to knit in the round, and then I’ll show you how to knit any pattern that you want in the round. It’s easier than you think.
What Are The Ways People Do It?
For years and years, people have been knitting small things like socks in the round on double- pointed needles (called DPNs), and big things like sweaters and hats on circular needles.
Double-pointed needles divide the stitches over 3 or 4 straight needles.
Knitting on DPNs
People divide their stitches over three or four double-pointed needles, and use a fourth or fifth needle to knit with.
 This complicated-looking method results is what is fondly known as the “ninja star of death” when attempting to try on something you’ve made using DPNs.
Sometimes it’s uncomfortable or unwieldy to try on your knitting; sometimes it’s just impossible. In addition, the place where the DPNs meet often creates a column of stretched-out stitches, called a ladder (the phenomenon is called laddering).
Also, the dang needles can sometimes fall out of your knitting (since there is no cap on the end of the needle) and get lost between the seat and the car door, never to be found again (the er… passenger car door, that is).

So let’s not go there.
Knitting with circular needles
Circular needles look like two double-pointed needles connected with a cable. Don’t call them cable needles, though – that’s something else.
Circular needles come in all different lengths, to accommodate the circumference of the project that you are knitting. Unfortunately, this results in you having to buy circular needles in all different lengths: 24 inches for a sweater, 47 inches for ablanket, 16 inches for a hat…
This can get very expensive, not to mention cumbersome to organize and/or travel with. Fortunately, there’s a better way.
The Round-Knitting Revolution
Recently, ingenious knitters around the world have seized on the ability of circular needles to be used like DPNs. Meaning that the stitches are divided into sections, each on its own circular needle.
Because the cables are flexible, only two sections are needed, and the needles can accommodate any number of stitches. The added length of the needle also makes it possible to knit more than one tube at a time, if you divide your stitches up properly and cleverly.
Knitting with two circular needles
But still, this is not as simple as it could be. Proponents of knitting with two circular needles (“two circs,” as it’s called) advise that you buy two needles of different lengths, so you can tell them apart (although I don’t know why you need to – you can’t tell your DPNs apart… but I digress).
The metal needle-ends hang down when not in use, clanking and banging on each other. And you are still buying more needles than you need. Which brings me to the most elegant, simple, and cost-effective solution of all… the Magic Loop.
Introduction to Magic Loop
What is Magic Loop?
Magic Loop, invented and first published by Beverly Galeskas, is the amazing technique of using one very long circular needle to knit anything you want, of any size, in the round.
Instead of using a circular needle that is just the exact circumference of your knitted project, you use one that is very long, letting a loop of cable come out between the stitches.
Why Magic Loop?
Magic Loop solves all the problems inherent in other forms of round knitting, plus, it’s easier, faster, and more fun. In all my experience knitting and teaching, Magic Loop is the best and easiest way to learn to knit in the round.
Try On As You Go
With Magic Loop, you can try on anything you knit as you go, whether it be socks or gloves, and never worry about losing stitches off the ends of your DPNs, or being stabbed by the ninja star of death.
Being able to try on your knitting as you go is a big time-saver: discovering that what you are making is too small or too big before you are done is one easy way to save yourself hours and hours of re-knitting.
No Laddering
With Magic Loop, the frustrating problem of laddering disappears.
Even beginners just trying the method notice after their first few rounds that their tube is seamless and even, all the way around. Hooray! As my student Dianne says…
“The Magic Loop! No more ladders in my socks, yay. It’s definitely the most useful technique I’ve learned and I use it all the time. Thanks Liat :)” -Dianne D.
Cost-Effective
This is a boring but succinct way to say you don’t have to spend so much money on needles.
You just have to buy one length of needle, in whatever size your project (or gauge swatch) calls for, and that’s it. Knit the biggest sweater to the tiniest novelty toy on one length of needle.
You also won’t have to carry so many different needles with you when you travel.
Never Use Dpns Again
I almost forgot this one. This is a main selling point of Magic Loop to some of my students, who have become so frustrated with using DPNs that they give up knitting in the round until they discover the joy of Magic Loop.
But you don’t have to hate DPNs, or give them up, to appreciate what Magic Loop can do in your life. Just think, you’ll never have to stop at a knit shop when traveling to buy a set of DPNs that you already have at home, just because you got to the top of your hat faster than you thought you would.
With Magic Loop, you’ve already got all the needles you’ll ever need. Now you can stop at that knit shop just because you feel like it.
Never Lose The Other Needle
No more losing needles in car doors, down the aisle of an airplane, or just in the cavernous depths of your knitting bag. You simply can’t – they’re attached to each other.
Make Two-At-A-Time
One huge advantage to using Magic Loop is that is opens the door to knitting things two-at-a-time.
We’ll explore the wonders of knitting two-at-a-time in the Toe-Up, Two-at-a-Time Socks course, in which I trick you into learning the two-at-a-time method without even trying. But for now, let me just say the words, “No more Second Sock Syndrome.”
Beginning Magic Loop
In this and the following chapter, I’ll teach you the art of knitting in the round on Magic Loop.
I’ll explain the supplies you’ll need, get you started with an introductory demo, and then cover the intermediate and advanced tips you need to know to become a Magic Loop Superstar.
It will then be time to practice this technique before we move on. You can practice on whatever round- knitting project strikes your fancy (I’ll show you how). So let’s get started.
Supplies You’ll Need For Magic Loop
All you need to begin learning Magic Loop is a 40- to 47-inch-long circular needle in a medium size, say, US size 7 or 8, and about 50 yards of worsted-weight yarn (for help with buying yarn and distinguishing yarn weights, see Chapter 14: Choosing the right yarn for your project).
If you don’t already own a circular needle and you need to buy one, purchase a 47-inch-long needle, as you will be able to use this length for any project, including two-at-a-time.
36 inches is the shortest length of needle that can be used for Magic Loop, so if you already have this length at home, that’s fine, but if you are buying new needles, the longer, the better (up to 47 inches).
What Brand Of Needles?
Local Shopping
You have a few choices when shopping for needles.
Common brands you will find at your LYS will be Clover bamboo circular needles, as well as Addi Turbo and Lace needles. You can also find Clover circulars at Michael’s and JoAnn Fabrics, but I don’t recommend them.
You may be used to knitting on bamboo needles, but bamboo circulars can have an inflexible cable and can have a rough join (the place where the cable is connected to the needle tips), causing snags and frustration as you try to move your knitting along. I don’t recommend them.
If you like the security of a bamboo needle, I recommend you try a pair of Addi Lace needles.
Addi Lace needles have a slightly rougher surface than the super-slick Addi Turbos, and they also have a pointier tip. This translates into more dexterity while you are knitting, and the ability to knit complicated stitches with ease.
Ask any LYS employee and they will rave about Addi Lace. Once you’ve gotten the hang of the techniques, Addi Turbos are a great choice for making quick progress on your projects. They have a blunt tip and a smooth finish, helping you speed along like a Knitting Superstar.
Addi also has a fun option, called Addi Click, a set of interchangeable needles and cables. With one purchase, you’ll have most of the needles you’ll ever need. You can buy other cables and needle-tips separately. As of this writing, the Clicks are only available in the Turbo style, but they are working hard on a Lace version.
The set of Addi Clicks is pricey, but compared to buying each Addi needle individually, it’s a steal.
Online Shopping
KnitPicks, an online knit shop, has a popular and inexpensive set of interchangeable circular needles as well. They come in wood and metal, and the gorgeous multicolored wooden ones have a nice sharp point similar to the Addi Lace.
The cables are very flexible (and purple!), and the price is the lowest available for this type of product. A set of these makes a great gift for any knitter. HiyaHiya interchangeable needles have also been coming on to the scene recently, and are worth a look.
This list wouldn’t be complete without the cream of the crop, Signature NeedleArts, the finest knitting tools money can buy. Made in a factory that machines airline parts, these precision aluminum needles now come in circulars as well. At $40 per pair of needles, these are a real treat for any Magic Looper in your life. Good thing they have a wish list on their site.
My opinion If you want me to pick for you, support your LYS and buy a pair of 47″ Addi Lace in size 7. I know you’ll be very pleased.
You’re ready. Grab your 47-inch, circular needle, a scrap of worsted-weight yarn, and follow along with the next video.
Learn Magic Loop
Materials
- Needles: 40-47-inch circular needle, US size 7 or 8
- Yarn: 50 yds worsted-weight scrap yarn (preferably a light color, so you can see what you are doing).
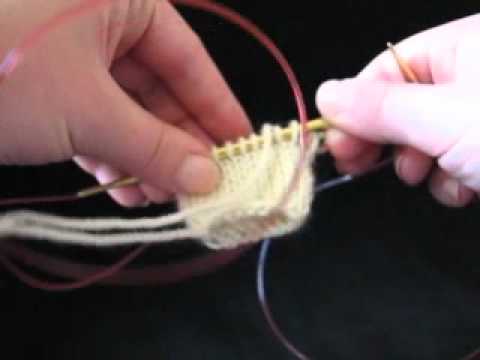
In this video, we’ll make a sample tube just to get the hang of Magic Loop. If you’d like to follow along with illustrations or take notes, download and print out the following illustration: Magic Loop Illustration
![[KnitFreedom] Knitting in the Round on Magic Loop - Basic](https://i.ytimg.com/vi/6KccLlkTKzE/hqdefault.jpg)
[KnitFreedom] Knitting in the Round on Magic Loop – Basic
In order to help you practice reading a pattern, here is what we are doing in the video, but written in pattern-speak:
Basic Magic Loop Swatch – Pattern Instructions
CO 20 sts. Join in the round using Magic Loop.
Rnds 1-10: K.
Going Faster
Magic Loop is supposed to be fast and easy, right? Here’s a video showing you how to use Magic Loop with the least amount of extra fiddling or movements, so that it gs really fast.

Magic Loop – Go Faster!
You’re doing great. Don’t bind off – continue to practice making your sample tube as you work through the next section, Mastering Magic Loop.
Mastering Magic Loop
You can now use Magic Loop to knit anything you want in the round. But you’ll need to practice before you move on. I want to make sure you feel really comfortable using Magic Loop, and so I’ve designed this section to cover any hiccups you might run into, as well as to challenge you a little bit.
Work out the kinks on your sample tube using the videos that follow, and then you can put your new skills to the test on any simple round project you want – I’ll give you a basic hat pattern at the end of this course.
Adapting Any Round Pattern To Magic Loop
Many students ask me how to start using Magic Loop on patterns that don’t specifically call for it. This is a good question, because hardly any patterns specifically call for Magic Loop. Just like using a stand mixer is easier than mixing cookie dough with a spoon, but it’s your choice which one you use.
Magic Loop is just a technique – and a technique that most knitting designers don’t expect you to know. They’ll just tell you to mix the cookie dough with a spoon and be done with it.
When you see a pattern call for a set of DPNs or a certain length of circular needle, you’ll know that the project is knitted in the round and that you can use your 47-inch needle and Magic Loop.
When the pattern says, “CO 40 sts and divide evenly on DPNs for working in the round,” you just follow the technique we learned: CO 40 stitches onto your needle, slide them to the middle, divide the stitches in half, and proceed as in the pattern.
The only time that converting a pattern from DPNs to Magic Loop may present any kind of problem is when the designer instructs you to do things in relation to a certain needle.
This is common on small projects like socks and baby booties, e.g., “K to end of 2nd needle, turn.” In this case, you’ll just have to look at how many stitches they told you to put on each needle in the first place (let’s say it was 8), and do the math yourself: knit 16 and then turn. I doubt you’ll run into this problem anytime soon, but if you do, you’ll know what to do.
Practice Increasing And Decreasing
Here’s an exercise to help you get comfortable with Magic Loop: practice increasing and decreasing. This exercise will demonstrate one of the wonderful things about Magic Loop: that it dsn’t matter how many or how few stitches you have – you can do Magic Loop with 2-4 stitches.
Try doing that on DPNs without pulling your hair out. This is also a good opportunity to practice some intermediate knitting techniques, with which you will want to be familiar when we move on to more challenging projects.
To continue practicing reading a pattern, follow the steps below to experiment with increasing and decreasing using Magic Loop.
Increasing and Decreasing Swatch – Pattern Instructions
Rnd 1: *(K1, KFB), rep from * to end (30 sts).
Rnd 2 and all even rnds: Work even
Rnd 3: *(K2, KFB), rep from * to end (40 sts).
Rnd 5: *(K2, K2tog), rep from * to end (30 sts).
Rnd 7: *(K1, K2tog), rep from * to end (20 sts).
Rnd 9: K2tog around (10 sts).
BO all sts, break yarn. That is one ugly sample (if you did it right). Nice work.
Troubleshooting Magic Loop
Here are demonstrations of some common mistakes people make when learning Magic Loop.
I encourage you to start your sample tube again, in order to practice beginning, and then you’ll be able to work along with me on the videos.
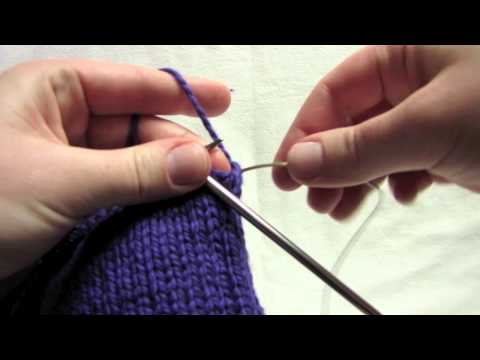
Keeping Your Loops The Right Size
Try to keep both loops of cable the same size. Having one too big and one too small can stretch out your knitting, and it also leaves you vulnerable to “losing” your loop. It’s okay – if that happens, this video shows you what to do.

Loops of Magic Loop
Pulling The First Stitch Too Tight
This is the most common mistake among Magic Loop knitters who have switched from using DPNs. Seasoned DPNers pull their first stitch tight in order to prevent a gap from appearing between the needles.
This is actually bad news for Magic Loop. Here’s how to prevent a gap and also prevent your stitches from being too tight.

Pulling 1st Stitch Too Tight on Magic Loop
Turning Your Knitting Inside-Out
Seeing the wrong side of their knitting come out the tops of the needles can really confuse a lot of knitters who don’t have a lot of experience knitting in the round. Don’t worry, you didn’t do anything wrong.
Just watch the video to see if you accidentally turned your knitting inside-out.

Turned Inside Out, Magic Loop
Accidental Round-End Yarn-Overs
An easy fix but a frustrating problem if you don’t know what is going on.

Accidental Round-End YO, Magic Loop
Getting Purl Bumps Where You Should Be Seeing Stockinette Stitch
Purl bumps, or Reverse Stockinette stitch, are what show when the inside of your work is suddenly facing out. This can result from not getting all the way back to ready position, or stopping in the middle and going back the wrong way.

Going Back Around the Wrong Way on Magic Loop
Managing Loops Of Cable
Sometimes, especially with new needles, the cables can get crazy loopy and all in your way. Here’s how to prevent that.
Twisting Loops of Cable on Magic Loop
One Stitch Left
Here is one last challenge for you. I want you to be incredibly comfortable with moving stitches around on Magic Loop, and using the technique so that it works for you in any situation.
What do you do when the stitches aren’t divided on your needle the way you need them to be? Move them. Here’s how. And to help you follow along, below the video is the challenge written in pattern-speak.

One Stitch Left – a Magic Loop Mastery Challenge
“One-Stitch Left” Swatch – Pattern Instructions
CO 20 sts. Divide in half and join in the round using Magic Loop.
Rnds 1-2: K.
Rnd 3: K9, K2tog, K8, K2tog (18 sts).
Rnd 4: work even.
Rnd 5: K8, K2tog, K7, K2tog (16 sts).
Well done! Now it’s time to practice. The following basic hat pattern will get you very comfortable, and you’ll also learn a bonus technique called the “Traveling Loop” method.
Traveling Loop
The Traveling Loop method is a cool way of using one loop of cable when knitting a large-ish diameter project, like a hat or small sweater.
Traveling Loop Method For Magic Loop: One Loop Only
I usually start out using normal Magic Loop, then switch to using one loop after I increase to the widest diameter of the hat (here, 100 stitches), and then switch back to using two loops when I start to decrease.
Basic Magic Loop Hat Pattern


Download the Basic Slouchy Hat for Magic Loop pattern here.
Time to practice your skills! Knit this basic Magic Loop hat in any fun, soft yarn you can find. Go wild with colors!
This hat can be made more fitted or more slouchy, depending on how long you knit after the cast-on. It’s up to you.
The pattern calls for worsted-weight yarn and size 7 circular needles at least 40 inches long – be sure to check your gauge (in the round, of course) before you start.
Magic Loop Illustration

