
It’s not as hard as it sounds.
What if the trick you used to do so were so rare that none of your friends had even heard of it?
Undoubtedly that would be even cooler.
On my last short-row project, I discovered a new way to pick up and hide purl-side wraps that makes each wrap completely invisible – a heretofore very elusive skill!
This is the very trick you need in order to pick up wraps on the purl side of your short rows.
The Problem: Short-Row Patterns Create Wraps That Must Be Disguised
A short-row pattern, by its definition, requires you to knit or purl almost all the way across a row, and then turn around.
That’s why its rows are called “short” – you stop short of the end.
Each time you get to the end of the row, the pattern will tell you to wrap the working yarn around the next stitch and then turn and go back the way you came.
If you keep doing this on each row, you’ll get a shaped piece of knitting which is taller in the middle than it is on the ends, like this:

You can see here that every other stitch has a “wrap” pulling it close to the stitch next to it.
When you’re done with the short rows, it’s time to hide the wraps and keep knitting.
But Regular Instructions for Hiding Wraps Look Awful on the Purl Side
To pick up wraps on the knit side, you bring the wrap up and over the wrapped stitch, and then knit both stitches together.
Extrapolating logically, to hide a wrap on the purl side you would lift it onto the needle next to its wrapped stitch and then do a purl 2 together.
The problem is, that looks awful, as you can see by looking at the pink-tinted loops in the photo below.

The problem with the “intuitive” way of picking up purl wraps is that it places the wrap in front of the stitch.
The challenge is to find an easy way to get that wrap in the back, which is exactly what our trick does.
Ready To Learn How To Pick Up Short-Row Purl Wraps The Invisible Way?
Before we start- if you need to brush up, please review Short Rows: Learn To Wrap-and-Turn. It will refresh your ability to follow the pattern below.
Make a swatch and follow along:
CO 20 sts.
Row 1: K 18, W&T (wrap and turn).
Row 2: P 16, W&T.
Row 3: K to 2 sts before next wrapped st, W&T.
Row 4: P to 2 sts before next wrapped st, W&T.
Repeat rows 3 and 4 until you have 4 wrapped stitches along each needle. K2, W&T.
Here is the part of the pattern that comes next, where you will use our new trick:
Next row: P across, pick up and purl wraps as you come to them.
Now, join me for the elegant way to make this happen.
By the way, this technique comes from the pattern instructions of the Cedar-Leaf Shawlette (who knew? It’s actually a good idea to read pattern instructions).
Video: How to Invisibly Pick Up Wraps on the Purl Side
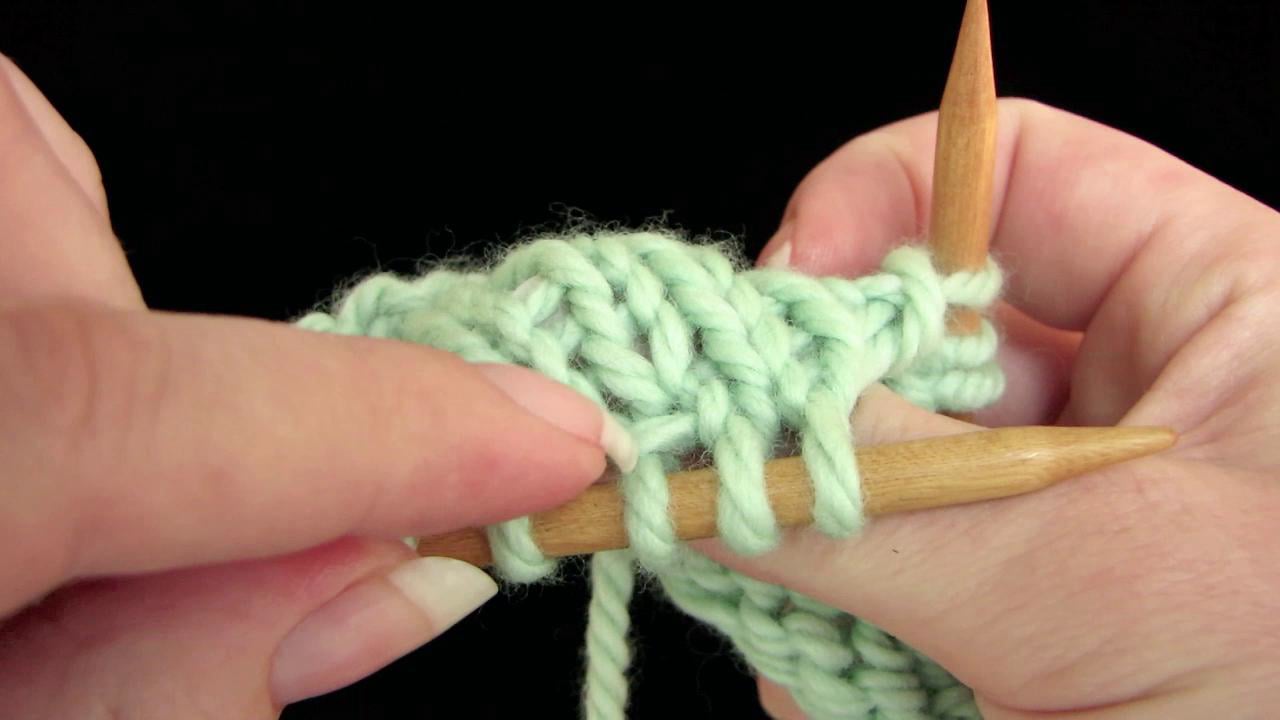
Short Rows: How To Pick Up And Knit Wraps On The Purl Side
To sum up:
- Knit to the wrapped purl stitch.
- Using the right-hand needle, pick up the wrap from the right side of the work.
- Place the wrap on the left-hand needle over and behind the stitch it was wrapping.
- Purl those two stitches together.
You can use this technique on any pattern that calls for short rows.
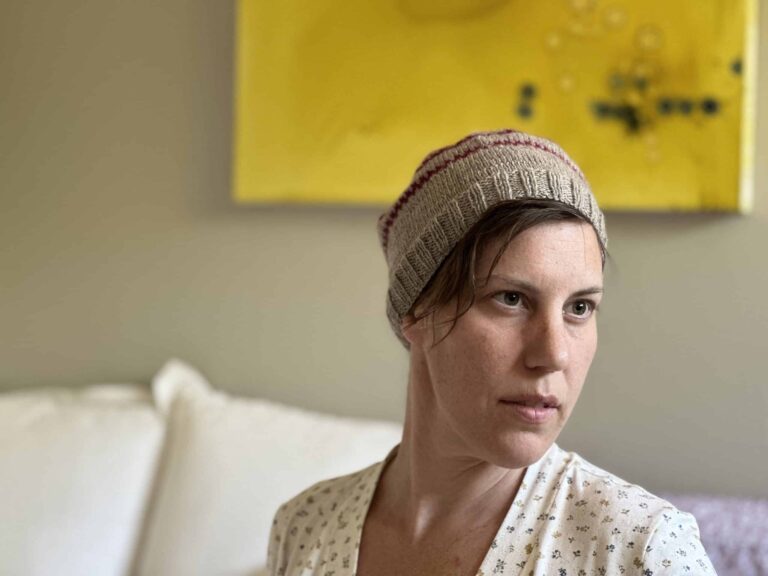
See What It Looks Like On A Real Project
Below are the short rows on my own Cedar Leaf Shawlette – after the purl wraps have been picked up and knitted.
I’ve put arrows pointing to the stitches that were wrapped, because without them it’s hard to tell!

So that’s it! Thanks to Never Not Knitting for sharing this great trick. Be sure to show the knitters in your group how to do it – I think they will be amazed.

So, Liat… What Were You Doing In Israel?
Glad you asked! I love sharing my summer adventures with you.
I went to Tel Aviv, Israel, for the last three weeks in March (the perfect time of year to visit).
My grandma, dad, aunts and uncles, cousins, and childhood friends all live there, and I managed to visit almost all of them!
I stayed with my grandma, and she was overjoyed.
Like a good Jewish grandma, she expressed her joy by filling the house with cookies and baking almost continuously.

Good thing for me, there was…

…every day. If anything, it kept me out of the house for two hours a day – two hours during which I could not eat cookies!
Now, my grandma may look all sweet and innocent, as if she just wants to feed me meatballs all day long…

…but she’s got a secret. She’s a ninja with a ping-pong racket! We got the whole family playing the night they came over to celebrate Shavuot.

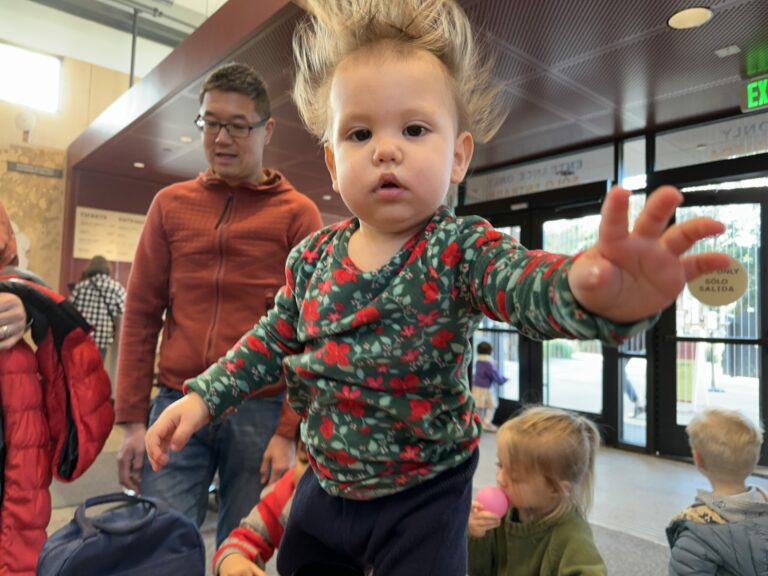
Switching themes, here’s a gratuitous photo that just serves to propagate a stereotype that all Israelis are young and buff, and that they sell electronics and have an affinity for gym bags.

It just might be true!
And, lastly, I made sure my grandma was fully stocked with yarn for many months to come.
By the way, she saw mine and now she’s knitting her own Cedar Leaf Shawlette! She’s adding a crochet scalloped edge and skipping the more difficult lace bit.

Love you, Safta. See you next year!

In KnitFreedom news, the whole month of June I’ve been in California with my mom, working hard on a complete website re-do and a real book contract (yes you read that right). Exciting!
And, coming next week: free mitten patterns for Magic Loop!
More Resources
- Short Row Tutorial: How To Wrap and Turn
- Advanced Technique: How to Pick Up and Knit Stitches 2 Ways
If you liked this tutorial on picking up wrapped stitches on the purl side, please add a link to this post on your blog, tell people about it on your favorite knitting forum, leave me a comment.


40 thoughts on “How To Pick Up Wraps On The Purl Side: Wrap and Turn”
Great tutorial but just one thing, please update your photo at the beginning to give credit to Alana Dakos of Never Not Knitting…. that’s her photo and credit needs to be given.
https://www.ravelry.com/patterns/library/cedar-leaf-shawlette
Done! Thanks for the reminder. I wrote this post a long time ago when I wasn’t as aware of stuff like this. I appreciate you helping me give credit where credit is due (i.e. the entire post is thanks to her!).
Really excellent tutorial, it helped so much!
Awesome video my purl side always looked sloppy before. Would you work double wrapped stitches in the same manner?
I would like to be involved in your knitfreedom forum as I would love to know how to do short rows, magic loops etc. Pat
Thank you for the video on how to hide the wraps on the purl side. Am I correct that if I’m doing a 1×1 ribbed shawl collar, that I use your technique on the purl stiches and the other one for the knit stitches? I have ripped back this collar four times because when it is all finished and I do the row where I pick up the wraps – it looks terrible! I’m hoping your technique will solve my problem.
Hey Kas, I’m sorry you’ve had to rip out your knitting :(
I’m not sure where your wraps are but I would try that – use the purl technique for the purl stitches and the regular technique for the knit stitches and see how that looks. And if you are still stuck, please feel free to post in the KnitFreedom Forum so we can help you there. :)
How do you do the Gussets on a Toe Up baby sock. Thank you Kate Fay
Hi Kate,
I have a toe-up baby sock pattern that describes exactly how to do the gussets. You can find the pattern here: Toe-Up Baby Sock Pattern.
I hope this helps!
I have referred to this video and tried your hints. My confusion is about the double wrapped stitches. They look funny on the knit side. Why does your demo stop short, as if there are no directions to wrap the next stitch and turn, so that all future rows end with a double wrapped stitch. If the technique is the same, I wish it was shown. I must be missing something, because your videos are so thorough on everything else. Thanks for all your work.
Hi there,
Thanks for your comment! Here is a much more thorough video on short rows. I hope this helps!
Thanks so much for the tip on picking up purl side wraps and for sharing your trip to Israel w/us. The picture of you & your Grandma at the yarn store is Priceless* Good Luck to you on all of your endeavors.
I love the new tech I am into knitting socks and with the short rows I didn’t like how the purl wrap was looking I can’t wait to try your tip on my next pair of shoes. thank you for sharing your talent with us.
Lena, you’re so welcome! I think you’ll LIKE doing short-rows now!
I’m pretty sure this is a Cat Bordhi discovery and it has traveled fast thanks to the internet and U tube. Its her Sweet Tomato heel. It’s fun to watch her video and hear her sharing this discovery.
No maybe not the Sweet Tomato heel. It’s the video that called something like La Link and La Rink. I get so confused because there are so many wonderful videos out there.
Excellent video on knitting the short row wraps on the purl side. Very clear and helpful!
Enjoyed the pictures of your grandmother, too! What a treasure!
It makes me happy that you liked the photos of me and my grandma. Putting them up made me remember my trip all over again!
It made my heart fill for you with your grandma! She’s a cutie-pa-tootie! Enjoy her while you can. She’s a treasure of life and you are so blessed to have her still so full of life.
Also loved your update video for the wraps. Congrats on your book deal, too! Way to go! All your hard work is paying off.
Thank you dear! I really am lucky to have such a wonderful grandma. I can’t wait to tell her about all the wonderful comments her pictures got!
Hi Liat
I just learnt that trick not long ago myself, and was thrilled to see you do a video presentation of it so I can direct all my friends to it.
Would you consider doing a video lesson on Cat Bordhi’s moebius technique? Over the years I have discovered that different people learn by different means, what seems so obvious to some people is as clear as mud to others. I found Cat’s presentation perfect for learning the moebius, but I have spoken to others who just couldn’t get the hang of it no matter how many times they watched it. Maybe your way of presenting this technique will fill that gap?
Keep doing what you are doing, you are a treasure to the knitting world.
Joyce :)
I actually do have Moebius knitting on my list of e-books to do. I learned how to do a moebius a few years ago from Cat’s video, and I agree – it’s a technique that can be confusing, especially if you are new to knitting in general.
There are also a lot of pitfalls when making moebius projects, and my favorite thing about doing an entire video course on a subject instead of just one how-to video is that I get to adress the problems that may come up. I’m looking forward to making the moebius ebook, and when I do, I hope you’l tell your friends about it!
Thank you for all the wonderful information. Easy to follow, and your voice is so soothing.
I am your moms age! I have been knitting a long time, but happy to learn new things.
Your grandma looks so happy. It is nice to be able to share the love of knitting with her. Thank You Judy
I often wish my mom were a knitter. I taught her once, but she prefers reading books. Do you have other people in your family that knit?
I just passed a pattern up because of the wrap and turn part. Why I didnt just run to you is beyond me. Thank you for always making what seems impossible, possible! You Rock!
Nooooo! Well, sometimes something seems so impossible that one doesn’t even think of looking up how to do it. I’m so glad you clicked on my email and learned the trick today!
Liat you are a GENIUS! So many times you have helped me with a technique and made me a better knitter! I have avoided sock patterns with short row heels because they never look good. Either I wrap too tight or too loose or something! Your video makes it look so much easier, I just might be able to do it now. Thank you for sharing your knowledge with all of us. You are a blessing.
Haha thank you Debbie! It is my whole purpose to make you a better knitter, and when I succeed I am so happy. I have a secret for you – I have a great free toe-up sock pattern with a short-row heel that doesn’t have any wraps at all! Also, I have a video that is all about wrap-and-turns exclusively: you can find it here: https://www.knitfreedom.com//short-rows. I hope this helps encourage you to try some socks with short-row heels! I know you can do it. :)
Thanks for the great tips and videos. They have really helped me learn more that I thought I could. They are clear, precise, and easy to follow. Thanks again
I’m so glad! Thanks for watching. :)
Videos are so helpful when you are learning a new technique or when you have forgotten something.
Thank you for the great website….you are part of the equation that has made
me a better knitter!
Teri, I’m glad you are a part of this site! If there is ever a technique you need a refresher on or want to see a video for that I don’t have up here, you can always comment and let me know!
Thank you Liat for this excellent video – as always, I learn so much from you, plus love the tone of your voice – very soothing and helpful. As a Grandmother, I can’t tell you how cool it was to see the tear-inducing pictures of you and your Grandmother. I know she knows Grandchildren ARE special!!!!
Cheryl, I’m happy you liked the video! Taking the time to watch it now means next time you do a short-row project, you’ll have this trick in your toolbox!
It was so wonderful to spend three weeks living with my grandmother – something I haven’t done since I was 11. We really cherished every day.
Thank you for the video of how to hide the wraps. I love the pictures of your grandmother. I am at the age where I have lost both my mother and grandmother. My grandmother outlived her daughters by 4 years . My mother was the last daughter to pass away. The first daughter passed away when I was 12. The 2nd daughter passed away in 2000 when my first grandson was born. My mother was the last daughter to pass but she was the oldest daughter . My grandparents are survived by the 2 remainng sons. My parents are survived by the 5 of us children. Four daughters and one son.
Julia, your comment really reminds me to treasure the fact that I still have my mother and both my grandmothers. My mom is 72, my grandma on my dad’s side is 88, and my grandma on my mom’s side is 99! And she tells us she’s not going anywhere until she hits 100.
Hi Liat.
Thank you for the purl side short row wrap video. I took a short row class at Stitches West, but it’s so much better to watch a video than locate and refer back to written material.
Thank you for sharing your pictures of your visit with your grandmother.
Tamara
How cool that you went to Stitches West! I’m planning on having a booth there next February. I hope I can meet you!
Any chance with Stitches East ??? or for that matter anything in the NYC area. I am so there if you do just keep me posted…
Hey Sari! I might be able to do Stitches East next fall. This fall I don’t think I can swing it, but hopefully next year! I will definitely let everyone know and I hope to meet you there in person!