Just Beyond Beginner – A Primary Course For Knitting Mastery: Part 1
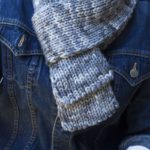
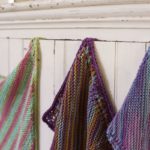


Table of Contents
[column width=”47%” padding=”6%”]
Choosing Yarn and Needles for Beginner Projects
- Choosing Yarn for Beginner Projects
- How To Hand-Wind Yarn From a Skein
- How To Wind Yarn Into a Bobbin
- Choosing Needles for Beginner Projects
- Knitting Needle Size Conversion Chart
- Supplies for Beginners: The Ultimate New-Knitter’s Toolkit
The Long-Tail Cast-On
The Purl Stitch
- Knit Stitch Refresher
- How to Do The Purl Stitch
- Fixing Common Purling Mistakes: When You Forget to Put the Yarn in Front
- Fixing Common Purling Mistakes: Wrapping Yarn Around the Needle the Wrong Way
- Examining Garter Stitch
Ribbing
- Introduction to Ribbing
- Examining 1×1 Rib
- Reading Your Work – 1×1 Rib
- The Fastest Way to Count Stitches in Knitting
- Check Your Tension
- Binding Off In Pattern (Bind Off in 1×1 Rib)
- Weaving In Ends on Ribbing
[/column][column width=”47%” padding=”0%”]
Fixing Mistakes on Ribbing
- Taking Out Stitches
- If You’ve Forgotten to Move the Yarn to the Back or Front
- If You’ve Knitted or Purled in the Wrong Spot
- If You Made a Mistake in a Previous Row
- If You Picked Up Your Knitting the Wrong Way
- Fixing Dropped Stitches
- Fixing a Mistake When It’s Far Down
Stripes
Easy Increases and Decreases
Fixing Mistakes
Stockinette Stitch and Gauge
[/column][end_columns]
Just Beyond Beginner – A Primary Course For Knitting Mastery: Part 1
Intro to Yarn
Before we can start knitting, let’s take a trip to your local yarn store (LYS). Visit Ravelry’s yarn shop search engine or Google yarn stores in your area. If chain craft stores or shopping online are your only options, don’t worry – I’ll also give you links to options that will work great for your projects. Let’s talk about some basics now so that when you go into your yarn store, you’ll know what to look for and what to ask about.
Yarn Fibers
Yarns are made out of different kinds of fibers spun together in different thicknesses.
Natural fibers can come from animal hair: that of sheep (called wool of course), goat (hello, cashmere!), llama, alpaca, and angora rabbit are the most common. They can be plant- or animal-product based: silk (from silkworms), cotton, and even corn, soy, and bamboo.
They can also be synthetic: made from petroleum or man-made substances, giving us acrylic, polyester, and nylon. Just like wine grapes, different fibers have different properties – in the case of yarn, they have different durability, drape, texture, and so on. Blended together, the fibers share properties and result in something that can be greater than the sum of their parts. You’ll find natural fibers in their pure form as well as mixed with other fibers in your LYS.
At large craft chain stores, you’ll find the more inexpensive synthetic blends (acrylic), perhaps mixed with a percentage of wool. The most common fibers you’ll come across are wool and acrylic, and they are pretty much doppelgangers, although sometimes they play nicely together. Wool is natural, supports sheep farmers, bounces, takes dye beautifully, smells good, and feels good to knit. It is also more expensive.
Acrylic is uniform, made in a lab from synthetic materials, is soft yet lacks character, dyes evenly, and is less expensive. Just keep this information in mind – it as well as your own experiences moving forward will help you make better-informed decisions at the yarn store.
Yarn Thicknesses
Yarns come in a wide variety of thicknesses. For the projects in this e-book, we’ll be sticking in the middle range of what’s available – this will mean that your projects won’t take too long, but they will also be subtle and wearable in all weathers, that is, not overly chunky.
Selecting a Yarn For Your First Project
For your first project, we’ll be shopping mainly for a soft wool or wool-blend yarn that is fairly bulky, to make a simple but elegant ribbed scarf.
Your yarn store may be organized by yarn weights, or thicknesses, which will be helpful, but either way, please ask an employee to help you find a soft, bulky- or aran-weight yarn (definitions coming up) with enough yardage to make a scarf.
Soft fibers that you may want to try are alpaca, merino wool, or more economically, a merino-acrylic blend. It’s up to you to decide what you feel comfortable purchasing, but as I give you a few choices let me encourage you to select something you’re really going to enjoy feeling in your fingers as you knit.
[column width=”30%” padding=”5%”]  [/column][column width=”55%” padding=”0%”]Berroco Comfort Chunky is an inexpensive synthetic yarn in the bulky thickness. It has an even color throughout and is quite soft. It runs $6.50 for 150 yards (100 g). Note: The words “bulky” and “chunky” are used interchangeably in knitting terminology.[/column][end_columns]
[column width=”30%” padding=”5%”] [/column][column width=”55%” padding=”0%”]At the other end of the scale, Misti Alpaca Hand Paint Chunky is a 100% alpaca yarn that is hand-dyed, costs a fortune, and feels like it, too. For 108 yards (100 g) it runs $15.20 for the solid colors and $23.00 for the hand-painted colors. This is what I’ll be using for the video demonstrations, so you’ll get to see how it looks in action even if you don’t buy it.[/column][end_columns]
[column width=”30%” padding=”5%”] [/column][column width=”55%” padding=”0%”]In between is a great yarn called Malabrigo Chunky which is a 100% merino wool yarn that is kettle-dyed for subtle color depth. It runs $11.60 for 104 yards (100 g).[/column][end_columns]
If you’re lucky, your local yarn store will have all these choices and everything in between. Just set your budget and ask for enough yarn to make a scarf (usually 3 skeins* or balls).
Your first scarf calls for either bulky OR aran-weight yarn – depending on how bulky you like your scarf (and how fast you want the project to go – the thicker the yarn, the faster it goes).
Aran-weight yarn is just one step thinner than bulky. I give you directions for either thickness of yarn.
*Some Yarn Terminology
Yarn is sold in different forms – it can be wound into a ball (called a skein), or twisted into a pretzel (called a hank).
[column width=”45%” padding=”5%”]  of Yarn")
a skein (ball) of yarn[/column][column width=”50%” padding=”0%”]
a hank of yarn[/column][end_columns]
However, be forewarned – at your yarn store your are more likely to hear balls called balls, and anything else called skeins.
Also, any hank of yarn needs to be wound into a ball before you can use it. Just ask the employees at your yarn store or wind it by hand at home (a slower option).
Yarn Labels
In the US, companies are required to list the fiber content of the yarns by percentage. They also usually categorize the thickness of the yarn with names and numbers.
[column width=”45%” padding=”5%”] For example, bulky or chunky would have a label that looks like this:
 [/column][column width=”50%” padding=”0%”]Whereas an aran-weight yarn would have a label that looks like this:
 [/column][end_columns]
This isn’t a perfect system by any means, and there are other ways to be sure about what thickness of yarn you have, which we’ll go over later in this course.
For now, you can ask your LYS employee to help you with the thicknesses.
My recommendation for our first project would be three skeins of Malabrigo Chunky or Malabrigo Twist (an aran-weight option), but, keep in mind, I have your knitting pleasure and the look of the finished product more in mind than your pocketbook – you’ll have to make the price decision yourself.
Make sure to ask your LYS to wind your hanks into balls for you, if it doesn’t already come that way. If you order online and you don’t have that option, here’s a video on how to wind yarn at home:
How to Hand-Wind Yarn From a Skein

Winding Yarn From A Hank
In case you need it, here’s how to wind any amount of yarn into a center-pull ball or bobbin:

How To Hand-Wind A Center-Pull Ball or Bobbin
A Note About Color
Since we will be mainly working with and learning about texture in this course, you’ll want to chose a yarn in a color that will show off the textures that you are knitting, and also make it easy for you to see what you’re doing.
Just remember that the more color-changes that there are in a yarn, the more difficult it will be to see the texture pattern. Kettle-dyed yarns are great – they have a solid color base, but the lightness and darkness of the color varies throughout the skein.
Solid-color yarns with flecks of color, as well as heathered or tweed yarns, also work nicely for patterned stitches and scarves. Here’s a video I filmed in Santiago, Chile that will help you choose the kind of yarn you want to look for.

Selecting Yarn
Intro to Needles
You’ll also want to pick up a pair of US size 9 (5.25 mm) or 10 ½ (6.5 mm) knitting needles, preferably bamboo or birch wood (as opposed to plastic – your stitches will stay on your needles easier, and it’ll be a more pleasant experience overall).
Buy a pair of 9s if you’re knitting with aran-weight yarn, and 10 ½s if you’re knitting with chunky yarn.
Selecting Needles
Knitting Needle Size Conversion Chart
Refer to the chart below if you need to convert between US and metric needle sizes. The most common sizes are in bold.[column width=”30%” padding=”3%”]
0 – 2.0 mm
1 – 2.25 mm
2 – 2.75 mm
3 – 3.0/3.25mm
4 – 3.5 mm
5 – 3.75 mm
6 – 4.0 mm
[/column][column width=”30%” padding=”3%”]
US #7 – 4.5 mm
US #8 – 5 mm
US #9 – 5.5 mm
US #10 – 6.0 mm
US #10½ – 6.5 mm
[/column][column width=”30%” padding=”3%”]
11 – 8.0mm
13 – 9.0 mm
15 – 10.0 mm
19 – 15.0 mm
35 – 20.0 mm
50 – 50.0 mm
[/column][end_columns]
Other Notions to Buy
While you’re at the yarn store, pick up a gauge checker (or you can use a simple ruler or tape measure) and a pair of small, sharp scissors you can put in your knitting bag.
You may also want to select a good-quality blunt metal tapestry needle (as opposed to the blue plastic ones you may have bought before).
If you’ve purchased yarn that comes in a skein (a ball of yarn that is pre-wound), you’ll want to find the end of the yarn that’s tucked in the middle of the ball, so that you can pull it straight out from the center and prevent a rolling-all-around-the-floor-cat-bait scenario.
If the employees wind your yarn for you at the yarn store, they should hand it to you with the end that comes from the middle sticking out and the outside strand tucked nicely out of the way. Again, just pull from the middle. 
Ultimate New-Knitters Toolkit
 If you’d like to read about all the supplies I think a new knitter would be lucky to have, head to my blog post: The Ultimate New Knitter’s Toolkit – Needles, Yarn, Notions, and Supplies to Buy For Beginning Knitters
As we learn the first skills you’ll need to know to make your ribbed scarf, you can practice on some scrap yarn, or you can use your new ball of yarn – it’s up to you.
Now let’s get started!Break
The Long-Tail Cast-On
I’m going to introduce you to the cast-on that will become your main workhorse for almost all of your projects to come. It’s much sturdier than the beginner cast-on I teach in the Learn-to-Knit course, since it uses two pieces of yarn to create the edge instead of just one.
It’s also nice and stretchy (if you do it properly). It’s called the Long-Tail Cast-On and it uses (you guessed it), a long tail of yarn to create the stitches.
To do it, you’ll have to estimate the amount of tail you’re going to need – there are a few tricks to this that I’ll explain in the video and below. For now, grab your needles and your yarn, and work along with me as I show you the steps for the long-tail cast-on.
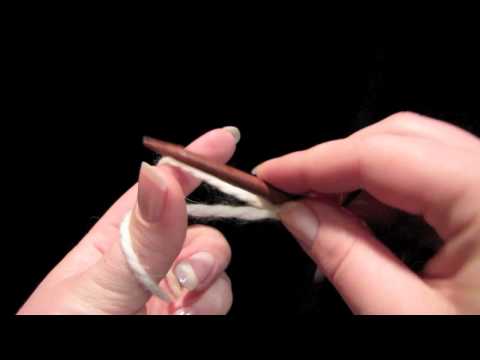
Long-Tail Cast-On
Just so you know – it doesn’t matter if the tail yarn goes over your thumb or over your finger. Either way is fine.
Estimating How Much Tail You’ll Need
Here’s how to estimate how much tail you’ll need, depending on the number of stitches you cast on.
Don’t worry – you’ll start to develop an automatic feel for this as you cast on for more projects. Just keep in mind – it’s better to have too much tail than too little.
In this video I also show you a little trick, based on what you’ve already learned, that you can use in emergencies when you run out of tail (for example on a big project where you wouldn’t necessarily want to start over).

Estimating Tail Needed
Refresher – A Quick Long-Tail Cast-On Video
Since you won’t be casting on more than once for every project, it takes a while to learn this cast-on by heart. That’s okay.
The video below is a quick review of the technique that you can watch when you need a reminder.
Long-Tail Cast-On – Quick Refresher
Wonderful. Practice casting on a few more times until the stitches feel even and the edge is stretchy but not loose.
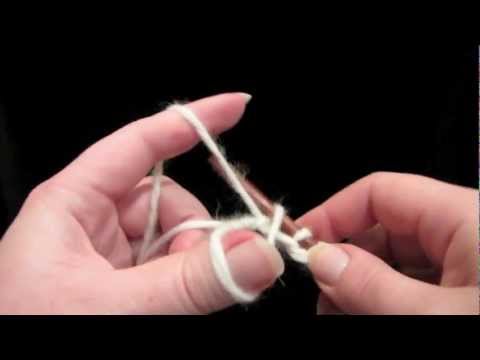
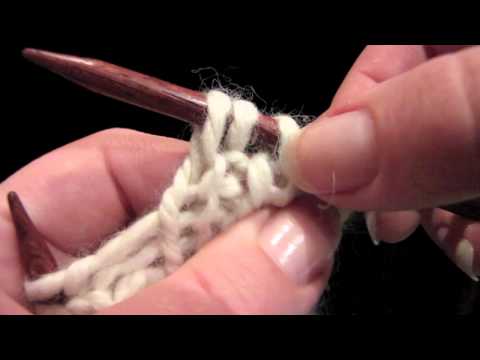
The Purl Stitch
Get Ready To Purl
We’re going to learn to purl, but first, let’s get set up.
Cast on 16 stitches and knit one row (work along with the video), and we’ll have a good foundation to learn the purl stitch. This will also be a good opportunity to review proper knit-stitch technique.
Preparation: 1 Row of Knitting
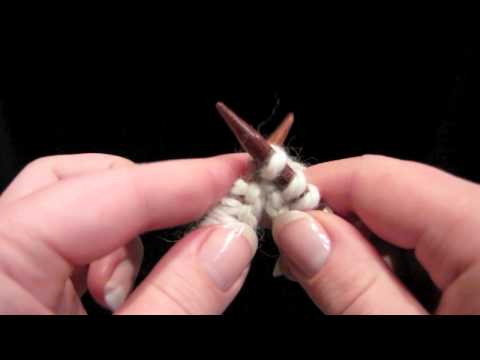
Introducing the Purl Stitch
The purl stitch is the opposite of a knit stitch – it’s the knit stitch’s mirror twin.
Basically, if I face you while you do a knit stitch, I’ll be looking at the back of you work – I’ll see a purl stitch. A purl stitch is a knit stitch seen from the other side.
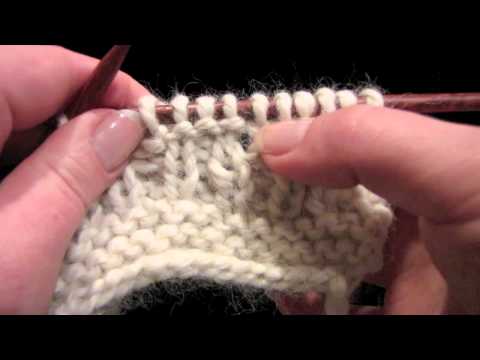
A knit stitch does not look the same from both sides, as you can see from examining the 16 knit stitches you just made.
A knit stitch is smooth on the front, and bumpy on the back. The reason we learn the purl stitch is so that we can put the bumpy part on the front of the work, if we want to.
Like a computer’s binary code, made up entirely of ones and zeros, different arrangements of smooth and bumpy stitches (knit and purl stitches) combine in knitting to create infinite textures, patterns, and designs.
Let’s learn how to do it. The purl stitch is abbreviated “P” or “p,” and is spelled “purl” (never “pearl”).

The Purl Stitch
Practice knitting using JUST the purl stitch, for about 5 rows.
You’ll notice that you are making the same fabric you made in the beginner scarf in the Learn-to-Knit course: garter-stitch.
Here are some troubleshooting tips to help you while you practice.
The most common mistake is forgetting to put your yarn in the front – here’s what will happen.

The Purl Stitch – Troubleshooting #1
Another bugaboo to watch out for: wrapping your yarn around your needles the wrong way.

The Purl Stitch – Troubleshooting #2
Now let’s look more closely at the garter stitch fabric, to discover why you can create it by either knitting or purling.

Examining Garter Stitch
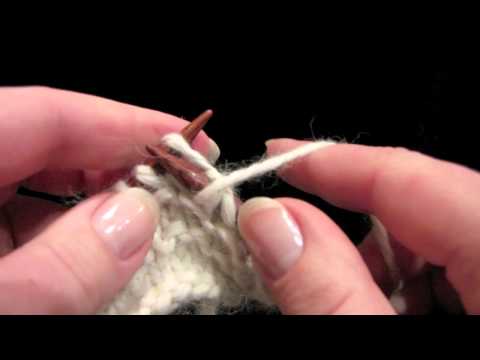
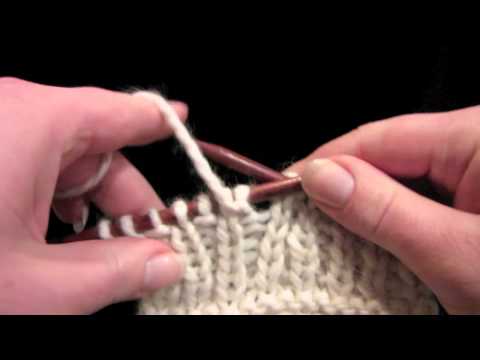
Ribbing – Switching Between Knitting and Purling
Here’s your next challenge – moving between knitting and purling.
You’ve got to do it right, or else you’ll end up with a big munched-up tangle that won’t look like anything at all.
Grab your swatch that you’ve been practicing on, and work along with the video as I show you how to move between the two kinds of stitches.
Introduction to Ribbing
The fabric that we’ve just created – the combination of alternating single knit and purl stitches, is called ribbing, and you may recognize it as the stretchy weave the you find on almost every sweatshirt or sweater cuff and collar.
This particular pattern is called “1×1 Rib” or “K1P1 Rib.”
In the same vein, if you were to knit two stitches and then purl two stitches, that pattern would be called “2×2 Rib” or “K2P2 Rib.”
We are going to delve deeper into how the rib stitch works, what it’s good for, and much more on our first project: a ribbed scarf.reak
Knit and Purl Stitches, Reading Your Work
Project: Ribbed Scarf
The simple but elegant ribbed scarf is the perfect introduction to the intermediate skills of choosing the right yarn, reading your work, and fixing your mistakes.
We’ve got the first one covered – let’s practice the latter two skills before we start the real thing. Still practicing on your swatch, let’s take a closer look at the anatomy of knit and purl stitches – we’ll also examine how ribbed fabric behaves, and why.

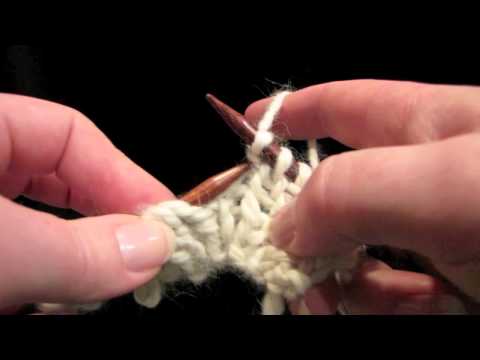
Examining 1×1 Rib
Reading Your Work
Work a few more rows, and then watch the next video, where I show you how to recognize where you are and what you just did when you lose track (also known as “reading your work”).
Reading Your Work – 1×1 Rib
As you continue to knit on your swatch, practicing the 1×1 rib, hopefully you will make some mistakes – that is, that you will purl where you should have knitted or knit where you should have purled.
You might also forget to move your yarn to the front or the back of your work when you should. This gives us a great opportunity to learn. If you haven’t made any mistakes, well, just make some on purpose! ;)
Here’s how to recognize when you’ve made a mistake in ribbing, and how to fix it.
In the first three videos, I’ll be showing you what to do when you notice your mistake right away.

Removing Mistakes
Here’s what to do when you’ve forgotten to move the yarn to the back or front of your work.

Ribbing Troubleshooting – Beginner
Here’s what to do if you’ve knitted or purled in the wrong spot.
Ribbing Troubleshooting – Intermediate
Here’s how to tell if you did a knit where you were supposed to purl, or vice versa, and then continued to knit without noticing.
You have a few options, the easier two of which I show you here.

Ribbing Troubleshooting – Advanced
Now you’re ready to start your scarf.
It’s going to be just like what we’ve been practicing, only you’re going to make it wider, and you’ll use a soft, lovely, and possibly colorful yarn instead of the plain practice yarn we’ve been using.
To sharpen your pattern-reading skills, I’m introducing two new kinds of instructions: options and repeats.
Options In Pattern Instructions
Options in patterns can range from different sizes, to instructions for different yarn, or even different styles of the finished garment.
There is a standard format that designers use to make these options clear and easy to choose between – parentheses.
In the introductory section of the pattern, the designer will indicate the options using a format similar to these two examples:
Sizes: Small (Medium, Large)
or
Yarn: Aran (Bulky).
What this means is that in the pattern instructions, the designer will write the instructions for the first option, and then follow with the instructions for the other options in parenthesis, separated by commas.
For the first sample above, the instructions might start out:
CO 40(50,60) sts.
You can see that by following the first number, 40, you will be making the small size, whereas casting on 50 or 60 will make the medium or large sizes, respectively.
When a pattern gives you options like this, it’s a very good idea to scan through the pattern and either circle or highlight the number that pertains to your size.
You don’t want to be accidentally switching around halfway through.
Believe me, this happens to the best of us, so use an ounce of prevention and circle your numbers. ;)
On our ribbed scarf project, I’m giving you the option to knit it with one of two different thicknesses of yarn. The thicker yarn requires thicker needles and the scarf will go a little faster, and it will look more bulky.
Circle the options in the pattern below that pertain to your choice.
Repeats in Pattern Instructions
When the designer would like you to repeat a set of instructions more than once in the same row of knitting, he or she will use an asterisk and/or parentheses to show you which parts of the pattern to repeat.
For example, what we’ve been doing (starting with a knit stitch and then alternating purl and knit stitches all the way across the row) would be written as:
Row 1: *K1, p1, repeat from * to end of row
or, in even more abbreviated language:
Row 1: *K1, p1, rep from * to end.
Reading across the instructions like a sentence, you can see that after you knit one and then purl one, the next instructions tell you to go back to the beginning (where the * is) and start again, over and over until you get to the end of the row.
In the case of a simple stitch like 1×1 rib, it might seem a little clunky to use all these extra words and symbols, which is why you may often see a designer write
Row 1: Work in 1×1 rib across
which just means to work in 1×1 rib across the whole row.
Another way to show which parts of the pattern need to be repeated is with parentheses, indicating that whatever in the parentheses can be treated as one unit for the sake of repeating it a certain number of times.
In the case of 1×1 rib, that would look like this:
Row 1: (K1, p1), repeat to end of row
or, in more abbreviated language:
Row 1: (K1, p1), rep to end
or simply
Row 1: (K1, p1) across.
Every single one of the above examples means the same thing. I’ll be using a mix of these styles of abbreviations in this e-book to give you practice reading them.
Alright, you’re ready to get out the big guns and start your scarf.
Read through the directions as well as the tips that follow the pattern, circle the number of cast-on stitches that corresponds with your yarn choice, and take it away!
Note that you will run out of yarn and will have to switch to a new ball of yarn at some point during the project.
Knitting patterns will not tell you to do this – it’s assumed (review Switching To a New Ball of Yarn in the Learn-to-Knit course if you don’t remember how to do this).
Pattern: Ribbed Scarf
Finished Measurements: 5 inches wide x 5–6 feet long
Materials
Yarn: 300 yds aran (bulky) weight yarn
Needles: One pair straight needles US size 9/5.25 mm (US size 10 ½/6.5 mm)
Notions: Tapestry needle, scissors
Instructions
CO 22(18) sts.
Row 1: *K1, p1, rep from * to end.
Repeat row 1 until scarf measures 5 to 6 feet long, according to your taste.
BO in pattern (see video below).
Finishing
Weave in ends (see video below).
Tips, Tricks, and Troubleshooting For This Project
Accidentally Going the Wrong Way
If you have to put down your scarf in the middle of a row, how to you know which way to go when you pick it back up again? Well, watch the video.
Troubleshooting – Getting Turned Around
Counting Your Stitches
You’ll want to make sure you are on track every once in a while while knitting this scarf, so that it doesn’t accidentally get wider or narrower without you knowing.
The easiest way to do that is to count your stitches occasionally (more often initially; less often once you feel comfortable). Here’s the fastest way to count your stitches in knitting.

KNITFreedom – The Fastest Way To Count Stitches In Knitting
If You Drop a Stitch
If for some reason you have fewer stitches than you are supposed to, you make have accidentally let a stitch slide off your needle.
Here is a video showing four different scenarios and options for fixing this mistake.

Fixing Dropped Stitches
If you have dropped a stitch but continue knitting without noticing, here’s how to fix that.
Fixing a Mistake When It's Far Down
If You’ve Added a Stitch
An added stitch usually happens at the beginning of a row, because you haven’t started with your yarn in the back of your work. The good thing is, if you’ve added a stitch, you’ll probably notice right away, because it will mess up your “knit 1, purl 1” pattern.
Review this video from the Learn-to-Knit course to recognize and stop this from happening.
How’s Your Tension?
I just want to check in with you to make sure you’re not developing any bad habits with your tension.
This is an important issue to nip in the bud if it comes up, so follow along with the video to check to see if you’re slipping into any of these habits, and the adjustments you can make to make sure you have great tension.

Check Your Tension
Binding Off In Pattern
Binding off in pattern just means that as you work your bind-off row, you’ll be knitting the knits and purling the purls on the last row (like you’ve been doing all along), instead of just knitting them all like you learned in the Learn-to-Knit bind-off video.
Work along with the video and see how even and flat this bind-off lays on this scarf.

Bind Off in 1×1 Rib
Weaving in Ends on Ribbing
Making your yarn ends look invisible on a double-sided project like this ribbed scarf can be a challenge. Here’s how I do it.

Weaving in Ends on 1×1 Rib
Great work! You’ve completed a gorgeous ribbed scarf, practiced your purling and ribbing skills, learned how to count stitches, watch out for and fix common mistakes, read more complex patterns, and finish your projects professionally.
Now it’s time to show off your project.
Introduction to Ravelry.com
I’d like to introduce you to a fabulous site called Ravelry, where you can put up pictures of your project, link them to their pattern pages, browse other people’s projects and notes, look for yarn, and so much more.
Ravelry is a great way to discover beautiful new patterns as well as connect with other knitters and share your experiences with them as well.
Why not head over and sign up for a free account? Ravelry will walk you through the steps of adding your first projects and finding your way around the site. I’ll be sending you to Ravelry often to look at yarns and project throughout this course.
It’s a big site, so don’t worry if you don’t learn how to use it all at once – we’ll be gradually getting to know it better as we go.
Also, you don’t need to sign up for an account to click the links and see the yarns and projects I’m going to show you on Ravelry, so do whatever you feel comfortable with.
Now, are you up for a knitting challenge? If you enjoyed the ribbed scarf project, why not try the following challenge project? You can start it and continue working through the rest of the course at the same time.
Challenge Project: Noro Self-Striping Scarf
This gorgeous and elegantly simple scarf isn’t a new concept, but it made a huge splash when designer Jared Flood photographed it and published it in 2007.
It takes advantage of the gradually-changing stripes of Noro yarns, and pairs them together to get this effect.
 Using four balls of Noro’s Silk Garden or any other self- striping worsted-weight yarn, Jared’s scarf can be made by casting on 38 stitches and working in 1×1 rib just like we did on the first scarf, using US size 7 (4.5mm) needles to get a width of about 5.5 inches.
The only trick here is that you knit with one ball of yarn for two rows, then switch to the next ball, without cutting the yarn at all. You simply let it hang until you’re ready to use it again, two rows up.
This technique is called “carrying yarn up the sides,” and below is a video showing how it’s done. Line
For more information and photographs, visit Jared Flood’s pattern here.
Here’s how to carry yarn up the sides of your scarf when you’re making stripes.

Switching Colors
Increasing and Decreasing
Let’s take a break from scarves and purling to work on another very important aspect of knitting: increasing and decreasing.
There are many ways to do it, but increasing simply means adding more stitches to your needle to make your knitted project wider.
This is normally done just a few stitches at a time, so that as you knit, the project gradually and evenly gets wider.
Decreasing is just the opposite – by taking away stitches as you knit, your project gets narrower and narrower.
I’m going to introduce you to the most common of these stitches, the Yarnover, abbreviated “YO,” and the “Knit 2 Together,” abbreviated “K2tog.”
And we’re going to learn and practice them on a great and fast project – the basic dishcloth.
This project starts out easy and gets more challenging as you go – it’s perfect for advancing your skills while practicing the ones you’ve already learned. 
Of course, we’ll also practice some more-advanced pattern reading as well.
In order to get started, you’re going to need to pick up some new yarn and needles, but don’t worry – this project won’t break the bank.
As you know, all good patterns lay out the materials, instructions, and any notes all in one standardized package.
It’s important that you read over the pattern before you head to the yarn store, so that you know what you’re looking for.
I’ll walk you through what to get here, but just to get in the habit, please read over the following pattern.
Project – Granny’s Favorite Dishcloth
This is a traditional pattern whose designer is unknown.
Here is a link to the pattern on Ravelry.
Materials
1 ball of Sugar ‘n Cream cotton yarn, US size 7 (4.5 mm) needles.
Optional:* crochet hood size G (4.25 mm).
Pattern Instructions
CO 4 sts.
Row 1: K4.
Row 2: K2, YO, K across.
Repeat row 2 until you have 44 sts on the needle.
Next: K1, K2tog, YO, K2tog, K to end.
Repeat last row until you have 4 sts on the needle.
BO, weave in ends.
*Optional: Do a round of single crochet around the dishcloth, making a loop of chain stitches in one corner to hang the cloth up in the kitchen.
Shopping For Your Materials
You can find Sugar ‘n Cream cotton yarn at any craft store and possibly your supermarket or Wal-Mart. Your local yarn store may also carry it.
It runs between $1.87 and $2.50 per ball, which is great, because these dishcloths make lovely gifts, especially wrapped up with some pretty soap. 
Here’s a quick yarn lesson – the weight, or thickness, of this yarn is called “worsted.”
It’s the next step down in thickness from the aran-weight yarns that we were looking at earlier.
The needle size that matches it is a US size 7 (4.5 mm), so pick up a pair of those as well while you’re at the store.
Worsted-weight yarn is the most common thickness of yarn used, so you’ll be using your size 7 needles on many, many projects to come.
If you’d like to make a little loop on one corner of your dishcloth to hang it up in the kitchen, also grab a crochet hook in size G (4.25 mm).
Don’t worry – even if you don’t know how to crochet, I have a video that will show you how to make the loop. So let’s get started!
Good luck finding the middle of your ball of yarn on this one – I usually have to “pull from the outside” on these yarns. It’s worth a try, though. ;)
Follow along with your pattern and these videos as we make the dishcloth together.
Increasing
Cast on 4 stitches using your new long-tail cast on, then knit one row.
Then, follow along with me to learn how to increase.

Dishcloth – CO and First Rows
If you didn’t work along with me in the Learn-to-Knit course, I’ll just remind you that the fabric we are creating by knitting every row of this project is called garter stitch – its properties are that it is reversible (it has horizontal rows of bumps on both sides) and it lays nice and flat.
Let’s work a few more rows and take a look at the dishcloth.
Dishcloth – Examining First Rows
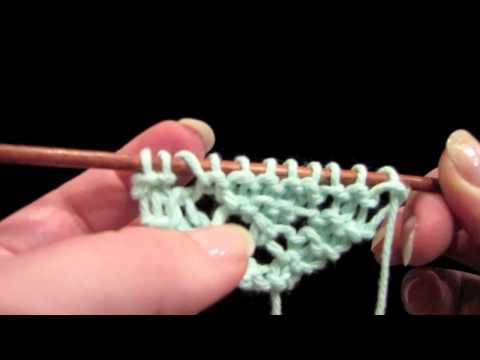
Moving on- we’re going to keep on repeating the increase row until we’ve got 44 stitches on the needle (time to practice your counting by fives.) Remember, yarnovers count as stitches too.
See how the dishcloth is starting to widen, nicely and evenly? That’s because we’re adding one stitch on every single row. We’re increasing!
Did you also notice how the yarnovers make decorative holes along the side of the dishcloth? It looks nice in this project, but people mostly don’t want sweaters and socks full of holes, which is why other types of more “invisible-looking” increases exist.
You’ll learn more about them in the next courses in this library.
Tips, Tricks, and Troubleshooting For This Project
If you accidentally forget to do a yarnover, or maybe do one at the end of the row instead of (or in addition to) at the beginning, the best way to remedy that on this project is to take out a row or two.
Don’t panic. We’ll do it together.
If you need to take out just a few stitches, you can review the video on how to back up your knitting (called “tinking,” for “knitting” spelled backwards) that we did during the chapter on ribbing.
If you find a mistake a few rows down in your knitting you’ll need to take out those rows (or, as my friend Brittany euphemistically puts it, “back up a little”).
Here’s how to do it properly and get going again without getting confused.
Taking Out a Whole Row
If you are having trouble getting your stitches back on your needles facing the right way, don’t worry. It’s time for a lesson in recognizing if they’re on right, and the quickest trick to fix it if they’re not.

Putting Stitches Back On When They're Wonky
Decreasing
Whew! Look how much you’ve learned, and we’re only halfway through this project.
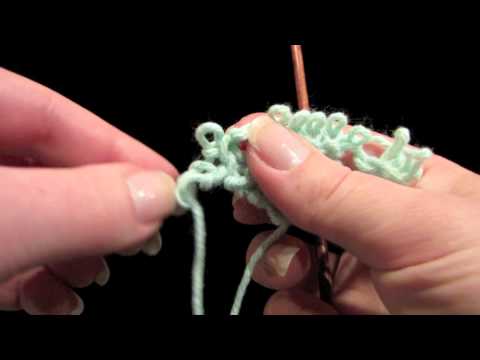
When you have 44 stitches on your needle, it’s time to start decreasing.
Decreasing is quite easy – you just knit two stitches together as if they are one. However, since we need to maintain the decorative holes (yarnovers) that border the dishcloth, we’ll be doing two decreases, one on either side of the yarnover. Follow me.

Decreasing
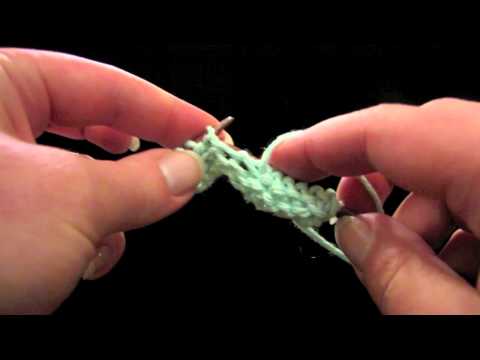
Just continue in this pattern until you again have four stitches on your needle.
Now you can bind off and weave in your ends.
If you’d like to add a crocheted border and a little loop to hang up the dishcloth, check out this video on my blog.
PS – Don’t forget to link your project to the pattern on Ravelry.
You can put down any notes about the project – what you thought of the pattern, if you enjoyed it, anything you’d do differently next time… These comments help other people who are thinking about making the same pattern.Line Break
Stockinette Stitch, Gauge, and Stitch Patterns
This next project is going to teach you all about the most useful and famous stitch pattern out there: Stockinette stitch (abbreviated St st).
Stockinette Stitch
Stockinette stitch is the fabric that happens when you knit on one side of the fabric and purl on the other.
Remember how we took a close look at the purl stitch and saw that it was just a knit stitch in reverse? We’ll take advantage of this fact to make a fabric that is all smooth on the front, and all bumpy on the back.
Almost all garments (knit and machine-made) are made in Stockinette stitch.
Take a look! Look at your t-shirt, sweatshirt, or sweater – see if you can find little Vs (the knit stitches) all over the outside, and little horizontal bumps (the purl stitches) all over the inside.
So let’s try some Stockinette stitch. Work along with the video to learn all about it.
Stockinette Stitch
One thing about Stockinette stitch is that it likes to curl toward the knit side. Ever cut the sleeves off a t-shirt? The edges will curl, making an informal-looking edge – the same thing happens in your knitting.
We are going to use the flat-as-a-pancake properties of garter stitch on our next project, combined with Stockinette stitch, to make a dishcloth that will be smooth in the middle, but won’t want to curl at the edges.
This is called a garter-stitch border, and it’s useful on any project that you want to have lay flat.
Before we get started on the next project, let’s use Stockinette stitch and garter-stitch borders to really quickly learn about making swatches and checking your gauge.
Swatching and Gauge
A swatch is just a sample of your knitting, and it’s almost always done in Stockinette stitch.
It’s a way to make sure your knit stitches are the size they are supposed to be, BEFORE you start out on a pattern.
Since we’ve only done scarves up until now, gauge hasn’t been an issue, but now we have a great opportunity to get our feet wet and learn a few techniques that will save you hours and hours of grief later.
This is important.
Gauge is the number of knit stitches and rows that fit into a specified unit of measurement, usually one inch. It’s important because if your stitches are too big or too small, your project will be too big or too small. Sad. Avoidable. With me?
Checking your gauge is as easy as knitting a small sample square, called a swatch, and placing a ruler or a gauge-checker over the fabric, and counting how many stitches there are in a few inches, and then dividing by the number of inches to get the average number of stitches per inch.
Checking just one inch is a little risky, which is why knitters take the average of two or three inches. You can also check how many rows are in one inch (called the “row gauge”), although this measurement isn’t nearly as important as your stitch gauge.
People really like to skip this step – they think it takes too long, or they feel that their swatch has to be pretty or perfect, or somehow useful later. Nope! It just has to be done. If you care about your project coming out the right size, you’ll check your gauge.
Don’t worry, though – in this next video I’m going to give your four tricks to make checking your gauge seriously fast and fun. Here’s how to knit a swatch and check your gauge.

Checking Your Gauge
Yarn Secrets
Okay, good work – you’ve learned how to check your gauge.
Now it’s time to let you in on the secret of always knowing what thickness of yarn you have – you can always tell by the gauge.
Remember the chunky yarn we were looking at earlier? Knit up a swatch- you should get about 3 ½ stitches per inch, which you can confirm by looking on the yarn’s label.
How about aran-weight yarn? It will knit up at 4 stitches per inch. And your worsted cotton yarn? 5 stitches per inch.
This time when you start looking at yarn labels, you’ll notice the suggested gauge.
Watch out – a yarn manufacturer might use a four-inch square, or 10 cm x 10 cm, to tell you how many stitches you can expect to get with their yarn and using the suggested needle-size.
They might say 20 sts in 10 cm – that’s 5 stitches per inch – a worsted-weight yarn.
One thing to watch out for: while gauge is a holy measuring stick for knitting, needle sizes are not. Knitting tension is individual and varies per person, and therefore so does needle size.
Basically, I don’t care WHAT size needles you use on a project – as long as you’re getting the right gauge.
You can start with the size suggested on your yarn label or in your pattern, but you may need to use a smaller or bigger needle size to get it just right – the only way you’ll know is to knit a swatch and check your gauge. Yay!
You now have the beginnings of the yarn secrets belonging to all Knitting Superstars, which will help you understand more and more about the yarn you buy and knit with.
Okay, ready to knit another project? We’re going to be using the skills we’ve learned so far, plus more advanced pattern-reading practice, so let’s get started.
You’ll need the same materials you used for the garter-stitch dishcloth.