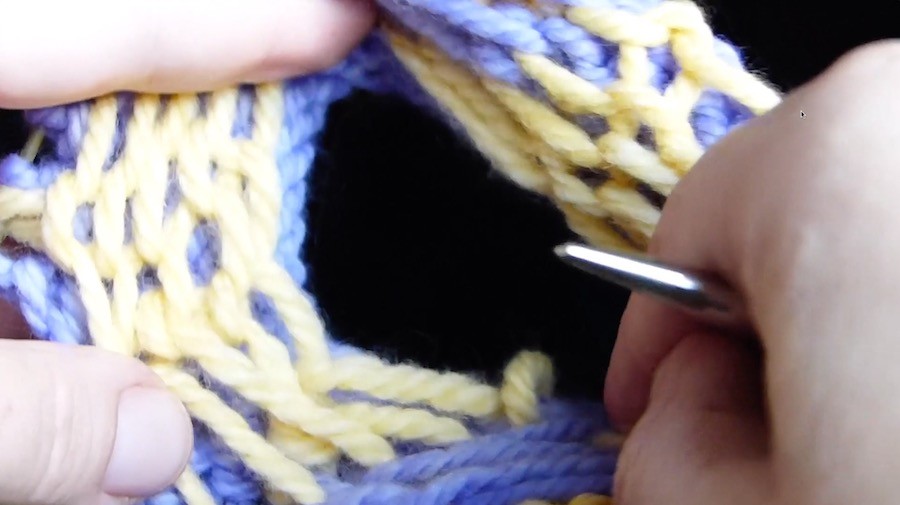
Regular Fair-Isle knitting isn’t stretchy enough to work well on socks and motifs that leave long floats. The Ladder-Back Jacquard technique is a way to knit your floats into a loose material along the back of your work that lets it stretch.
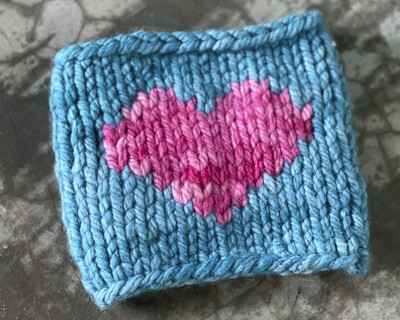
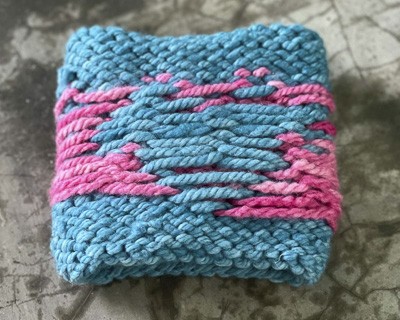
With Ladder-Back Jacquard, you can knit stretchy garments, like Fair-Isle socks, with great success, no matter the motif.
Video: Learn the Ladder-Back Jacquard Stitch
The Ladder-Back Jacquard Technique is an exclusive members’ video. To access this and all other 450+ time-saving knitting videos, get personal email help and request your own videos, become a member here. Starts at just $12.99/month!
Member Video
 This video is available to KnitFreedom members and customers of our Fair Isle class.
Become a KnitFreedom Member Here
and get this and over 450 time-saving knitting videos for just $12.99/month.
If you are a KnitFreedom member or own the Fair-Isle class, please LOG IN to watch.
Ladder-Back Jacquard: Step-by-Step Instructions
To do the Ladder-Back Jacquard technique, you’ll need a motif that contains spans of unbroken color more than 5 stitches across. The Fair-Isle Heart chart below is a good example.
To use the above chart to practice Ladder-Back Jacquard, cast on 30 stitches and join for working in the round.
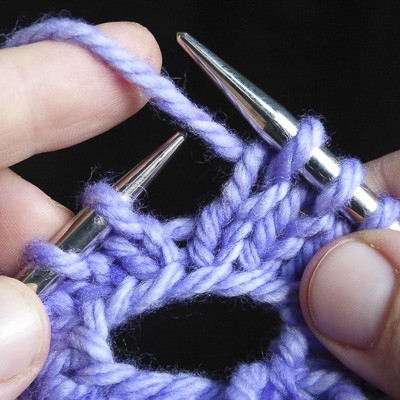
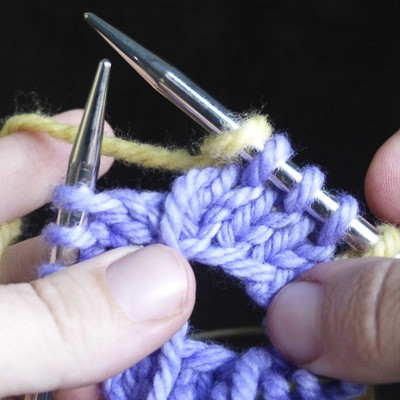
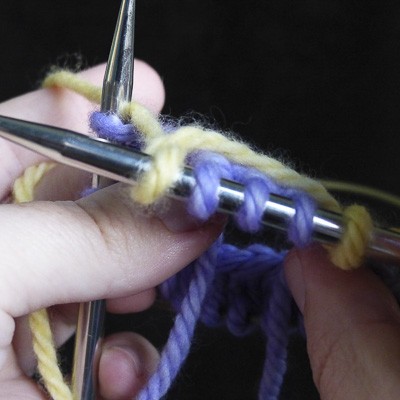
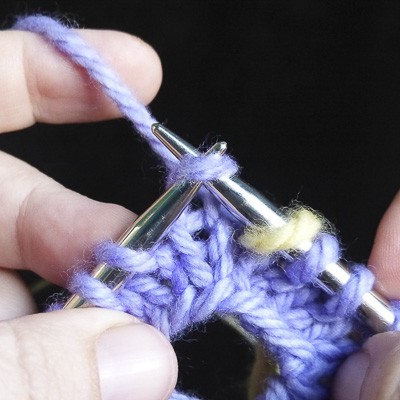
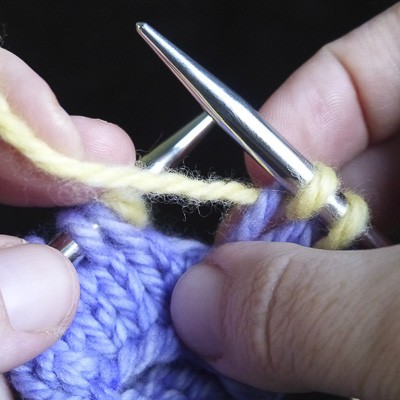
Work the first two rounds of the chart, then work up to and including stitch #8 on Round 3 (the first contrasting-color stitch). Then begin to create Ladder-Back Jacquard cast-on stitches using the contrasting color (float color) as follows:
First Contrasting-Color Round
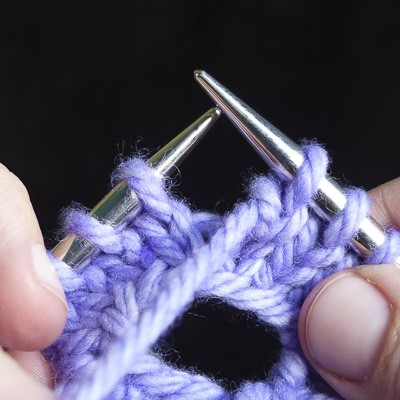
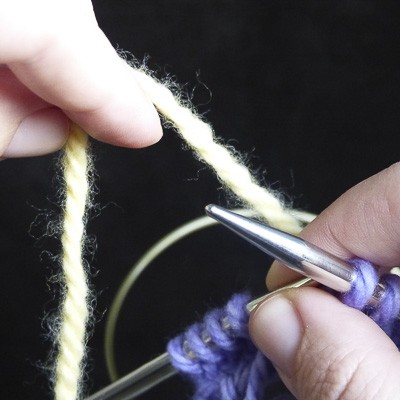
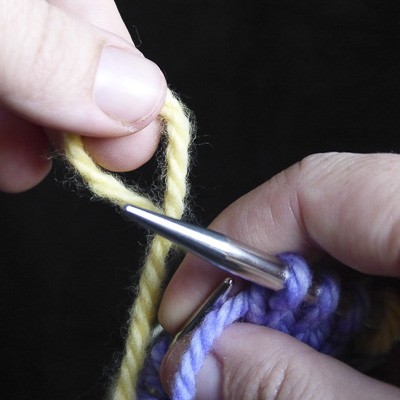
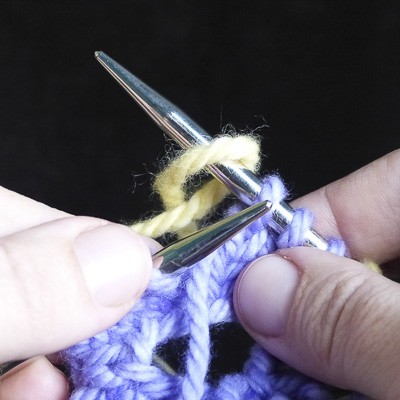
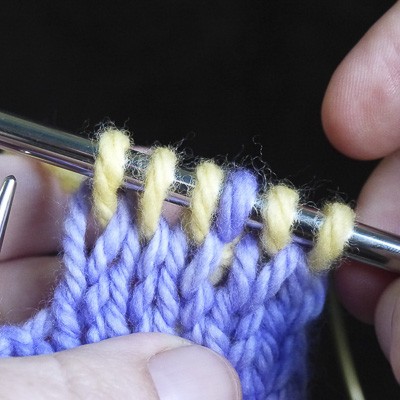
Continue Inserting Cast-On Stitches
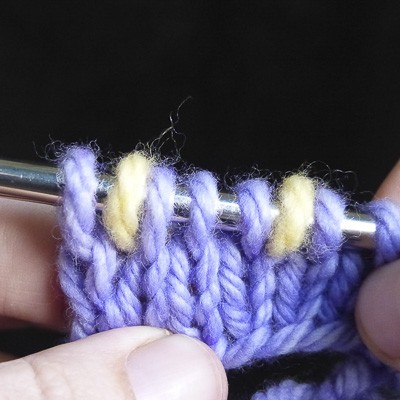
Each time you come to an area of more than 5 stitches in the same color on your chart, break up those stitches by inserting Ladder-Back Jacquard (backwards loop cast-on) stitches as shown above.
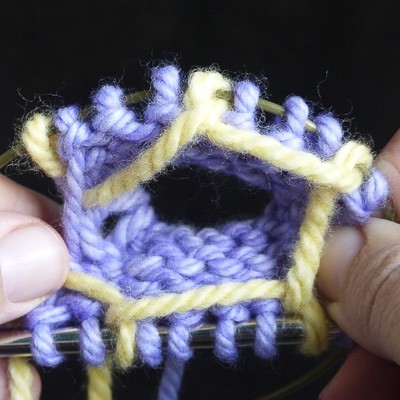
Work Your Fair-Isle Chart According to the Pattern
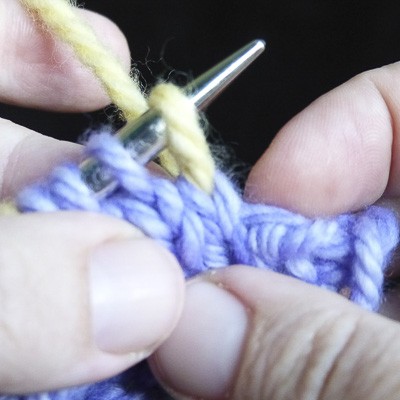
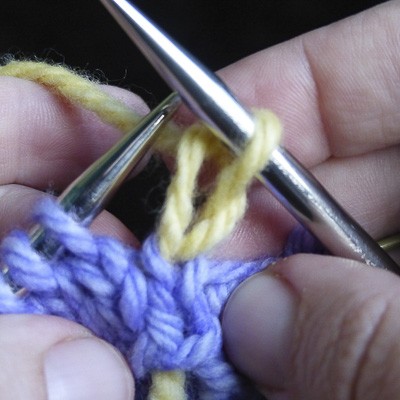
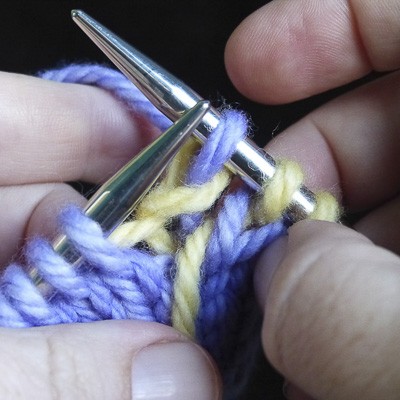
Knit the Cast-On Stitches With the Inactive Color
Continue working according to your chart until you come to one of your cast-on stitches.
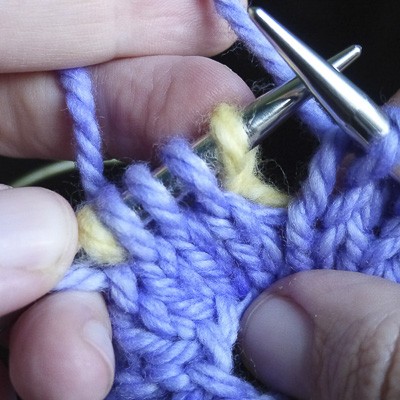
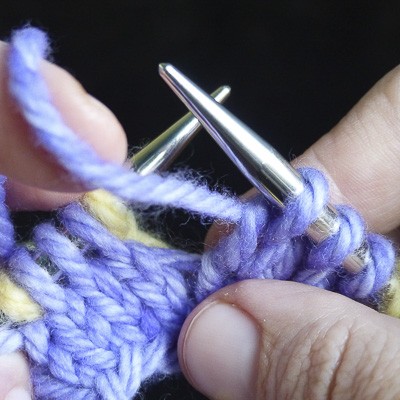
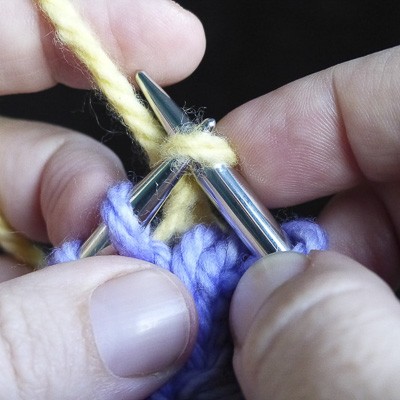
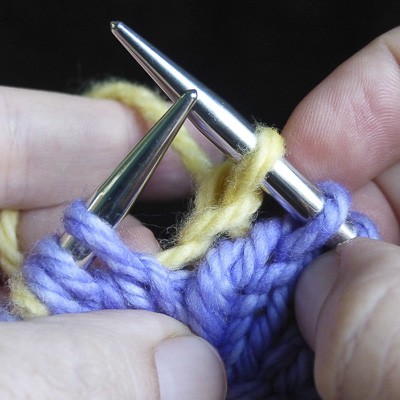

Use the Inactive Color to Knit Cast-On Stitches
Please note that you do not have to knit the cast-on stitches with the same color you used to make them. Knit them with whatever color you are not actively using.
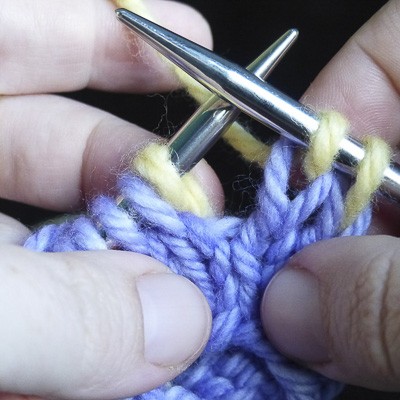

Knit Out Unneeded Ladder-Back Jacquard Stitches
As your pattern changes, your active color may no longer have long stretches of more than 5 stitches. You can remove the inserted Ladder-Back Jacquard stitches when you don’t need them anymore as follows:
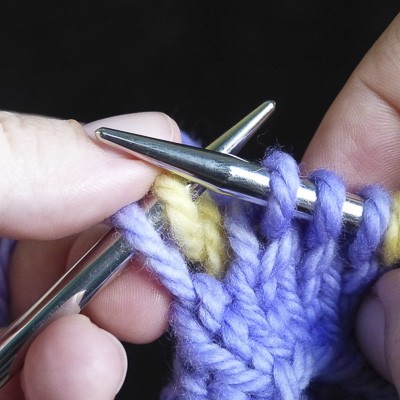
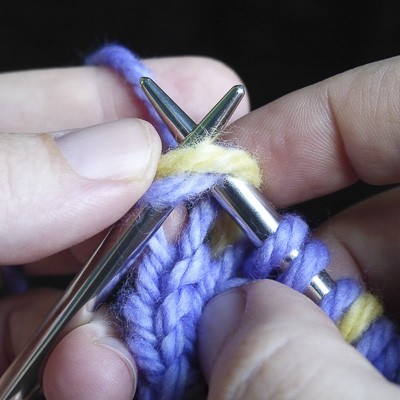

If you need to create a new stitch again in subsequent rounds, just create another Backwards-Loop Cast-On stitch with the inactive color as described above.
Rearrange Ladder-Back Jacquard Stitches
As your pattern changes, your Ladder-Back Jacquard stitches may no longer be evenly splitting up your groups of live stitches. You can move a Ladder-Back Jacquard stitch to more evenly break up the active-color stitches as follows:
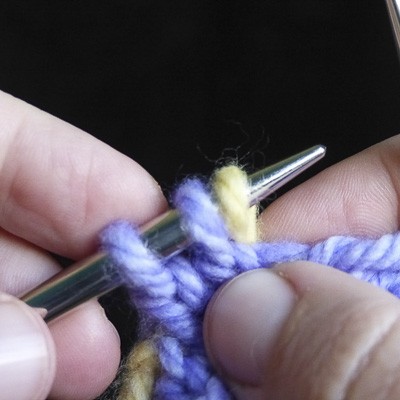
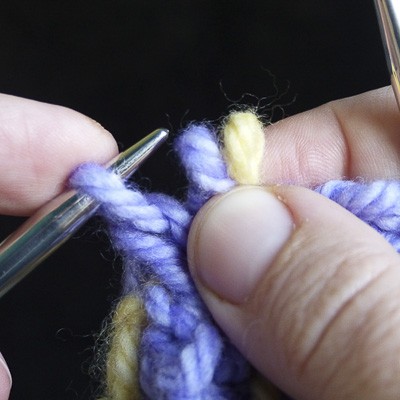

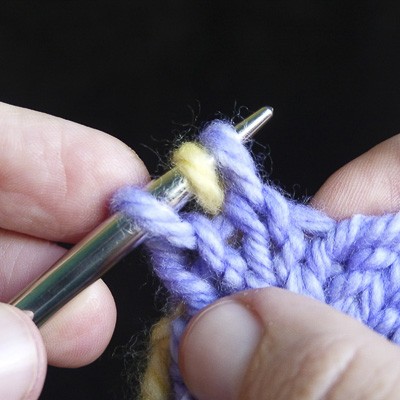
…and there you have it! Now you know everything you need to know to make your Fair-Isle floats stretchy enough to use on socks and wide motifs.
Remember: Check your floats as you work and don’t pull them too tight!
Leave a Comment
Did you enjoy this tutorial on the Ladder-Back Jacquard Technique? Are you going to try it? What are your biggest frustrations with Fair-Isle knitting? Leave a comment and let me know!
Learn to Fair-Isle Knit With Ease
 Going crazy trying to figure out Fair Isle knitting?
Holding two or more colors at once can be awkward as you learn how to manage the tension of each stitch. My step-by-step Fair-Isle class teaches you all the secrets so you can confidently Fair-Isle knit with ease.
Includes the above Ladder-Back Jacquard video tutorial free!
Family Photos

Here in Mexico the stores will cut into their produce to sell you just a portion! A slice of watermelon, half a cabbage… Today Milo wanted papaya.
Hugs,
Liat






8 thoughts on “Ladder-Back Jacquard – Stretchy Solution for Fair-Isle Floats”
Using the backward loop instead of picking up a stitch below is genius. It never causes a pucker and smoothly adds a new stitch. Thank you for this helpful technique.
Question: How many stitches would you move a repositioned stitch? 1? 2? 3?
Cheers
Hi Lulu,
I’m going to be passing your question along to Liat, but I want to let you know that she is currently on maternity leave (she is expecting her baby very soon) and will be taking up to 1-2 weeks to answer.
Thanks so much for your patience and understanding!
Best,
Elias
Hi Lulu,
I’m delighted that your found this helpful!! I would probably only move a repositioned stitch by a max of 2 stitches. But the best thing is to try it for yourself so you know what you like!
Hi !
It seems great, but I was wondering, when you have motif like that why not knit intarsia ?
Or if all the rest of the “sock” is stranded work with short floats, can you knit just a few rows using this method and then continue with stranded knitting ?
What would you do if you only had one or two rows with long floats ? I usually knit my floats, which method would be best ?
Thanks for your answer to my complicated questions…
And thanks for being out there for us
Hey Liat!
I haven’t ever tried to knit c Fair Isle, even though I love the look of it. Your post says don’t knit your floats too tight. So, how does one know if the floats are too tight or r too loose?
Hi Linda, great question! If the floats are correct and not too tight, you’ll be able to spread out the stitches on your needle just like regular knitting. If you try to spread out the last 4-5 stitches and the float doesn’t stretch to allow that, it’s too tight. You can see me do it several times in the video, the first one is at timestamp 5:55.
Cheers! Liat
Ps I’m still looking forward to you sending me a sample of the top-down sock patterns that you wanted to turn into toe-up! Thanks!
L
Liat, your tutorials are the best, and I hope to try this one. Milo is simply adorable, and looks as though he’s loving his papaya slice!!
Hi Carol, thank you so much for this! I really hope you like this technique. Big hugs to you!
Liat