Ch. 3 Knit Your Slippers
Begin Knitting 1st Garter Strip

Grab your yarn and your small paper schematic, it’s time to knit! Select the yarn that you’ve chosen for the Toe Bottom (square 1) and cast on the number of stitches required in your pattern.
Knit for the number of rows specified in your pattern.
Tip: Don’t slip the first stitch of every row if you are tempted to do so. As you’ll be seaming these squares up later, you’ll want the stronger edge that a non-slipped-stitch edge will provide.
If you don’t know what slipping a stitch is, perfect! I don’t want you to do it on this project.
Knit along with me in the video below to get a preview of how to count your rows in Garter stitch*.
Restricted Video
![]()
![]() This video is available to members of Knitting Superstar University or the following classes:
This video is available to members of Knitting Superstar University or the following classes:
If you own this class, please LOG IN to watch.
*Garter stitch is the fabric created when you knit every row.
Count Rows on Garter Stitch

To Count Rows On Garter Stitch:
Make sure your tail is on the same side as your working yarn.
This means you have done an even number of rows.
- Point your needle-tip to the right.
- Count the garter-stitch ridges, not counting the cast-on row.
- Each ridge counts for two rows. If you count 12 ridges, you have knitted 24 rows.
Follow along with the video below to learn how to count your Garter-stitch rows with complete confidence.
Restricted Video
![]()
![]() This video is available to members of Knitting Superstar University or the following classes:
This video is available to members of Knitting Superstar University or the following classes:
If you own this class, please LOG IN to watch.
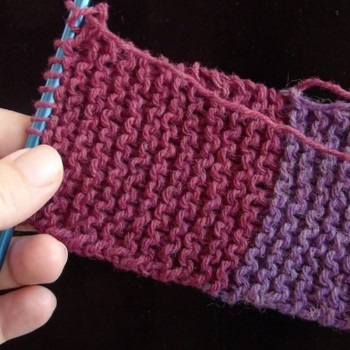
Change Colors

To change colors, select the color you’ve designated for the next square. Leaving a long tail (12 inches) hanging down for seaming later, begin knitting the next row with your new yarn.
I show you how to do this in the video below.
Restricted Video
![]()
![]() This video is available to members of Knitting Superstar University or the following classes:
This video is available to members of Knitting Superstar University or the following classes:
If you own this class, please LOG IN to watch.
Count Rows on Second Square
Counting your Garter-stitch rows on the second and subsequent squares is even easier, since there is no cast-on row to worry about.
Simply count your ridges and multiply by two (making sure the RS – right side – is facing you and the needle-tip is to the right).
Restricted Video
![]()
![]() This video is available to members of Knitting Superstar University or the following classes:
This video is available to members of Knitting Superstar University or the following classes:
If you own this class, please LOG IN to watch.
Continue knitting the rest of the squares 2-6 in your Garter stitch strip.
In the next video, I’ll show you how to pick up and knit stitches for the flaps (squares 7 and 8).
Pick Up and Knit Two Flaps

Picking up and knitting is a great skill that you will use on future projects as well as this one.
It is a way to start knitting from the edge of an existing piece of knitting.
To pick up and knit, hold your project with the RS facing you and the edge you want to pick up into at the top.
Insert your right-hand needle into the fabric two loops – one whole stitch – in from the top edge. Tension your yarn in your hands to knit. Wrap the yarn around the needle and pull the needle and stitch through the fabric.
Repeat the above step evenly along the edge of the fabric until you have picked up and knit the required number of stitches.
The video below demonstrates how to do this easily and quickly.
Restricted Video
![]()
![]() This video is available to members of Knitting Superstar University or the following classes:
This video is available to members of Knitting Superstar University or the following classes:
If you own this class, please LOG IN to watch.
After you pick up and knit stitches for square 7, turn your work and begin knitting in Garter stitch.
Continue knitting until you have the required number of rows for your pattern. Bind off.
Repeat the pick-up-and-knit process for square 8, making sure the RS of the work is facing you. Once you finish knitting square 8 and bind off, you’re done knitting your slipper.
Knit Second Slipper
You can either seam the first slipper (see the next chapter) and weave in your ends and then knit the second slipper, or knit the second slipper now and seam them both up afterwards.
Either way, you’ll want to have both slippers completed when it’s time to felt them so they come out the same size in the wash.
