Finishing
Block

The final touch for most knitting projects is blocking.
Soaking your project in warm water with a little soap and then laying it out to dry is all it takes to make your edges and stitches more even and to cover up any inconsistencies in your tension.
Free Video for Subscribers
![]()
![]() This video is available to anyone with a free subscription. Sign up for free below.
This video is available to anyone with a free subscription. Sign up for free below.
Already a member? Log in here to watch.
To Do the Blocking Knitting – How to Block Your Work:
- Soak for 20 minutes in water with Soak or Eucalan.
- Gently squeeze out water.
- Lay flat to dry, stretching and pinning if desired.
More Info:
Blocking is more important on some projects than on others. It tends to flatten out the knitted piece, so if your project depends on the stitches being very three-dimensional (ribbed scarves being a prime example), you may want to avoid blocking.
Because it flattens out knitted fabric and limits the tendency of Stockinette stitch to curl, blocking is very helpful on any project where you plan to seam or sew the edges. It’s easier to see what’s going on if the edge is flat and straight. To flatten, widen, or straighten the edges of your project even more aggressively, use T-pins to hold the corners and sides of your knitting in place as it dries.
You can pin your piece to anything you want – a couch cushion, the mattress in the spare bedroom, etc. You can also get a blocking kit with specialized interlocking foam pieces that dry quickly and can be arranged in any shape.
To block something lightly, after you soak it, squeeze out as much water as you can before laying it flat. Then, when you lay it flat, be careful not to stretch it out. Just use your fingers to straighten the edges and make the whole thing look even and neat.
To block something aggressively, leave the knitted piece quite damp, stretch it aggressively into the shape that you want, and use T-pins to hold it in that shape until it dries.
BO – Bind Off

In order to wear and enjoy your project, you must take the stitches off the needle.
Use this bind-off (called the Standard Bind-Off) to finish every project unless the directions specify otherwise.

BO - Bind Off
To Do the BO – Bind Off:
- K2
- Using left-hand needle, pass 2nd stitch on right needle over 1st stitch on right needle. = Bound off 1.
Kitchener Stitch
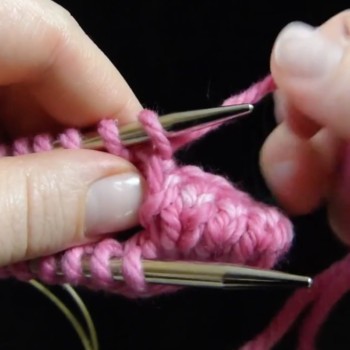
This is an advanced sewn bind-off that is completely flat and invisible. It is slow but it gets faster as you get better at it.
Not only is this a fabulous way to invisibly join two pieces of knitting, this technique is used in a lot of other advanced bind-offs, making it an investment in your future knitting happiness.
I would consider it “required” for intermediate knitters.
For a step-by-step photo tutorial, downloadable cheat sheet, and lots of Kitchener stitch tips and tricks, see our post The Complete Guide to Seaming Your Knitting With Kitchener Stitch.

How to Do Kitchener Stitch Without Fear - KnitFreedom.com
To Do the How to Do Kitchener Stitch Without Fear:
Cut your yarn tail as follows:
Measure out three times the width of the stitches to be bound off, plus add 6 inches for weaving in. Cut yarn.
Thread yarn onto a tapestry needle.
Setup Stitches:
- Go purlwise into first stitch on front needle. Pull yarn through.
- Go knitwise into first stitch on back needle. Pull yarn through.
After you do the setup above, repeat the following steps:
- Go knitwise into first stitch on front needle. Take the stitch off.
- Go purlwise into first stitch on front needle. Pull yarn through.
- Go purlwise into first stitch on back needle. Take the stitch off.
- Go knitwise into first stitch on back needle. Pull yarn through.
To finish, work step 1 and then 3.
To easily remember Kitchener stitch, repeat the following mantra: (front needle) Knit off, purl; (back needle) Purl off, knit.
More Info:
Even if you’ve run into a lot of frustration with this bind-off before, I want you to put that aside and try this with a fresh, new outlook.
I promise you can do it, because I’m going to show you everything slowly and carefully.
Keeping it simple: There are only two basic movement groups that make up this bind-off, and you say them like a mantra in your mind as you work.
The moves are “knit-off purl” and “purl-off knit,” and I explain them in the video and the photo tutorial below.
About sewn bind-offs and delicate yarn: Any time that you’re using a delicate yarn on a sewn bind-off, you’ll want to be careful not to pull too fast or too tight, because the yarn could break. Just go slow.
To undo this bind-off if you mess up, take the tapestry needle and follow the path of yarn back through the stitches the way you came, putting the stitches back on the needles as you go.
If your bind-off ends up being too loose, use your tapestry needle to pick through the stitches one by one and pull them tighter down the seam to tighten them up. If it’s too tight the best thing would be to take the bind-off out and start over.
Download an illustrated guide to Kitchener Stitch here.
Animated GIF: How to Do Kitchener Stitch Without Fear
If GIF doesn’t play immeditately when clicked, wait 20-30 seconds. It will play. Click the GIF again to stop.

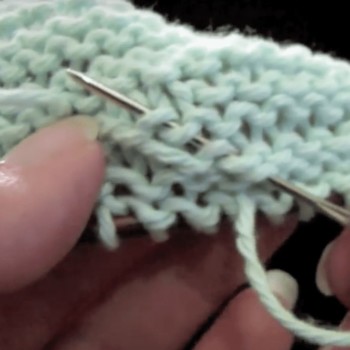
Mattress Stitch

Mattress stitch is a way to seam together pieces of knitting. To make this process as easy as possible, block the pieces to be seamed and use a sturdy, contrasting yarn as your seaming yarn.
Once you get the hang of Mattress Stitch, you can use the tail yarn of your project to do it (this is slightly more challenging because the yarn won’t stand out as you work).
Free Video for Subscribers
![]()
![]() This video is available to anyone with a free subscription. Sign up for free below.
This video is available to anyone with a free subscription. Sign up for free below.
Already a member? Log in here to watch.
To Do the Mattress Stitch:
- On the upper piece, insert the tapestry needle under both legs of the bottom-right-most stitch you can find. Pull the yarn through.
- On the lower piece, insert your tapestry needle under both legs of the top-rightmost stitch you can find. Pull the yarn through.
- On the upper piece, insert your tapestry needle under the stitch next to the one you went under previously. Pull yarn through.
- Repeat steps 2-3 until entire edge is seamed.
Weave In Ends
Restricted Video
![]()
![]() This video is available to members of Knitting Superstar University or the following classes:
This video is available to members of Knitting Superstar University or the following classes:
If you own this class, please LOG IN to watch.
