Seaming Bind-Offs
 The bind-offs in this section all have one thing in common: they are used to join two live pieces of knitting and bind them off at the same time.
These bind-offs don’t work to seam up pieces of knitting that are already bound off — you would use a regular seaming technique like Mattress Stitch for that.
Some of these bind-offs are easy and some are challenging.
I’ve listed the bind-offs here basically in order from easiest to most challenging, so if you want to seam something up and you don’t want it to be hard, start at the beginning of this list.
When you’re looking at the icons and the descriptions for the different bind-offs in this section, keep in mind that all seaming bind-offs are a little bit more challenging than their non-seaming counterparts.
The speed and difficulty ratings are relative, so if I say that it’s a beginner bind-off, it means compared to other seaming bind-offs.
Please don’t shy away from learning these bind-offs. They’re always in your ability level.
If you are a little bit nervous, just look for the ones that say beginner or intermediate.
If you neglect to learn any of the seaming bind-offs, you’ll miss out on being able to do cool patterns that require these techniques.
So step up to the challenge — I believe in you and I know you can do it. Even the hardest ones in here (probably the Three-Needle I-Cord Bind-Off or Kitchener Stitch) are within your reach.
You can do both of them, because I guide you through every single step of the way.
My favorite bind-offs in this section are Russian Grafting because it’s so fast and Kitchener Stitch, because once you master it, all the invisible bind-offs are easy.
Seaming Bind-Off Sampler Instructions
Seaming Bind-Off Sampler Instructions

The bind-offs in this sampler increase in difficulty as you go. Most of the techniques build on a technique learned in the previous bind-off.
To make this sampler, you will be working flat to prepare two strips of knitting. You will then seam them together with the different seaming bind-offs.
Back strip
With white yarn, CO 84 sts onto any length circular needle.
Work back and forth in k1p1 rib for 5 rows.
Change to red yarn.
Row 6 (rs): K. turn.
Row 7 (ws): P. turn.
Row 8: P12, k72. turn.
Row 9: P. break yarn, leaving 6-inch tail.
Push sts to other end of circular needle. This needle will be the back needle when you go to seam the two sides of this sampler together.
Front strip
With white yarn, CO 84 sts onto another circular needle (same needle size as 1st one).
Work back and forth in k1p1 rib for 5 rows.
Change to red yarn.
Row 6 (rs): K. turn.
Row 7 (ws): K12, p72. turn.
Row 8: K. turn.
Row 9: K12, p60. Move yarn to front and leave hanging down. Sl rem 12 sts onto L needle.
Set needle aside. This needle will be the front needle when you go to seam the two sides of this sampler together.
Hold the two pieces together horizontally with the RS (Stockinette-stitch sides) facing out. Use some stitch markers to pin the two pieces together. You should have a 12-st section of garter st on the L end of the knitting on both halves. The working yarn should be hanging down on the inside of the front needle, 12 sts in from the end.
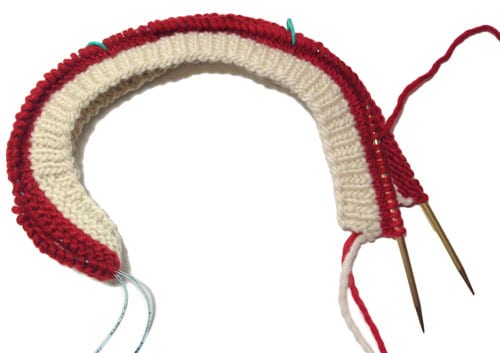
Check to confirm that you have the needles oriented correctly: point the needle-tips to the right. Look at the garter-stitch sections at the far end of the sampler pieces. You should see purl bumps facing you on both the front and back needles (check the step-by-step photos on the Kitchener Stitch for Garter Stitch to see what this looks like.
You are ready to start seaming.
- BO the first 12 sts using Russian Grafting. When done, place last st from crochet hook onto R needle. Sl next st on L front needle to R needle. BO 1. Move the st back to the L front needle.
- BO next 12 sts using the Japanese Bind-Off. When done, k1 from front L needle. BO 1. Move the st back to the L front needle.
- BO next 12 sts using the Zigzag Bind-Off. When done, k1 from front L needle. BO 1. Move the st back to the L front needle.
- Turn your work inside out and BO next 12 sts using the 3-Needle Bind-Off. When done, place remaining st on the L front needle and turn the knitting right side out again. Make sure the st is on front needle. It counts it as the first CO st for the next bind-off.
- BO next 12 sts using the 3-Needle I-Cord Bind-Off. When you have 1 st left on the R needle, sl 1 from L front needle to R needle, BO 1, and move the st back to the L front needle to be ready for the next bind-off. I suggest you wait to label this bind-off so the tag doesn’t get in the way while you do the next two bind-offs.
- BO next 12 sts using Kitchener Stitch. Wait to label this bind-off until you are done with the sampler.
- BO rem sts using Kitchener Stitch for Garter Stitch.
Block the sampler.
The Bind-Offs
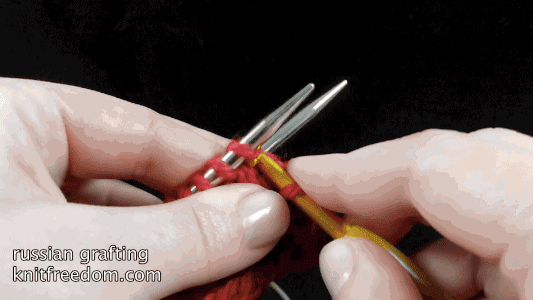
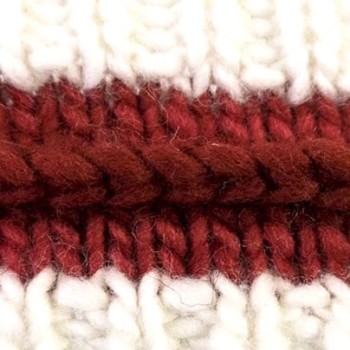
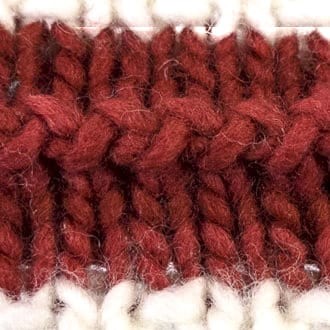
Russian Grafting

This is a fast seaming bind-off that’s good for beginners.
It has a visible zigzag seam that lays flush with the knitting. It is one of the few nearly-invisible seaming bind-offs that is not sewn (the other being the Three-Needle Bind-Off ).
This bind-off would work fine for the toe of a sock or anywhere that a sturdy, flat seam is wanted.
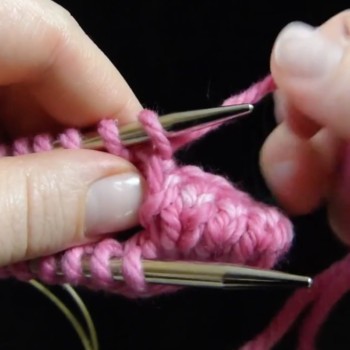
You’ll be using a crochet hook to do this bind-off which makes it go really fast. Use a crochet hook that is the same size as your needles, not smaller. This will make the bind-off more even.
You’ll need to transfer the working yarn to the other end of your needles before you start this bind-off, which I will show you how to do.
The trick here, as with most of the seaming bind-offs, is to get comfortable managing stitches on not one but two needles, and pushing the stitches to the tips of the needles without stretching them.
Pointy needles can be a bit painful in this case – you may want to use traditional needles like the Addi Turbos I use in the tutorial here.
This bind-off is part of: the Beginner Bind-Off Challenge
Restricted Video
![]()
![]() This video is available to customers of the following class(es):
This video is available to customers of the following class(es):
Click the links above to learn more about the class(es) OR Join KnitFreedom Premium now and get this and every other video we sell FREE.
If you own this class or are a member of Premium, please LOG IN to watch.
To Do the Russian Grafting (Bind-Offs Class):
Your working yarn is at the needle tips. Transfer it to the other end of the needle as follows:
- Pull back needle out.
- Turn back needle to face front needle. Sl 1.
- Slip all sts on front needle.
- Turn. Working yarn is at other end of sts.
Use a crochet hook the same size as is called for on your yarn label.
- With crochet hook, go knitwise into 1st st on back needle.
- Slip st onto crochet hook and off needle.
- Go knitwise into 1st st on front needle.
- Slip st onto crochet hook and off needle.
- Pull 1st st through 2nd st on hook.
- Go knitwise into 1st st on back needle, place st on hook.
- Pull 1st st through 2nd st on hook.
- Repeat steps 3-7 across.
- 1 st on hook. Cut yarn, wrap yarn around hook.
- Pull tail through rem st on hook.
- Thread yarn onto a tapestry needle.
- Poke needle down side sts and pull through.
1. Refer to these photos if you forget which move you just did:


2. Make sure you go into the stitch correctly.


Click image to play. If GIF doesn’t play immediately when clicked, wait 20-30 seconds. Click the GIF again to stop.
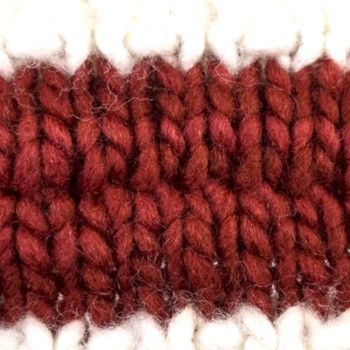
Japanese Bind-Off
This is a medium-speed seaming bind-off that leaves a visible ridged seam. It uses three needles.
The stretchiness of this bind-off depends upon which technique you use to finish it.
There are two pieces to this bind-off: Join the two pieces of knitting into one, and binding off those stitches. If you use a stretchy bind-off to do the second part, the whole bind-off will be stretchy and if you don’t, it won’t.
While working with three needles can be challenging, the Japanese Bind-Off is the easiest of the three-needle bind-offs and a good place for you to start.
Similar bind-off: Zigzag Bind-Off (which is stretchier and completed all in one step).
This bind-off uses: any bind-off you desire (shown in swatch photo above: Elastic Bind-Off; shown in step-by-step photo: Standard Bind-Off).
Restricted Video
![]()
![]() This video is available to customers of the following class(es):
This video is available to customers of the following class(es):
Click the links above to learn more about the class(es) OR Join KnitFreedom Premium now and get this and every other video we sell FREE.
If you own this class or are a member of Premium, please LOG IN to watch.
To Do the Japanese Bind-Off:
Use a third needle in your R hand, the same size as or 1 size smaller than the other two.
- Go knitwise through 1st st on front needle.
- Grab front loop of 1st st on back needle purlwise, slip st onto needle.
- Pull back st through front st. Remove st from front needle.
- Repeat steps 1-3 across.
- Turn work. Working yarn will be on the end opposite the needle tips.
- With an extra needle, sl 1. Continue to slip all sts in row.
- Turn work. Working yarn is now at the front.
- BO sts using the Elastic Bind-Off or any bind-off you prefer, depending on how stretchy you need your seam to be.
Click image to play. If GIF doesn’t play immediately when clicked, wait 20-30 seconds. Click the GIF again to stop.

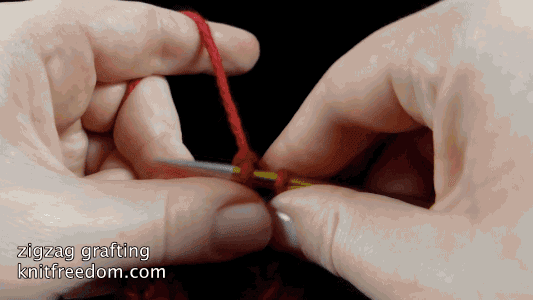
ZigZag (Ancient Greek) Bind-Off
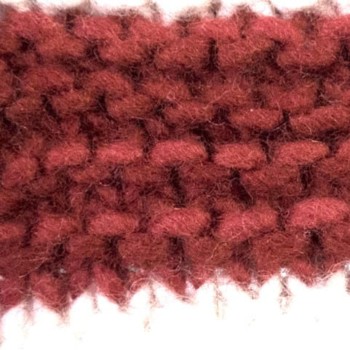
This is a very stretchy seaming bind-off that leaves a visible zigzag-shaped ridge.
It does have a distinctive zigzag look to it that is similar to Russian grafting, only this one has a pronounced ridge and the bind-off is very stretchy. It also stretches back into place nicely.
You’ll need an extra needle for this bind-off.
The interesting thing about this bind-off is that it has an ancient origin. In her book, Cast On, Bind Off, Cap Sease writes that this bind-off was discovered on the heel of an ancient Greek sock! That makes this a very old bind-off indeed.
This bind-off is part of: the Intermediate Bind-Off Challenge
Restricted Video
![]()
![]() This video is available to customers of the following class(es):
This video is available to customers of the following class(es):
Click the links above to learn more about the class(es) OR Join KnitFreedom Premium now and get this and every other video we sell FREE.
If you own this class or are a member of Premium, please LOG IN to watch.
To Do the ZigZag (Ancient Greek) Bind-Off:
Use a third needle in your R hand, the same size as or 1 size smaller than the other two.
- P1 on back needle.
- K1 on front needle.
- BO 1.
- P1 on back needle.
- BO 1.
- Repeat steps 2-5 to last st.
- K1 on front needle.
- BO 1.
- Cut yarn and pull through last st. Stretchy!
Click image to play. If GIF doesn’t play immediately when clicked, wait 20-30 seconds. Click the GIF again to stop.
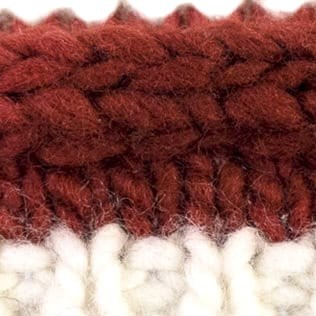
Three-Needle Bind-Off
This is a strong bind-off that leaves its seam on the wrong side of the work, making it nearly invisible.
It lays mostly flat, and, like the name suggests, requires a third needle.
You would most commonly use this bind-off on the shoulder seam of a sweater to secure the seam firmly (so it doesn’t sag) and to differentiate the back of the sweater from the front.
Because you have to handle three needles at once, this is a intermediate-to-advanced bind-off. It is one that I would consider “required reading” for intermediate-level knitters.
It would be smart to learn this bind-off before attempting the related but more-challenging Three-Needle I-Cord Bind-Off.
Tip: Use a smaller needle as the third needle. This will make it easier to get into the stitches on the left hand needles. If you use all blunt needles it’s going to be a little bit tricky.
This bind-off is also used in: 3-Needle I-Cord Bind-Off
Restricted Video
![]()
![]() This video is available to customers of the following class(es):
This video is available to customers of the following class(es):
Click the links above to learn more about the class(es) OR Join KnitFreedom Premium now and get this and every other video we sell FREE.
If you own this class or are a member of Premium, please LOG IN to watch.
To Do the Three-Needle Bind-Off:
Click image to play. If GIF doesn’t play immediately when clicked, wait 20-30 seconds. Click the GIF again to stop.

Three-Needle I-Cord Bind-Off
This is an advanced seaming bind-off that leaves an I-cord along the seam.
It makes a pronounced round ridge, is stretchy and strong, and like the name suggests, requires a third needle.
You would use this on any project where you would want a visible ridge that is shaped like an I-cord (a knitted tube) running along the seam, for example, on a child’s toy or quilt-square-type blanket.
I think you will feel really proud of yourself once you get the hang of this bind-off, because there are quite a few moving parts and steps involved.
But don’t let that intimidate you! Just follow the steps that I show you in the tutorial and you’ll be fine.
This is a bind-off that you will want to try just to see if you can do it, even if you don’t ever use it on anything.
Based on: I-Cord Bind-Off, 3-Needle Bind-Off
This bind-off is part of: the Advanced Bind-Off Challenge
Restricted Video
![]()
![]() This video is available to customers of the following class(es):
This video is available to customers of the following class(es):
Click the links above to learn more about the class(es) OR Join KnitFreedom Premium now and get this and every other video we sell FREE.
If you own this class or are a member of Premium, please LOG IN to watch.
To Do the Three-Needle I-Cord Bind-Off:
- Hold a third needle in your right hand.
- K1 from front needle. Do not drop st from needle.
- Move new st back to L front needle. Work steps 2-3 three times.
- 3 new sts cast on.
- K1 from front needle twice.
- Sl 1 from front needle.
- Go knitwise into 1st st on front AND back needles.
- K those sts together.
- BO 1.
- Move 3 sts from R needle to L needle.
- All sts moved to L needle.
- Repeat steps 5-11 across.
- 3 I-cord sts rem on R needle. No sts rem on L needle.
- BO 1 twice.
- Cut tail and pull through last st. Stretchy!
1. To keep everything simple, leave both of the left needles in front of your work as you go.

2.
Even though you are passing stitches back and forth and working between the tips of needles a lot, make sure that as you form the knit stitches you push them down onto the barrel of the needle before you pass them back over — otherwise everything will get too tight and cramped up.
This is just good bind-off etiquette, but it’s especially important to keep in mind on a bind-off like this where you are moving stitches back and forth a lot.
Click image to play. If GIF doesn’t play immediately when clicked, wait 20-30 seconds. Click the GIF again to stop.

Kitchener Stitch
This is an advanced sewn bind-off that is completely flat and invisible. It is slow but it gets faster as you get better at it.
Not only is this a fabulous way to invisibly join two pieces of knitting, this technique is used in a lot of other advanced bind-offs, making it an investment in your future knitting happiness.
I would consider it “required” for intermediate knitters.
For a step-by-step photo tutorial, downloadable cheat sheet, and lots of Kitchener stitch tips and tricks, see our post The Complete Guide to Seaming Your Knitting With Kitchener Stitch.
Even if you’ve run into a lot of frustration with this bind-off before, I want you to put that aside and try this with a fresh, new outlook.
I promise you can do it, because I’m going to show you everything slowly and carefully.
Keeping it simple: There are only two basic movement groups that make up this bind-off, and you say them like a mantra in your mind as you work.
The moves are “knit-off purl” and “purl-off knit,” and I explain them in the video and the photo tutorial below.
About sewn bind-offs and delicate yarn: Any time that you’re using a delicate yarn on a sewn bind-off, you’ll want to be careful not to pull too fast or too tight, because the yarn could break. Just go slow.
To undo this bind-off if you mess up, take the tapestry needle and follow the path of yarn back through the stitches the way you came, putting the stitches back on the needles as you go.
If your bind-off ends up being too loose, use your tapestry needle to pick through the stitches one by one and pull them tighter down the seam to tighten them up. If it’s too tight the best thing would be to take the bind-off out and start over.
Download an illustrated guide to Kitchener Stitch here.
Matching cast-on: Judy’s Magic Cast-On
Similar bind-offs: Kitchener Stitch for Garter Stitch
This bind-off is also used in: Tubular Bind-Off, Kitchener Double-Rib Bind-Off
Restricted Video
![]()
![]() This video is available to customers of the following class(es):
This video is available to customers of the following class(es):
Click the links above to learn more about the class(es) OR Join KnitFreedom Premium now and get this and every other video we sell FREE.
If you own this class or are a member of Premium, please LOG IN to watch.
To Do the How to Do Kitchener Stitch Without Fear:
Cut your yarn tail as follows:
Measure out three times the width of the stitches to be bound off, plus add 6 inches for weaving in. Cut yarn.
Thread yarn onto a tapestry needle.
Setup Stitches:
- Go purlwise into first stitch on front needle. Pull yarn through.
- Go knitwise into first stitch on back needle. Pull yarn through.
After you do the setup above, repeat the following steps:
- Go knitwise into first stitch on front needle. Take the stitch off.
- Go purlwise into first stitch on front needle. Pull yarn through.
- Go purlwise into first stitch on back needle. Take the stitch off.
- Go knitwise into first stitch on back needle. Pull yarn through.
To finish, work step 1 and then 3.
To easily remember Kitchener stitch, repeat the following mantra: (front needle) Knit off, purl; (back needle) Purl off, knit.
1. Always keep the yarn below the needle tips.


2. Watch your tension.


Tip #3: Bring the needles close together every time you pull the yarn through.
This will to help you get the tension right.


4. If you get lost and don’t remember where you are in the sequence, look at your working yarn.

Click image to play. If GIF doesn’t play immediately when clicked, wait 20-30 seconds. Click the GIF again to stop.

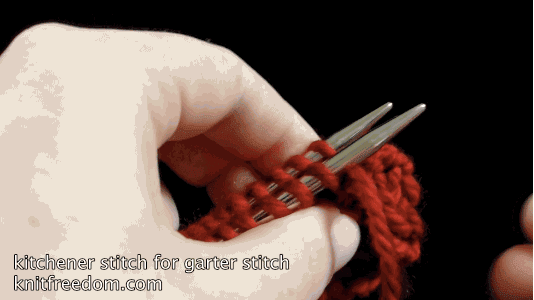
Kitchener Stitch for Garter Stitch
This is an invisible bind-off that is used to seam up two pieces of garter stitch.
It is closely related to Kitchener Stitch, which is both a help and a hindrance. Being familiar with the moves is good, but you might accidentally start doing regular Kitchener stitch, which is bad. So just stay sharp.
The mantra for this bind-off is the same on the front AND back needles:
“knit-off purl,” “knit-off purl.”
Note: if you finish this bind-off, whether it came out perfectly or not, pat yourself on the back, because I bet this is a new one for you and I applaud you taking on the challenge.
Similar bind-offs: Kitchener Stitch
Restricted Video
![]()
![]() This video is available to customers of the following class(es):
This video is available to customers of the following class(es):
Click the links above to learn more about the class(es) OR Join KnitFreedom Premium now and get this and every other video we sell FREE.
If you own this class or are a member of Premium, please LOG IN to watch.
To Do the Kitchener Stitch for Garter Stitch:
- Cut yarn, leaving 3x the width of the sts to be bound off, + 6 in. for weaving in later. Make sure you can see purl bumps facing you on both front and back needles.
- Thread yarn onto a tapestry needle.
- With tapestry needle, go purlwise into 1st st on front needle. Pull yarn through.
- Go purlwise into 1st st on back needle. Pull yarn through.
- Go knitwise into 1st st on front needle. Take st off needle.
- Go purlwise into next st on front needle. Pull yarn through.
- Go knitwise into 1st st on back needle. Take st off needle.
- Go purlwise into next st on back needle. Pull yarn through.
- Repeat steps 5-8 to last 2 sts.
- Go knitwise into 1st st on front needle. St comes off. Pull yarn through.
- Go knitwise into 1st st on back needle. St comes off. Pull yarn through.
1. Always keep the yarn below the needle tips.
2. Watch your tension.
Tip #3: Bring the needles close together every time you pull the yarn through.
This will to help you get the tension right.
Click image to play. If GIF doesn’t play immediately when clicked, wait 20-30 seconds. Click the GIF again to stop.