“Become A Knitting Superstar” Premium Video Knitting Library > Toe-Up Socks
Toe-Up, Two-at-a-Time Socks


Table of Contents
Worsted-Weight Toe-Up Socks With a Fleegle Heel
- Pattern Overview/Walkthrough of Finished Project
- Pattern: Worsted-Weight Toe-Up Socks for Magic Loop
Casting On For Toe-Up Socks
- Judy’s Magic Cast-On
- Judy’s Magic Cast-On for Two-at-a-Time Socks
- Fixing Mistakes: How to Fix a Loose Cast-On Row
- Avoiding Gaps in Two-at-a-Time Socks
Increasing For the Toe
- How to Do a Make One Left (M1L) and a Make One Right (M1R)
- Increasing on the Toes of Your Socks
- How to Recognize Your Increases So You Don’t Have to Write Anything Down
Fixing Mistakes on Two-at-a-Time Socks
The Fleegle Heel
- How to Tell When You Are Done Knitting the Foot and Ready to Start the Heel Gusset
- How to Turn the Fleegle Heel
- How to Purl Backwards
- How to Work the Final Decreases for the Heel
Finishing
- How to Bind Off Using the Invisible Ribbed Bind-Off
- How to Weave in Ends on Your Socks
- How to Block Your Socks
Toe-Up Socks – Extras
- Toe-Up Sock Patterns to Download In Other Weights And Sizes
- Adding Creative Stitches To a Basic Toe-Up Sock Pattern
- Making Your Own Custom Toe-Up Sock Pattern From the Fleegle Formula
- Toe-Up Socks With a Faux Heel Flap for High Insteps
- Illustrated Guide to the Invisible Ribbed Bind-Off
Heel Stitch-Pattern Videos
Toe-Up, Two-at-a-Time Socks
Toe-up socks are the next intermediate project after Magic Loop in the KnitFreedom Knitting Superstar course progression.
This fun, portable, and gift-able project is the perfect way to learn and practice the techniques that are going to take you to Knitting Superstardom.
What Is Toe-Up?
 Making socks from the toe-up is the norm in most European countries, but it is less prevalent in America.
The sock is simply constructed starting at the toe and ending with the cuff.
Never Run Out Of Yarn
Knitting socks from the toe-up enables you to use all the yarn you have, without ever worrying about running out before you finish, like you might with a traditional top-down sock.
It even lets you use leftover yarn to make ankle- and slipper-socks, without having to guess how long you should make the cuff.
Make Custom Cuff-Lengths
In fact, you can go the opposite route and make knee-socks, showing of today’s lovely patterned yarns for 11-12 inched of gorgeous sock. Again, without ever having to guess ahead of time how long you need to make the cuff.
Try On As You Go
Being able to try your sock on as you knit it means your sock will ft perfectly every time, or, if it doesn’t, you’ll at least find out before you finish. You can adjust the ft of your sock so that it matches your foot and leg exactly.
What Is Two-At-A-Time?
 Making socks two-at-a-time (abbreviated 2@at) is a fantastic new technique made possible by the discovery of Magic Loop and the 2 Circs methods.
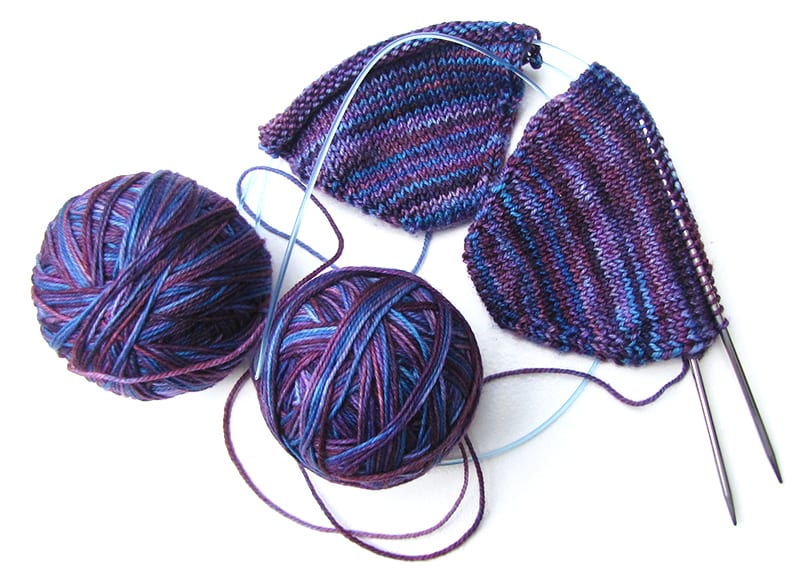
Using a clever cast-on, you simply work alternately from two balls of yarn to make both socks (or two of anything knitted in the round, for that matter) at the same time, on one set of needles.
Never Run Out Of Yarn
With two-at-a-time, you won’t ever have to guess how much yarn you’ll need for one sock.
Simply wind the yarn into two balls of equal weight, and you’ll have the right amount. In a pinch, you can even knit of both ends of one ball of yarn.
It’s Fast
Whether it’s because knitting a second sock is less enjoyable than knitting the first or not, knitting socks one at a time feels like it’s going slow.
You’re just never as excited to knit the second one. On top of skipping the dread that accompanies “second-sock syndrome,” you skip all the measuring, counting, thinking, and preparing that you’d have to do all over again on the second sock, and, amazingly, knitting two socks at once takes only about 50% more time than knitting one sock.
Everything Comes Out The Same
In addition, both socks will come out exactly the same – same length, circumference, and shape, without any extra thinking on your part. You won’t ever have to measure one cuff and then try to duplicate it on the next sock, which brings me to everyone’s favorite reason…
Never Knit A Second Sock Again
With two-at-a-time, when you’re done, you’re truly done. No more thinking, “Yay! Now all I have to do is do it all over again…” You’ll bind of and put the pair of socks directly on your feet, and skip happily to the yarn store to start a new project.
Important: You don’t have to knit both socks at the same time if you aren’t ready. To knit one sock at a time, just cast on for one sock and follow the directions, ignoring any mention of the other sock.
If you are just a little nervous, however, let me encourage you to try the two-at-a-time method. It’s barely any harder than one-at-a-time, and I’ll be with you every step of the way.
How To Use This Course
Just like cooking a meal with a recipe you’ve never used before, I highly recommend that you scan all the way through this tutorial, or at least read a section ahead before beginning.
The reason I’m asking you to do this is that some of the techniques have more than one video, and many chapters give basic instructions followed by troubleshooting videos. I’d hate for you to miss seeing a video that would’ve helped you. Ready? Let’s get started.
Project – Toe-Up, Two At A Time Socks
For your frst foray into toe-up socks, we are going to make a pair of lounging socks in a medium-thick yarn so that the project goes quickly.
Download the Worsted-Weight Toe-Up Socks for Magic Loop pattern here
Choose Your Materials
Yarn: You’ll need two skeins of heavy worsted-weight wool for these socks – about 180 yards total. I recommend that you choose a machine-washable yarn. Here are some great yarns to pick for this project:
- Shibui Merino Worsted
- Berocco Pure Merino
- Malabrigo Twist (shown in video walk-through)
Ask the yarn shop employee to wind the yarn into two separate balls (usually not a problem as you will probably by buying two skeins anyway).
Needles: The gauge for this project is 4.5 sts/in in St st (knitted in the round). Choose a 47-inch- long circular needle with pointy tips, such as Addi Lace, in a size that will cause you to achieve the right gauge.
Start with a size 8 and check to make sure you are getting the right gauge.
Just make a round tube, like we did for the Magic Loop tutorial, block it, and then check your gauge. You could skip this step and just start, if you are careful to check a couple inches into your sock and are okay with starting over. Up to you.
Next, choose which size you are going to make. This pattern comes in two sizes:
- Small-Medium fits a foot that measures 7 inches around the ball of the foot;
- Medium-Large fits a foot measuring 8 inches around.
If your (or the sock recipient’s) foot measures less than 7 or more than 8 inches around, go down or up a needle size to compensate.
Tips For Following The Pattern Easily
You may want to go through the pattern and circle with pencil all the numbers that correspond with your size.
If you were making the Medium-Large, you would circle the number in red: 28(32).
Walk-Through Of Pattern
This first video will walk you through how the sock is constructed, so you have a sense of context when we begin.
KNITFreedom – Toe-Up Socks Pattern Overview: How to Knit Basic Socks from the Toe Up
Let’s start knitting. I’ll take you through the entire pattern, step-by-step. With your pattern, needles, and two balls of yarn beside you, watch the videos in order, and we’ll make the socks together.
Knit Two-at-a-Time, Toe-Up Socks
Learn Judy’s Magic Cast-On
One of the greatest inventions of all time, Judy’s Magic Cast-On was originally published in Knitty.com’s Spring issue of ’06 and is absolutely the best way to start toe-up socks. This video shows you how.

Judy's Magic Cast-On (JMCO)
Cast On For Both Socks
We start by casting on for one sock, and then immediately we use the second ball of yarn to cast on for the second sock.
I’ll show you how to use Magic Loop to work one round, two-at-a-time, and then it’s time to begin to increase.

Toe Up Socks – JMCO for Two-at-a-Time and 1st Round of Knitting
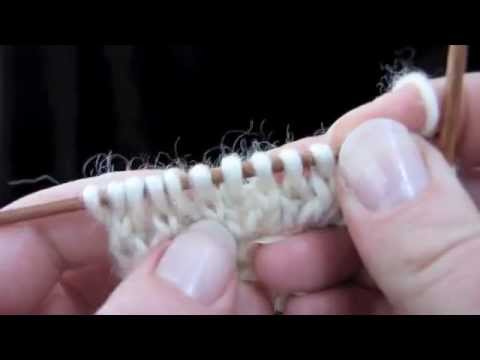
Loose Cast-On Row
If this happened to you, you can fx this issue by working the loose bits towards the tail and then tightening the tail. You can do this at the end or now, whichever you prefer.

Troubleshooting A Loose Toe-Up Cast On
Avoiding Gaps in Two-at-a-Time Socks
When you’re using Magic Loop to knit your two-at-a-time socks, what you do in Ready Position, especially between socks, makes a big difference.
To prevent holes in the sides of your socks, you must manipulate the cable properly and not pull the first stitch too tight.
Here’s how to hold your cable and start your rounds to prevent any holes in your socks.

KnitFreedom | Two-at-a-Time | Troubleshooting – Avoid Gaps When Knitting Two-at-a-Time
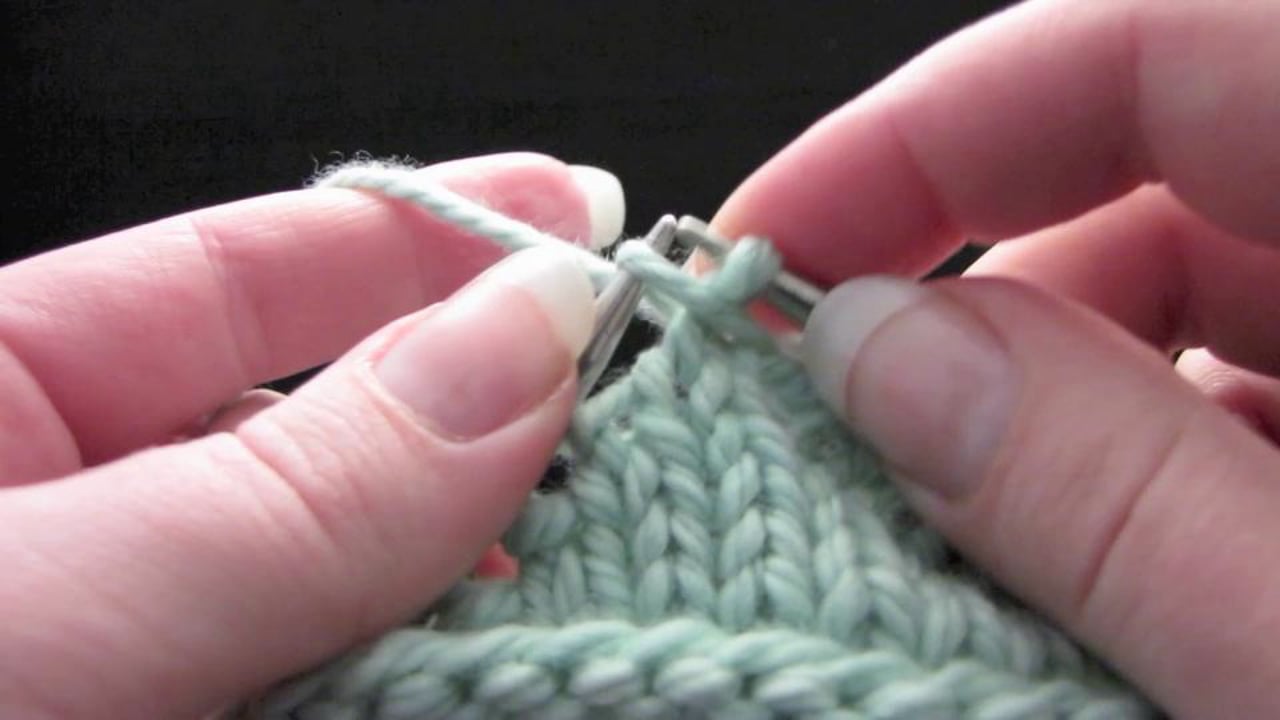
Increase For The Toe
In these two videos, I show you how to do the two kinds of increases found in your pattern, the M1L and M1R, and why we do them. Continue increasing as in the video until your socks contain the specified number of stitches.

Toe Up Increases: Overview
How To Do A M1L And M1R, Shown On Toe-Up Socks
Since I’m knitting along with you, I’ll show you what this looks like on your socks. You can also review the videos for M1L and M1R in your video dictionary. By the way, this is the hardest part. It’s all downhill from here.

Toe Up Socks – 1st Increase Round
Keeping Track Of Your Increases
Here’s how to read your work so you don’t have to write anything down while you knit.
Toe-Up Keeping Track of your increases
Here’s what it looks like when you’ve finished increasing for the toes. Tip: tuck your tails inside your socks to keep them out of the way. 
Troubleshooting Two-at-a-Time Toe-Up Socks
Before we move on, let me show you a few troubleshooting videos in case your socks aren’t coming out exactly right.
Keeping Your Balls Of Yarn From Tangling
You’ll want to learn how to keep your balls of yarn separate when you are knitting two-at-a-time, and there are a few tricks to doing it easily. Don’t let your yarn tangle. Set a good Magic Loop example, and watch the video.
![[KnitFreedom] | Two-at-a-Time | Troubleshooting - Avoid Tangles When Knitting Two-at-a-Time](https://i.ytimg.com/vi/Tq8xO4B0WMM/hqdefault.jpg)
[KnitFreedom] | Two-at-a-Time | Troubleshooting – Avoid Tangles When Knitting Two-at-a-Time
Socks Not Joined On One Side
Sometimes people are concentrating so hard that they forget to come back to ready position, and consequently get turned around. Here’s what to do.

Troubleshooting – 2@aTime Issues
You’re doing great! You’re totally past the hard part. Now, let’s make a heel.
The Fleegle Heel
Knit Foot
Continue to knit even until your socks reach the fronts of your ankles, as shown in the video below. Once they are at this point, you are ready to start making the heel.
![[KnitFreedom] Toe Up Socks: When To Start Increases For Fleegle Heel](https://i.ytimg.com/vi/DmYhggEeWcs/hqdefault.jpg)
[KnitFreedom] Toe Up Socks: When To Start Increases For Fleegle Heel
Make Gusset
You’ll be increasing again, just like you did for the toe, only this time, only increase on one side of the sock – the “heel” needle.
Increase following the pattern and the video above until you have the specified number of stitches on your heel needle.
Tip: so that you don’t have to write anything down, review the video above on how to tell where you are on your increasing.
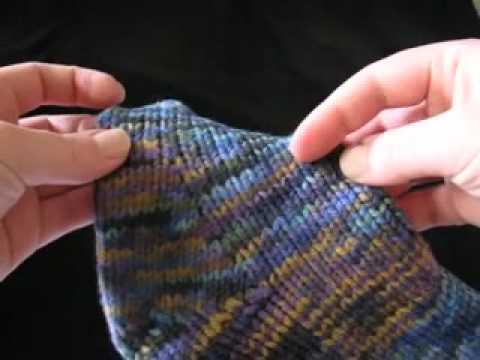
Turn Heel
If this is your first time turning a heel, make sure you have a quiet spot and no one talking to you.
Watch the video and then follow along in the pattern. Once you have turned one heel, go directly to the second sock and do it all over again, with the second ball of yarn, only this time, check out the next video and see if you want to try it.
![[KnitFreedom] Socks | Heels - No-Holes Fleegle Heel for Toe-Up Socks](https://i.ytimg.com/vi/qMrGhzUp6LE/hqdefault.jpg)
[KnitFreedom] Socks | Heels – No-Holes Fleegle Heel for Toe-Up Socks
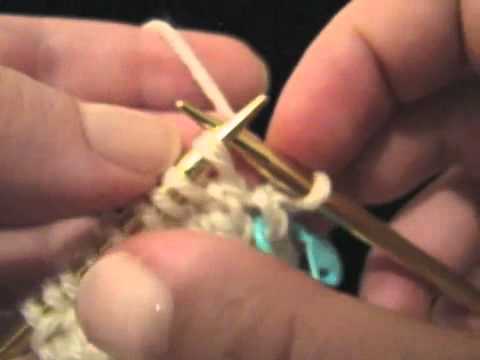
Bonus – How To Knit (Well, Purl, Really) Backwards
This technique is optional, but take a look and see if you feel comfortable trying it.
It will save you a lot of time because if you know how to do it, you don’t have to turn your work back and forth every row.
This technique is very useful in Entrelac knitting, where you constantly have to turn your work after only a few stitches, and, of course, in turning any sock heels or doing any kind of short-rows.
![[KnitFreedom] Knit Backwards: Save Time By Knitting Backwards](https://i.ytimg.com/vi/0h72xZoGp6o/hqdefault.jpg)
[KnitFreedom] Knit Backwards: Save Time By Knitting Backwards
Final Heel Decreases
When you finish turning the heel, you’re almost done.
You’ll need to work a few more rounds with strategically-placed decreases to bring the number of stitches on your heel needle back down to the original count.

Toe-Up Heel – Final Decreases
Cuff, Bind-Off, and Finishing
It’s time to head for home
Knit Cuff
Continue to work even until your cuff measures 5.5-6 inches from the top of your heel. You can mark your first round after you finish turning your heel so that this is easy to measure later.
Work In Rib For 1 Inch
Pretty straightforward. Review the 1×1 rib tutorial in the Video Dictionary if you get stuck here.
Bind Off Using The Invisible Ribbed Bind-Off
Another invention of pure genius (not mine!), this bind-off blends right into your ribbing, and is just as stretchy. Don’t use a regular bind-off – you won’t be able to get your foot into the sock, I promise.

KNITFreedom – Invisible Ribbed Bind-Off – A Stretchy Invisible Bind-Off For 1×1 Ribbing
To do the invisible ribbed bind-off, cut a long tail of at least 6 times the circumference of the project you want to bind off. Thread the tail on a tapestry needle.
Set-Up:
- Go purlwise into stitch 1 (the stitch closest to the needle-tip)
- Go knitwise FROM THE BACK into stitch 2.
Identify stitches 1, 2, 3, and 4. These labels do not change until you finish the repeat.
Repeat:
1) Go knitwise into stitch 1, remove stitch from needle
2) Go purlwise into stitch 3
3) Go purlwise into stitch 2, remove stitch from needle
4) Go knitwise FROM THE BACK into stitch 4
An easy mantra to repeat:
1) Knit off purl,
2) Purl off knit
Below you can download an illustration of the steps of the invisible ribbed bind off that has proved to be helpful for many of my students. Download Invisible Ribbed Bind-Off Illustration
Weave In Ends And Block
Here’s how to weave in your ends on ribbing and inside the toe.

Weaving In Tails On Ribbing

You may want to block your socks – here’s a photo comparison to show how much nicer a blocked sock looks and fits.
Especially if you are giving these socks as a gift, blocking adds the final touch by letting the sock relax into its new shape as it dries.
If you’d like to watch a video to see how to block your socks, here’s how to block your knitting.
You can buy sock blockers at your local yarn store; they are made of plastic or wood and shaped like a foot.
If worse comes to worst, you can always put them on your own feet and order your family around for a few hours. “Honey, can you get that? I can’t get up, my socks are blocking.”
You’re done.
Congratulations – you’ve just accomplished something many knitters never have. And now that you’ve seen how easy it is, I know you’ll be saying, “Everyone should know how to do this!”
I hope you enjoy the super-easy technique of toe-up socks, and that you (or someone you love) are wearing your gorgeous new socks with joy. You’re totally on your way to Knitting Superstardom – and you already know more than almost everyone at your LYS.
Toe-Up Socks – Extras
The next section covers toe-up socks for any weight of yarn, as well as making your own patterns for toe-up socks.
Toe-Up Sock Patterns In Other Weights And Sizes
Now that you understand how simple it is to construct a pair of toe-up socks, why not make tons of them? Here are links to download my other toe-up socks patterns for you to try.
- Fingering-Weight Toe-Up Socks for Adults
- Bulky-Weight Toe-Up Slipper Socks for Adults
- Super-Bulky-Weight Toe-Up House Socks for Adults
- Aran-Weight 2-Hour Toe-Up Socks for Newborns
Adding Creative Stitches To a Basic Toe-Up Sock Pattern
It’s easy to add texture elements, like cables or lace, to these basic patterns.
Look through your favorite stitch dictionary and find a stitch pattern with a repeat number that fits exactly or almost exactly into the number of stitches called for in the cuff of the pattern.
In a repeating pattern, the section that is repeated is usually between 4 and 12 stitches wide, and most will ft into the number of stitches you need for the sock cuff.
The Fingering-Weight Toe-Up Sock for Adults calls for 56 stitches around the cuff for a medium, or 28 stitches on each needle.
Find a cable pattern that is 4 or 7 stitches wide, and work it along the top of the foot, knitting the sole of the foot in Stockinette stitch, and then work the cables around the entire cuff. Voila! New pattern, designed by you.
Just remember, lace tends to be more stretchy than Stockinette stitch, while cables tend to be less stretchy. Plan accordingly.
Custom-Make Your Own Toe-Up Socks Pattern Using the Fleegle Formula
There are many sock patterns available in books and on the Internet, and many more variations you can make using the techniques above.
But let’s say you want to design your own basic toe-up sock pattern like the one you learned here, with any yarn or needles you have. The formula is really easy – I must give credit to Fleegle, who published this easy formula for us all to enjoy.
I describe it to you in my own words here.
Toe-Up Cast-On
Using a size needle that is appropriate to your yarn weight (suggested on the yarn label), and using Judy’s Magic Cast-On, cast on about an inch and a quarter of stitches.
Increase For Toe
Increase just like we did for our project, stopping when the sock is as wide as your foot at the “ring” (fourth) toe.You don’t want to increase until the sock is as wide as your whole foot, because then it will sag and fall off. No fun.
Count the stitches on your sock – you will use this stitch count when we get to the heel.
Knit Foot, Increase For Heel
Work even until the sock reaches the front of your ankle. Increase on the heel needle just like we did for our worsted-weight sock, stopping when you have, on the heel needle, two less than the total number of sock stitches you had for the foot.
Turn Heel
Placing a marker at the midpoint of your heel stitches, knit to 2 sts beyond the marker.
Decrease, K1, then turn and purl back to 2 sts beyond the marker.
Decrease, P1, and turn. You may remove the marker.
Continue turning the heel by working up to the gap, as I showed you in the tutorial: decreasing, working 1 more, and then turning your work.
You are done turning the heel when your K1 after the decrease is the last stitch on the needle.
Working exactly like we did on our project, knit once across the instep and do a final decrease on the right-hand side of the heel. You should be back to your original number of stitches.
Work Cuff And Ribbing
Knit even for the cuff as long as you like. If you want to make long-cuffed socks strong or even knee try on the after you have knitted 8 inches – may need to increase one stitch either side of sock p in a few more again and increase as needed. If you are making knee socks, do at least 1.5-2 inches of ribbing, decreasing at the very top to adjust for the leg getting narrower at the top of the calf.
Bind Off Invisibly, Weave, And Block
Bind off using the invisible ribbed bind-off, weave in your ends, block your socks, and you’re done. This is the formula that I’ve followed for all my toe-up sock patterns, so you should feel comfortable with it once you’ve knitted the socks along with me.
Two-at-a-Time Toe-Up Socks with a Faux Heel Flap For High Insteps
Sometimes, the simple toe-up sock formula provided by Fleegle doesn’t cover all your toe-up sock needs. If you have high insteps or for any other reason would like to knit toe-up socks that have a built-in “faux” heel flap, read on.
Download the patterns here:
- Worsted-Weight Toe-Up Faux-Heel-Flap Socks for Adults
- Fingering-Weight Toe-Up Faux-Heel-Flap Socks for Adults
Read the blog post about faux heel flaps here. Learn about using a high-instep sock pattern here.
To learn to how to work a faux heel flap, watch the video below.
How To Knit The Faux Heel Flap Heel
Heel Stitch-Patterns
One of the fun things about heel flaps is that they give you the opportunity to add textured stitches to the heel. Below are two videos showing popular heel-stitch patterns you can try.
Slip-Stitch Heel
![[KnitFreedom] Socks | Heel Stitches - Slip-Stitch Heel Pattern](https://i.ytimg.com/vi/wIlUOLJRWM8/hqdefault.jpg)
[KnitFreedom] Socks | Heel Stitches – Slip-Stitch Heel Pattern
Basic Slip-Stitch Heel Pattern
Row 1 (RS): *(Sl 1, k1), repeat from * across, end k1.
Row 2 and all even rows: Sl 1, P rest of sts.
Repeat rows 1-2 for desired heel flap length.
Eye-of-the-Partridge Heel
KnitFreedom | Socks | Heel Stitches – Eye-of-the-Partridge Heel Pattern
Eye-of-the-Partridge Heel Pattern
Row 1: Sl 1, (k1, sl 1) until 1 st remains before a visible gap in the stitches. SSK. Turn.
Row 2: Sl 1, p until 1 st remains before a visible gap in the stitches. P2tog. Turn.
Row 3: Sl 1, (sl 1, k1) until 1 st remains before a visible gap in the stitches. SSK. Turn.
Row 4: Sl 1, p until 1 st remains before a visible gap in the stitches. P2tog. Turn.
Repeat rows 1-4 for desired heel flap length.