“Become A Knitting Superstar” Premium Video Knitting Library > Mosaic Knitting
Majestic Mosaics
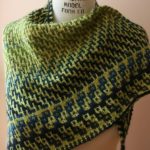
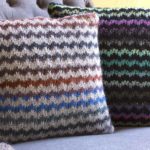
Table of Contents
Project: Stripes Brigade Mosaic Pillow
Basic Mosaic Knitting
Slip-Stitch Knitting
Fixing Mistakes In Mosaic Knitting
Advanced Mosaic Knitting
Majestic Mosaics
My favorite Mosaic knitting project was a colorful Christmas stocking I made one year. I was living in a houseful of knitters, or so it seemed, as we were three girls who knitted all the time plus several (varying) boyfriends who knitted almost without meaning to, as if by force of osmosis.
 I remember that Christmas because we knitted these crazy Mosaic Christmas stockings with our names on them. Mine was bright pink with purple, Julia’s had green and blue, and Muffin (my friend Brittany) had lots of reds in hers. Cam, one of the boyfriends, did a green-and-brown thing. We sewed in felt linings on Brittany’s sewing machine (and by “we” I mean “Brittany”), and then hung them up by her fireplace to decorate the living room and windows.
We’ve come a long way from those Montana winters now — Brittany is married and living in Seattle, Julia is in sunny Southern California, and I’m all the way in Mexico. But when I see my family for Christmas, I take out my crazy pink Mosaic Christmas stocking and hang it by the fire and think, “Man, what fun. I loved knitting with those guys.”
What I particularly like was that we did the stockings in Mosaic knitting. Although it seemed like a simple technique, it wasn’t as easy as we thought, and we kept on running into problems. Julia must have re-knit hers three times and, although Brittany’s came out perfect, mine had lots of wrinkles from tension problems as I learned how to slip the stitches without pulling the yarn behind too tight.
We were knitting in-the-round as well, with the thick Noro yarn getting tangled in the circular needles as we changed colors every other round. We were essentially making what was for some of us a first sock, but huge and not shaped for a person.
Everyone was relieved but very proud when the stockings were done. And every Christmas, mine still hangs as a reminder of how much candy, toys, and love can fit into one really big sock.
What Is Mosaic Knitting?
 Mosaic knitting is a way of knitting color designs that is perfect for a beginner. It’s easy because you only use one yarn at a time across each row.
The trick is to use slipped stitches in a purposeful pattern to make interesting color designs appear. Knitting this way makes it look like you’ve used more than one color at a time even though you haven’t.
Mosaic knitting is for everyone – you only need to know how to knit and purl to start learning it. If you are already familiar with slipping stitches, making stripes, and reading your work, mosaic knitting will be even easier for you.
Where Did Mosaic Knitting Come From?
In the 1970’s, a knitter and designer named Barbara Walker invented mosaic knitting and coined the term “mosaic knitting.”
She got so excited by the seemingly infinite possibilities of the technique that she created hundreds of charts and motifs herself and published a definitive book on the technique.
How You Are Going To Learn Mosaic Knitting
I’ve put together three simple but very effective swatch exercises for you to learn everything you need to know about mosaic knitting.
Each swatch exercise comes with a video on how to do it.
There is also a cute pillow you’ll be knitting, which is a fun project. It will help reinforce the concepts you’ve learned while exposing you to situations where you can make mistakes – an important part of getting better at knitting.
 This mosaic throw pillow, which is simple to knit but requires you to use some possibly unexplored finishing techniques, will add to your confidence for future projects, especially those requiring sewing or attaching notions and embellishments.
After you have gone through the three exercises in this course and knitted the throw pillow, you will have gained a lot of experience and know-how in a very short time.
In addition to intermediate skills like reading your work, taking out your mistakes, and reading different kinds of patterns, you will also have learned to knit from a mosaic chart, which makes knitting from other kinds of charts a breeze.
I also include links to recommended beginner, intermediate, and advanced projects for practice at different points in the course.
By the end of this short course, you may be surprised at how ready you feel to do new techniques like Brioche Knitting, Fair-Isle Knitting, and Double Knitting – all styles of two- or three color knitting that use multiple yarns at once.
Ready to get started? The next chapter contains instructions for knitting your first swatch.
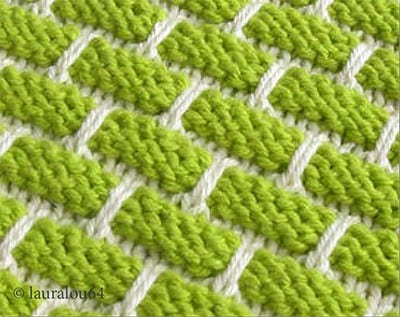
Learn Basic Mosaic Knitting – Easy Mosaic Brick Pattern
 To start learning mosaic knitting, let’s dive right in and make a swatch.
Find two yarns of the same weight in two different colors and a pair of needles in the size recommended on the yarn ball-band.
Bulky yarn is my favorite choice for things like this.
Take a look at the instructions for the Easy Mosaic Brick Pattern below the video.
If you understand most of the abbreviations, give it a try and try to knit the swatch on your own. Refer to the Three Tips for Mosaic Knitting and Basic Mosaic Troubleshooting sections that follow if you need help as you go.
The reason I want you to try it on your own is that then, when you watch the video with me, you will have some experience and context, and maybe some questions you want answered.
Either way it will set you up to learn more, faster, if you attempt the patterns in this ebook on your own before watching the videos.
If you don’t feel comfortable doing that, or don’t understand the pattern instructions, that’s perfect too – I’ve explained everything in the videos that follow.
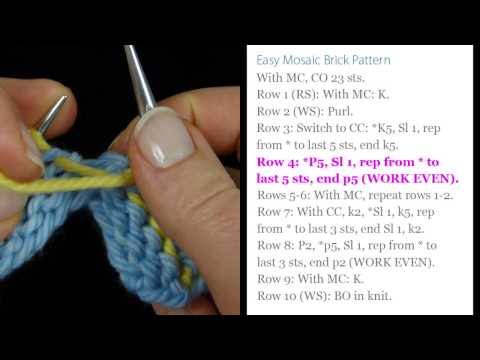
Easy Mosaic Brick Pattern
Easy Mosaic Brick Pattern
CO 23 sts or a multiple of 6 sts -1.
Row 1: (RS): With MC: K.
Row 2 (WS) and all WS rows: Purl all purl sts and slip all slipped sts.
Row 3: With CC, *K5, sl 1, rep from * to last 5 sts, end k5.
Row 4: *P5, sl 1, rep from * to last 5 sts, end p5.
Row 5: With MC, repeat Row 1.
Row 6: Repeat Row 2.
Row 7: With CC, k2, *sl 1, k5, rep from * to last 3 sts, end sl 1, k2.
Row 8: P2, sl 1, *p5, sl 1, rep from * to last 2 sts, end p2.
Row 9: With MC: K.
Row 10: BO in knit (k each stitch as you bind it off even though you’re on the WS). This helps the edge of the swatch not curl so much.
Three Tips for Mosaic Knitting

Three Tips for Mosaic Knitting
1. Slip All Stitches With the Yarn on the Wrong Side (WS)
This keeps the messy stuff on the wrong side of the work. You will be able to recognize the wrong side of the work because it has horizontal rows of purl bumps.
2. Keep Your Floats Barely Loose, Never Tight
Floats are the strands of unused yarn that remain behind slipped stitches.
Float tension refers to how tight those strands of yarn are. The floats need to be loose and even for your knitted fabric to lay flat and smooth.
The time to pay attention to float tension is right after you slip a stitch. Basically, don’t pull your yarn too tight after slipping a stitch.
Being careful to not pull your floats too tight is a good habit that will come in handy when you are ready to do more complicated two-color knitting techniques like Fair-Isle and Intarsia.
3. Always Work Even On the Wrong Side
On a mosaic knitting project, you don’t have to think hard or look at your pattern to know what to do on the wrong-side rows – simply work even. This means slip the slipped stitches and purl the purl stitches. Just keep this rule in mind: On the RS, look at the pattern. On the WS, look at your work.
Fixing Mistakes: Basic Mosaic Troubleshooting
The most common mistake in mosaic knitting, both on the right side and the wrong side, is to keep knitting or purling and neglect to slip a stitch when you were supposed to.
The good thing is that, because you’re using two colors of yarn, it’s really easy to notice your mistakes – they will be glaring.
In the example in the video below, I did just that. I messed up on Row 8, which is a wrong-side row.
What I’m going to show you is how to notice mistakes like this and how to fix them without having to take out your work or go backwards.

Basic Mosaic Troubleshooting
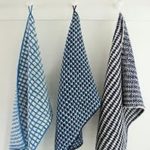
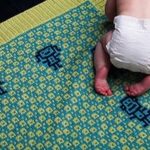
Practice Project – Ballband Dishcloth
This cute free dishcloth pattern is similar to the brick motif you just learned.
However, it takes advantage of a neat aspect of mosaic knitting – that you can do it in Stockinette stitch, Garter stitch, or a combination of both.
This pattern uses Stockinette for the “outlines” and Garter stitch for the “bricks.”
Unlike the brick pattern I showed you in the video, this pattern has you work 2 rows in one color and 4 rows in the other.
Recommended Free Pattern – Ballband Dishcloth by Peaches & Cream
If you are going to try out this pattern, here’s some extra information that may help:
The abbreviations “YF” and “YB” mean “yarn forward” and “yarn back.” These just serve as reminders for what you already know – that you always leave the yarn to the wrong side of the work when slipping stitches.
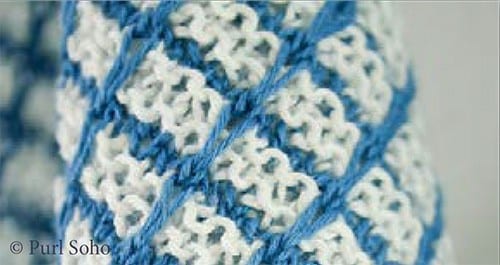
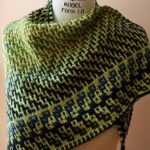
Learn Slip-Stitch Knitting – The Zigzag Stripes Motif
 Slip-stitch knitting refers to patterns that use slipped stitches but that, unlike mosaic knitting, don’t always follow the rule of working even on the wrong side.
On slip-stitch knitting you need to pay attention to both the right and wrong sides, because the patterns are different. This extra flexibility allows for pretty and interested stitch combinations that go beyond what you can do with true mosaic knitting.
In this chapter, you’ll practice a motif where you also work stripes of one color at a time (the basic mosaic concept) but this time, you’ll also do the following:
- You’ll work four rows in each color, not just two.
- You’ll twist the yarns every 2 rows to keep the edges even.
- You’ll have to pay attention on the purl side because there are pattern rows on both sides.
- You’ll be slipping more than 1 stitch at a time so you’ll need to pay attention to float tension.
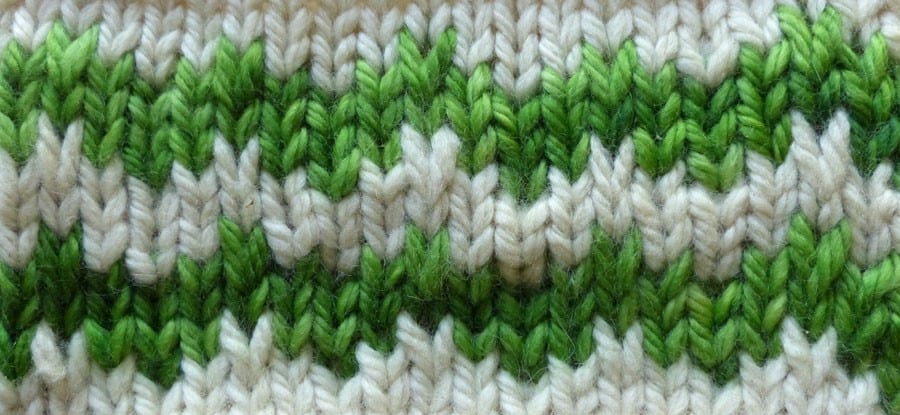
The Zigzag Stripes Motif shown above is the basic pattern you’ll use on the pillow project in the next section.
But before you jump right in to making the pillow, make the practice swatch on the next page. Like in the last section, I recommend you try to knit this swatch on your own before watching the videos.
In this demonstration, I use white for the main color (MC) and green for the contrasting color (CC).

Zigzag Stripes Motif
Zigzag Stripes Swatch
With MC, CO 21 sts or a multiple of 4 sts + 1.
Setup Rows
Row 1 (RS): K.
Row 2: P.
Pattern Rows
Row 1: K1, (Sl 3, k1) across.
Row 2: P2, (Sl 1, p3) to last 3 sts, end Sl 1, p2.
Row 3: Twist yarns once around each other. Continuing in same color as Rows 1-2, K across.
Row 4: P across. Switch yarns.
Repeat Pattern Rows 1-4 until knitting reaches desired length, switching colors after every Row 4.
BO.
Fixing Mistakes – Advanced Mosaic Troubleshooting
If you make a mistake on this motif, you’ll find out as soon you get to the end of the row, because you won’t have the right number of stitches to complete the instructions. For example, it might say “P2” but you’ll have only stitch left.
Looking back over the stitches in the row, it will be easy to see where you went wrong just by the colors of the stitches on your needle.
If this happens to you, back up to the point in the row where you made the mistake and work the stitch correctly instead.

Advanced Mosaic Troubleshooting
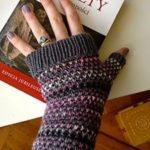
Project: Stripes Brigade Mosaic Throw Pillow
 It’s time to actually make something! And it’s going to be awesome.
The following pillow pattern uses the Zigzag Stripes Motif that you just learned. The self-striping yarn makes zigzags of color that gradually fade and transition as they contrast against a solid background.
Download the Stripes Brigade Mosaic Throw Pillow pattern here.
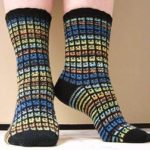
Choosing Yarn for Two-Color Projects
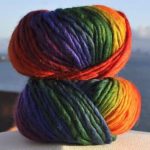
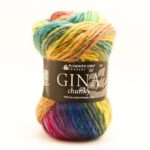
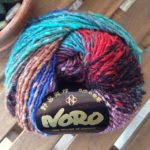
To make sure your pillow comes out looking amazing, you need to pick two yarns that will work well for the pattern and will also coordinate with each other and your decor. The thumbnails above link to my recommendations for bulky self-striping yarn.
The Easy Part: Choose Yarns of Equal Weight
Choose two yarns of the same thickness or “weight.” This pattern calls for bulky-weight yarn, and you can check out my Yarn Recommendations section for yarns that will work well here.
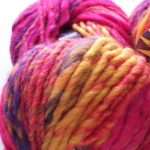
Choose Similar Fibers and Textures
Your project will look its best if you choose yarns that are similar to each other in fiber and texture (texture being the way the yarn is twisted, or plied). For instance, the yarns used in the pillows above make sense together because they are both slightly-fuzzy, mostly-wool yarns that are not very tightly twisted.
You can tell by looking at them that the textures look similar. The yarn labels confirm that both yarns are mostly wool.
Two super-soft and smooth merino wool yarns that are tightly plied, like Malabrigo Chunky (the yarn I’ve used in the videos), would also work great as well.
The Fun Challenge: Choosing Colors
When you pick out colors, make one of them a self-striping yarn to increase the impression that this is a complicated project involving many colors.
For your contrasting color, pick a solid-colored yarn that coordinates with but isn’t exactly the same as any of the colors in the self-striping yarn.
You can make this pillow in subdued colors for an elegant or earthy look, or in loud neons or rainbow colors for a teenager’s room or a college student’s dorm room. School colors, anyone?
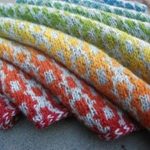
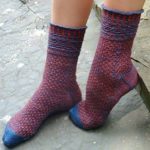
Patterns for Practice – Easy Mosaic Knitting
Now that you’ve gotten the hang of basic mosaic knitting, why not check out some of the really cute patterns you can already knit?
Here are five adorable, easy/intermediate mosaic patterns that you can knit right now. Enjoy!


Have fun knitting, but don’t stray too far. There’s much more learning to be had right here.
In the next section you’ll learn a to decipher mosaic charts, enabling you to knit some of the coolest mosaic projects out there.
How to Read a Mosaic Chart
Good job on the pillow! I hope it was a great success. To round out your mosaic knitting education and rocket you into the stratosphere of chart-reading, here is an advanced section on mosaic knitting from charts.
 As you can probably tell from the photo at right, mosaic knitting can be a lot more sophisticated than what we’ve done up to this point.
The physical technique of mosaic knitting never gets much harder that what you’ve seen – knit, purl, and slip is still all there is – but the patterns themselves can get complicated.
I’m talking about charts.
Charts are an easy way to visually communicate complex information that would be confusing if it were written out in longhand.
Charts are usually easy to read and work from – that’s why they are popular among knitters as an alternative to written instructions.
Mosaic charts have a reputation for being tough to understand and follow, which is why this whole chapter is dedicated to unraveling their secrets.
If you don’t have much (or any) experience knitting from charts, don’t be afraid.
Just keep this in mind – my video shows you every step so you won’t get confused, and after you learn mosaic charts, any other kind of chart will be a cinch.
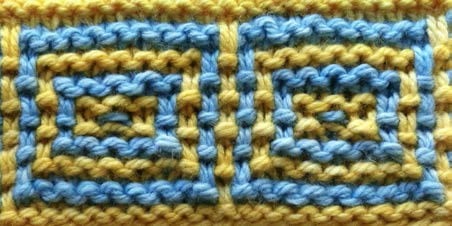
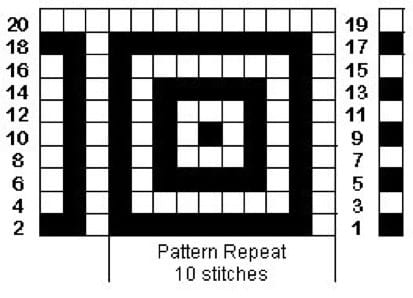
Concentric Circles Mosaic Chart
Here’s the swatch you’ll be knitting as you learn how to read mosaic charts.
 To follow along, print out this page and get and a pen and highlighter ready along with your two colors of yarn and your needles.
When you have your chart printed out, follow along with the video on the next page, referring as needed to the graphics and notes that follow. This chart is from the excellent Knitty tutorial on mosaic knitting.
How to Read a Mosaic Chart
In this demonstration, I use blue for my MC and yellow for my CC.

How to Read and Work a Mosaic Chart
Tips to Remember
- Decide which of your yarns will be the dark (MC) and which will be light (CC). Write it on your chart so you don’t forget.
- Using CC, CO a multiple of the pattern repeat stitches plus the edge stitches.
- Work 1 wrong-side row in the cast-on color (you can knit, resulting in garter-stitch fabric, or purl, resulting in Stockinette-stitch fabric).
Three Rules Of Reading A Mosaic Chart
- Each row on the chart is two rows of knitting.
- Work right-side (odd-number) rows from right to left and wrong-side (even number) rows from the left to right.
- Always work even on the wrong side.
The Box On The Right Is The Key To The Chart
- If there is a black square in the key on that row, knit all the black squares and slip all the white squares in that row.
- If there is a white square in the key in that row, knit all the white squares and slip all the black squares in that row.
To Knit The Chart
- Start by working the stitch in the box on the right. It is the edge stitch.
- Work according to the chart, knitting all the stitches that are the color in the key and slipping all the stitches that are the opposite color.
- On every wrong-side row, work even (ignore the chart, look at your work).
- Always work the last stitch in every row no matter what the chart says.
Tip: Use a highlighter to mark off each right-side row on the chart after you finish it.
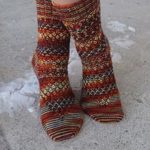
Patterns for Practice – Charted Mosaic Knitting
Congratulations! If you were able to follow along with me and read and knit the sample mosaic chart, you are well on your way to doing some serious color knitting.
So now that you’ve tackled the joys and challenges of mosaic charts, it’s time to reap the rewards.
These nine charted patterns are proof that knowing mosaic knitting allows you to knit some pretty amazing things. Enjoy.


Hooray! Whether you decide to try one of the practice projects right now or not, please give yourself a pat on the back for coming this far.