Crochet Videos
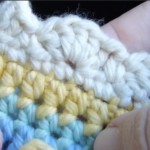
Crochet Border on Knitting

Crochet Border on Knitting
Crochet Scalloped Border on Knitting

Crochet Scalloped Border on Knitting
Extended Single Crochet
Extended Single Crochet
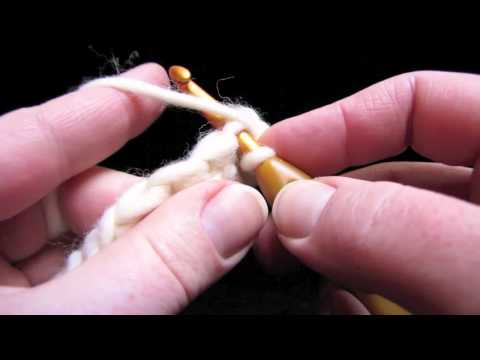
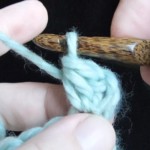
Base Chain
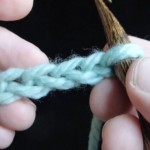
To chain, wrap yarn around crochet hook, pull yarn through loop on crochet hook.
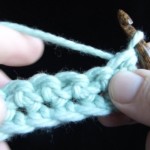
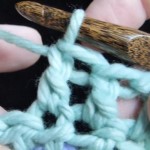
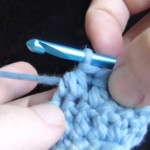
Single Crochet (Class)
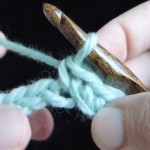
Insert hook, yo, pull yarn through work (2 loops on hook).
Yo, pull yarn through both loops on hook (1 loop on hook).
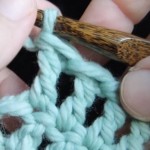
Next SC Row
To work another row of single crochet, watch the video below. You’ll create the all-important “turning chain” and learn how to crochet into a row of single crochet stitches. Good news: it’s easier than crocheting into the original chain!
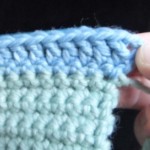
Examine Single Crochet Row
Take a close look at the fabric you’ve made. As you watch the video below, you’ll learn to recognize the single crochet stitch, count your stitches, understand why not each row looks the same, and learn how to find the front of your work.
Half-Double Crochet
Yarn over (2 loops on hook).
Insert hook, yarn over, pull yarn through work (3 loops rem on hook).
Yarn over, pull yarn through all 3 sts (1 loop on hook).
Double Crochet
Yarn over (2 loops on hook).
Insert hook, yarn over, bring hook through (3 loops on hook).
Yarn over, pull yarn through first 2 loops on hook (2 loops rem on hook).
Yarn over, pull yarn through final 2 loops on hook (1 loop rem on hook).
Triple Crochet
Yarn over twice (3 loops on hook).
Insert hook, yarn over, bring hook through (4 loops on hook).
Yarn over, pull yarn through first 2 loops on hook (2 loops rem on hook).
Yarn over, pull yarn through final 2 loops on hook (1 loop rem on hook).
Slip Stitch
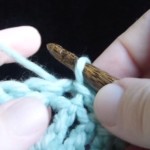
Insert hook, yarn over, pull yarn through work and through loop on hook (1 loop rem on hook).
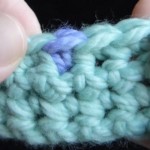
Make Stripes Crochet

To start crocheting a row with a new color, work every step of the last stitch in the original color. Then for the last yarnover, tension the new yarn and yarnover in the new color and pull it through to complete the stitch.
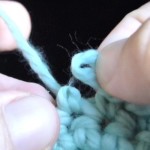
Sandwich Yarns

To sandwich yarn tails, lay the tail over the top of the stitches to be crocheted. Insert your hook into the stitch as usual, keeping the tail over the stitches. Complete the rest of the stitch as usual. The tail yarn will be sandwiched inside the stitch. Work 3-5 stitches and then cut tail yarn.
Magic Ring

Tension the yarn in your left hand, leaving a 10-12 inch tail hanging down. Make a loop with the tail behind the working yarn. Pinch the tail and working yarn in the thumb and middle finger of your left hand. Insert the crochet hook into the ring and begin to crochet (usually with a turning chain). Crochet desired number of sts in ring and pull tail to tighten ring. Join with a sl st to 1st st.
Crocheted Flower
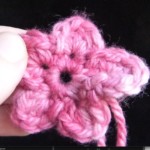
Materials:
1 yard bulky yarn
1 size H-8 (5 mm) crochet hook.
Flower Center:
MR (Magic Ring). Working in center of circle SC 11 stitches around, sl st to join in first SC st.
Petals:
Working in same stitch:
Ch 1, SC 1, HDC 1, DC 1, HDC 1, SC 1 – one petal completed
*Sl st in next SC of flower center, repeat petal instructions, repeat from * until five petals have been worked ending with a sl st. End off leaving long tail. Use tails to sew flower where desired
Coffee Cozy Crochet
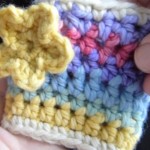
To crochet the coffee cozy,
Loosely ch 20. Join in round with sl st in first ch.
Ch 2 (turning chain), HDC in each ch – 20 HDC. On last yarnover of last HDC, use new color. Use new color to join with slip stitch in first HDC.
Continue for five more rounds changing color on the last yarnover of the last HDC of each round, sandwiching tail yarns in the first few HDCs of each round. End off. 6 rounds total of HDC.
Border:
Join yarn, ch 1. SC around both the top and bottom edge of cozy (working through the bottom loop of the initial base chain). End off. Cut sandwiched yarn tails. Weave in remaining tails with a tapestry needle.
Granny Square
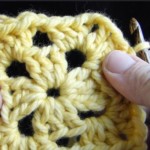
To start crocheting a row with a new color, work every step of the last stitch in the original color. Then for the last yarnover, tension the new yarn and yarnover in the new color and pull it through to complete the stitch.
Check Gauge – Crochet
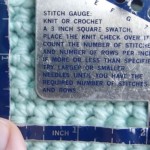
To check your stitch gauge in crochet, lay a ruler or gauge checker across the stitches and count the horizontal ridges. To check the row gauge, lay the ruler vertically and count the ridges and dents.
Crocheted Hat

Link to the pattern: https://stixyarn.com/blogs/stix-blog/the-perfect-basic-crochet-hat-for-every-head
Increasing on Crochet
To increase on crochet, work two (or more) stitches into the space of one.
Decreasing on Crochet
To decrease on crochet, work up to the last step of your stitch, then insert your hook in the next stitch and work up to the last step. Yarn over and pull loop through all remaining loops on hook.
Fixing Mistakes on Crochet
If you notice you’ve made a mistake, remove your crochet hook and tug the working yarn to pull out the stitch. If the mistake is further back in your crochet, keep pulling the yarn until the mistaken stitch has been unraveled.
Put the loop back on your crochet hook and work the stitch or stitches correctly, then keep going to finish your pattern.
Seaming With Crochet

To seam two pieces of crochet, hold them together right sides or wrong sides facing (depending if you want the seam on the inside or the outside). Insert the hook into the first loop in each piece, draw up a loop. Use slip stitch or single crochet to seam up the pieces.
Crochet Border – Double-Crochet Shell
Directions for this border can be found here: Hydrangea Baby Blanket
Weaving in Ends on Crochet
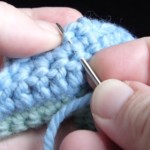
To weave in your ends on crochet, use a tapestry needle to thread the tail through the loops of the stitches on the wrong side of your work. Work up one stitch, down the next, and up the next.
Crochet Bind-Off

This is a medium-fast, medium difficulty bind-off that matches the Chain Cast-On.
Crochet Provisional Cast-On

The crochet provisional cast-on is very convenient because it’s so easy to remove.
It works the same way as the Chain Cast-On, only you’ll be using a piece of waste yarn to cast on the first row . After you cast on, work the stitches in your working yarn according to your pattern.
When it’s time to remove the cast-on, simply pull the tail – the chain will unravel easily.
To do a provisional cast-on for ribbing, work the first row after the cast-on in all knits or all purls. Then start the ribbing. This ensures the chain of provisional yarn unravels easily.
