Tips for Your Toes
Hello dear knitalong knitters!
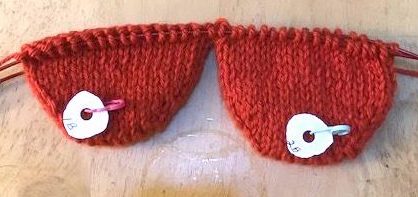
Some knitters have forged ahead, already finishing their sock toes and knitting the feet of their socks.
For those of you still on the toe (which is where we are officially in the knitalong), I have gathered another handful of tips and tricks inspired by reader questions and comments.
If you are already knitting the foot of your sock (you overacheiver), skip to the bottom of this post - I have guidance for you on how far to knit the foot before beginning the heel gusset increases.
Tips For Not Losing Your Cast-On Stitches: Part 2
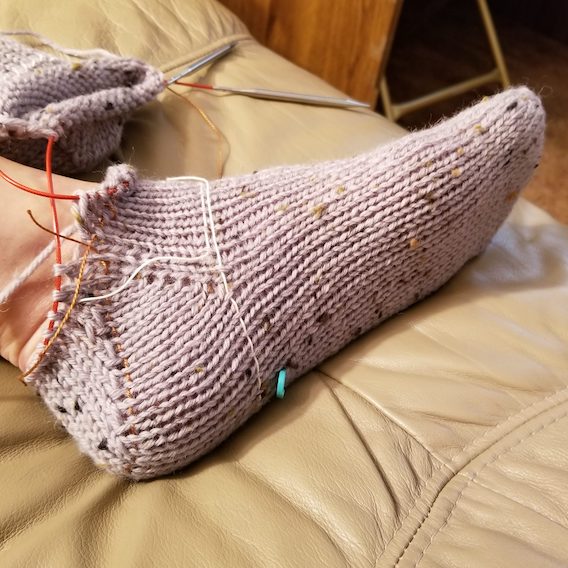
"Also, instead of cutting the tail to preclude working with it, I've found it helpful to weave it in if I'm satisfied with my CO row. That way, the tails are out of my way, and I continue knitting with the toes already shaping themselves into little pockets."
For Those Struggilng with M1s: Is There a Way to Do Easier Increases?
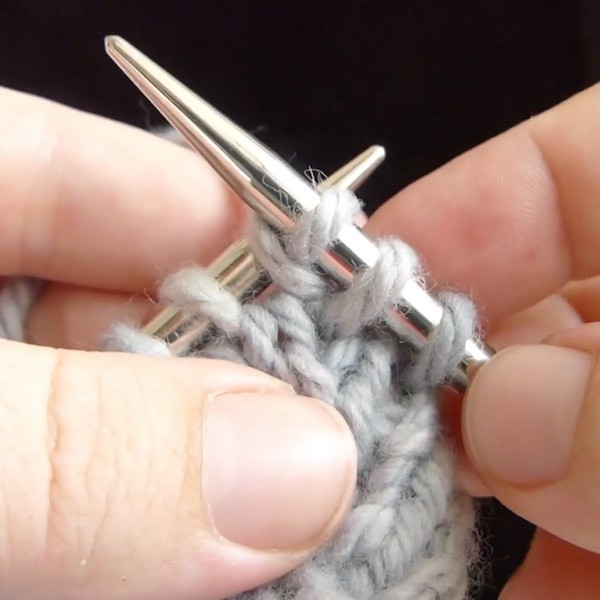
For them, and you, I've made the following video:
How to Do a KFB (Knit Front-and-Back) Instead of M1 on Toe-Up Socks
What If You Need To Re-Do One Sock? Can You Take It Off And Just Fix That One Sock And Then Put It Back On The Two-at-at-Time?
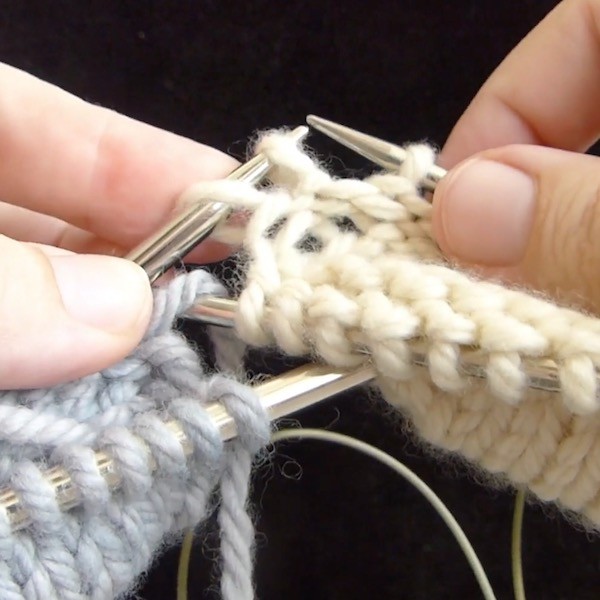
Here's how to do so correctly.
How to Remove One or Both Socks from Two-at-a-Time Needles to Unravel and Put Back On
Tips On Reading A Pattern If It Gets Confusing

In most cases, the knitters have solved their problems by reading problem bits of the pattern
1) Out loud,
2) To a friend, or
3) Writing an email to me with the parts that were confusing, and explaining what they've done.
When you read a pattern out loud or explain it to someone else, 90% of the time you notice what you didn't notice when you were reading it to yourself.
Common Confusion: Total Stitch Count
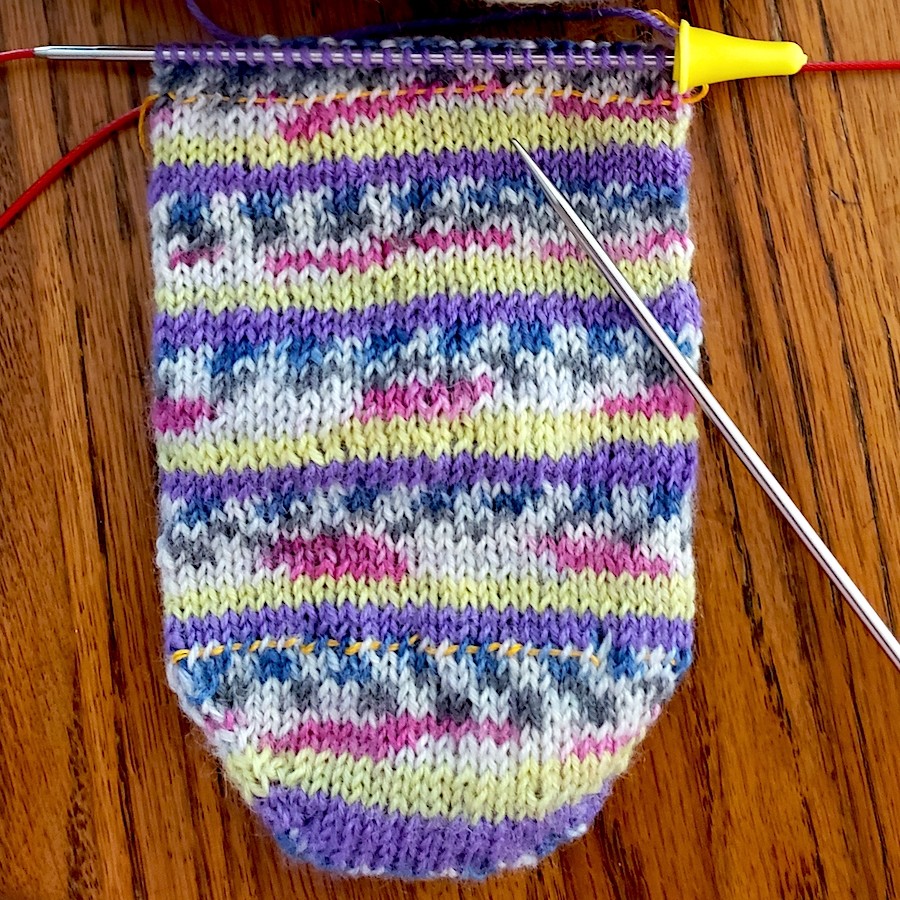
1) In Magic Loop, the sock stitches are divided in half. Half the stitches are on the heel needle, and half are on the instep needle. The total stitches of the sock are the total of the entire sock.
2) When doing two-at-a-time, do not add the stitches of both socks together. The numbers in the pattern are for one individual sock at a time.
Next Steps: Finish Increasing for the Toe and Knit the Foot
You'll have a while to knit this next section. Follow the directions in your sock pattern and in your Toe-Up Sock class videos to finish increasing for the toe and knit the foot of your sock.
Knit the Foot Until...

There is a section and video in your Toe-Up Socks class that shows you exactly where that is.
For the faux-heel-flap socks, you'll knit until your knitting the specified number of inches FROM THE BACK OF YOUR HEEL.
Be aware - the faux-heel-flap socks pattern does not measure from the toe but rather from the back of the heel.
Leave a Comment with Questions
I'm here to help you if you have questions! Please let me know how you're doing on your socks, if the knitalong is moving too fast or too slow for you, and anything else you'd like to report. Leave a comment below.
Happy knitting!

Hi Liat – I was just knitting what may be the last round of the foot before I start the gusset. BUT, I discovered I have two too many stitches on the first half of the second sock. I turned to do the second half of the round so now that sock is at the needle tips. I watched your video on removing a sock. I am working on two circulars so I have needle tips at both ends. Shall I remove the sock that is on the left to a circular needle, then unravel the one that remains on the two circs, reknit to the same point as the sock I’ve removed, and then put the sock on hold back on? I don’t know how I got these extra stitches. If I didn’t have the yarn coming over the needle correctly seems I would have noticed it was a yarn over; but, maybe not. Sigh.
Thanks for your guidance.
Marla
Hi Marla,
I’m sorry for the delay in getting back to you! Yes, you are on the right track with the plan you described. I hope you don’t have to unravel too much! But even if you do, re-knitting the sock will go fast as it is only one. As you unravel, try to see what happened, just for learning purposes for next time.
Let me know how it goes!
Liat
Thanks for confirming I understand what to do next. Looking at where I believe my mistakes are, it seems it might be possible for me to drop down without completely unraveling a couple of rows. I’m attaching a pic of the holes which are right at the point where I would turn to knit the second half of the round. The extra stitches are on the first half of the round of the second sock. So, is it possible for me to drop off the last stitch or 2 stitches at the end of that half round and work down to undo the errors? I’m not confident generally about doing that so I would appreciate your guidance. If I find that I inadvertently created a yarn over (or two) and knit into them, once I undo those, how do I work back up if I then have the correct number of stitches?
Always many thanks for you!
Marla
Hi Marla,
Your pic didn’t come through – I think we are having an issue with the image uploading with comments. I’m so sorry. Regardless, when you have too many stitches, it’s not the right move to drop down and take the extra stitches out, because you will have extra yarn there from the stitches you knitted. It’s not easy to disguise extra yarn. Dropping down and fixing stitches is good to know how to do but it’s mostly useful when you need to change which stitches are there, not eliminate extra stitches or create new ones.
Let me know if that makes sense.
Cheers,
L
Yes, I get it, thanks! I tried to upload my photo again before I saw your reply. Sorry about the overlap. I’ll let you know what happens as I work back to my errors and, hopefully, figure out how!
Hi Liat – I eliminated my extra stitches! I was reluctant to unravel though so I unknit. First I took off the sock with no mistakes. Then I had to work back three rounds. I believe I had a yarn over in the same spot (between the first and second halves of a round) on two consecutive rounds. Curious that I didn’t see I was knitting into a yarn over. Also that I had no issues with keeping my yarn in the correct orientation until those two rounds. Anyway, always grateful for your advice and support. A few more rounds and I’ll be ready for the gusset!
Many thanks. Hope you’re well!
Marla
Hooray! This is fabulous news! I’m glad you choose to unknit instead of unravel as it was only 3 rows. Great detective work!!
Big hugs,
Liat
Thanks! I was anxious about whether those stitches were really yarn overs so after I got the first one out, and it didn’t look like any stitches would run down, I put a removable marker into the one under it just in case. Then when I unknit and got back around to that stitch, it didn’t look like any other stitches were dependent on that so I took a deep breath, removed the marker and continued. Whew. I’m relieved I can move on! But, this was also a good experience as I now understand how to get a sock off if needed. Your videos are the best, thanks!
Yes, hooray! This is exactly how you learn what is a yarnover and what is a dropped stitch. Remind me- were they at the beginning of the round or half-round? Or at the end?
Liat
Not sure why my photo didn’t appear. Trying again.
Looks like I am a bit behind the others. I need clarification of “ring of the foot”. Does that mean just covering your toes?
Hi Connie,
It’s impossible to be behind! Everyone goes at their own pace during this knitalong. As far as the part of your pattern you are confused on, I think you are referring to the “ring toe?” Which would be the fourth toe- NOT all the toes. If you are following the generic pattern, as far as I can tell from the photo, you have increased too far and will need to rip back some. If that’s the case, I can help you with that.
To help you better, can you tell me exactly what pattern you are looking at? The name of the pattern (found at the top of the first page) and the version number (found at the bottom of any of the pages) are what I need to know which pattern you are looking at, and give you more exact directions. Thanks!!
Liat
OK – I think I see now. I have the patterns at home and there was something I printed that referred to the “ring of the foot”. I went back and found your free patterns and printed the Basic Aran-Weight Toe-Up Socks for Magic Loop – Version 4 and it says that I should have stopped at 16 stitches on each needle. So I will try again. Thanks Liat! Gosh, I was getting really good at M1L and M1R but I thought it looked funky :-)
Oh ok great! I’m glad you found the right pattern. Yes, 16 stitches will be correct. Thanks for letting me know you got it straightened out!
-L
Hi! I’m dazed ad confused. I’m doing the fingering weight socks with heel flap. I’m at the point where things don’t look or feel right. After increasing for the turn to 52 stitches,I knitted over 37 steps for the first adventure in W&T, following the instructions successfully through Row 4. The numbers 5 19, 6 18, etc. are not illuminating. I took them to mean Row 5, Row 6, etc, but the second number confused me. Being a Fleegle Fanatic, I powered on with the pattern of knitting or purling to one stitch before the last W&T, and I am the proud parent of a teeny turned heel with the working yarn waving at me from the right side of the four unknit center stitches, and 14 untouched stitches on each side of the heel increase. This can’t be right.
I’m undaunted. I need clarification on the numbering scheme after Row 4, and what does ” 2.5″ for heel turn” mean and what do I measure?
I’m going to tink back to the original 52 increase stitches (knit side up) and await help. Thanks. I’m getting the brain workout I had hoped for.
Connie H.
Connie,
I am so sorry about this!! Those extra numbers in the pattern are notes, completely not supposed to be in there! I have updated the pattern right now. The correct version is 4.8 and you can download it here: https://www.knitfreedom.com/free-pattern/faux-fingering/
Can you take a look and see if that helps??
Let me know!
Sorry again about this.
Liat
Thank you for removing your count notes. 😊 I thought it odd that the instructions to repeat the rows 3-4 came on the next page…
I am going to make a sample heel with larger yarn and follow the instructions again. I think the effort will be worth it so that I can see what’s happening. Right now I’m stuck in Fleegle mode.
To clarify, I’ll be starting the heel turn short rows on the knit side, knitting in to stitch 37 (of the 52 for my size), W&T, and then purling back 22 stitches to make the next W&T? What happens to the remaining, outlying stitches? Do they become part of the heel after the disguising is all finished?
Hi Connie,
I’m sorry for the trouble you had posting the comments! Actually both comments did come through, so I’m answering you here (although I got your email too). You are welcome for fixing the pattern. I also just added page numbers (easy to do, great suggestion) and sent out the corrected pattern to everyone. The version with page numbers is 4.9.
As to your clarification of the stitches, yes. You’ll K37, W&T, P22, W&T, etc until finished with the heel turn. 14 sts will remain untouched on both sides of the short-row section. Then, when you are knitting the heel “flap,” you’ll actually be decreasing on either side of the heel flap as you knit it, which will decrease those side stitches down to 0, 2, or 4 sts (whatever number it specifies for your instep height).
Let me know how it goes! And thank you for your patience and positive attitude in spite of my errors.
Liat
You are so great! Thank you for your patience and for clarifying the steps. In my mind we are doing a half of a heel (the rounded bottom portion) with the W&Ts and those extra untouched stitches will be worked in when we make the heel flap, right? As a frequent Fleegler, I didn’t bother with flaps.
As an aside, I could be president of the Pedants of America, and that annoys even me. Thanks for hanging in with me on this. I’m still going to practice with a sample and stop stressing my socks until I feel confident with this new skill.
Connie
Yes, exactly! You can look at the photo on this page and see the two sections you are talking about. It will make a lot more sense once you do it on a sample.
I love your attitude. Let me know how it goes!
Liat
I took the Star Wars approach and decided to trust the force, Obi Liat. It worked! My sample came out with a cup heel and the correct number of stitches on each needle. My hang up was that I couldn’t visualize the ‘force’ that created the cup with the picked up wraps. Also, I was somewhat stymied by the fact that my working yarn was in the middle of the row.
I must have had this kind of consternation when I was learning to knit 14 years ago, but like childbirth, as the child grows the memory of the painful delivery disappears.
I’m going to go back to my actual socks and move forward with more confidence. Looking forward to a fancy heel, too!
Thanks for hanging in with me!
Connie
Hooray!! I’m so glad you trusted the process and your sample heel came out great. In knitting, it’s often hard to visualize beforehand exactly what’s going to happen. We have to go into these situations with a balance of trust and good judgment. The latter will grow with time and experience, but you’ll always need a dose of the former if you are going to try out a new technique. Well done you!!
Liat
I have a question on when to stop knitting for the faux-heel-flap socks (I’m doing the faux-heel-flap in fingering weight). I do see that you stress, “For the faux-heel-flap socks, you’ll knit until you’re knitting the specified number of inches FROM THE BACK OF YOUR HEEL.” I can think of two ways I could do this. 1) I can measure my foot (9.75″) and subtract the number of inches (for my medium size: 3.75″) and stop knitting when the toe/foot section reaches 6″. Alternatively, 2) I could try on the sock as you do in your fleegle video and stretch it to the “stretchiness” I’d want my sock, and knit until there’s 3.75″ between the back of the heel and the toe/foot portion of the sock when on my foot. Since I’d be stretching the yarn when I pull it on, this gets me a different stopping point than the first option. Which would you recommend? (Or is there a 3rd way I’m not considering?) Thanks!
Nevermind!! I just went back to the pattern and read this: “Measuring hint: Try the sock on and pull it on as snug as you like your socks to fit. Flex your ankle. Measure from the back of your heel to the needles.” I’d delete my comment if I could but I’ll just sheepishly reply that I found the answer already in the pattern instructions.
Hi Megan,
Your comment cracked me up! I saw the “nevermind” email first and was like, “What did I miss?!” Anyway, I’m so glad you found the correct instructions in the pattern. I have modified the chapter instructions for the Faux Heel Flap to include information about when to start increasing for the heel – just to help people in the future.
Happy knitting!
Liat