
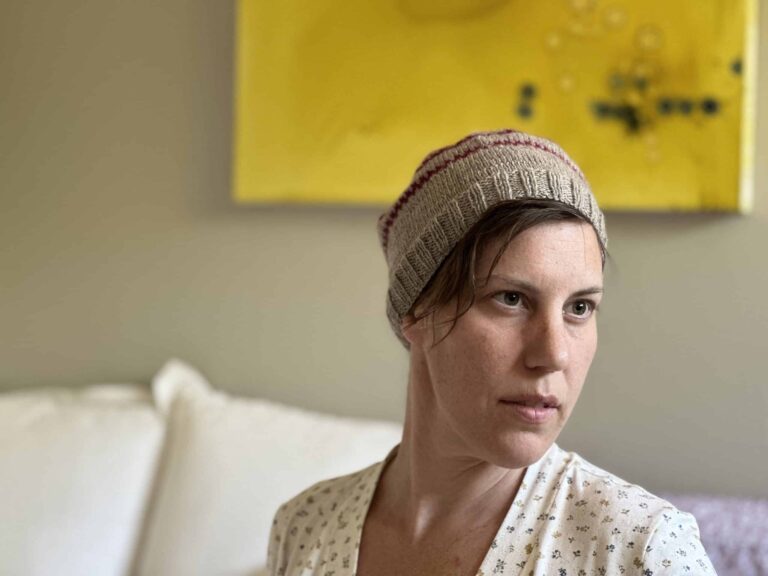
What makes this hat look perfectly finished?
It’s the hemmed edge on the bottom. It’s a subtle, advanced technique that makes knitted projects look SO professional.
This hat just wouldn’t look the same with a plain ribbed brim.
Here’s a video teaching you how to create the hemmed edge.
Remember, this is a step you do at the BEGINNING of your work, so don’t wait until you’re finished to decide to make a hemmed edge!
Unless of course you like sewing by hand.
A note: you can do a row of purl stitches on Row 5 if you want to: that will create the bottom edge you see in the photo above.
In the video below I demonstrate the technique without the purl row. It’s up to you!
![[KnitFreedom] How To Knit A Hemmed Edge](https://i.ytimg.com/vi/u5WrK8NC0fw/hqdefault.jpg)
[KnitFreedom] How To Knit A Hemmed Edge
To follow along with the video:
CO 14 sts
Work in St st for 11 rows
Row 5 (optional): P
Fold knitting and place the purl bump of the first cast-on stitch on the needle. Knit this stitch together with the stitch on the needle. Repeat down the row.
Continue knitting in St st or according to your pattern.

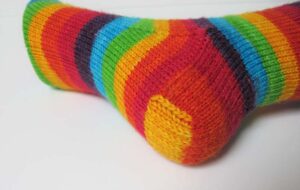
You can also knit a hemmed edge in the round.
Here’s a Christmas stocking pattern that uses a hemmed edge in the round to make a gorgeous cuff.
Again, a ribbed edge just isn’t the same.
In local news, I’ve been learning to read and write knitting patterns in Spanish. No official reason, yet… it’s just fun!
I had breakfast at a cafe one morning and read through the magazine below word-by-word, translating the terms I could figure out by looking at the diagrams.
 Fun fact: here they sell knitting magazines at corner newsstands, not in yarn stores.
When I asked the owner of my LYS if I could buy a knitting magazine she had laying on the counter, she gave me a weird look and said, “You can borrow it if you want, but it’s mine.”
When I asked her where I could get a copy, she told me to go to the news kiosk across the street.
When I asked if she was sure, she said, “Yes – that’s where I got mine!”
Another (unfortunate) difference between the yarn stores here and those in the States – there are signs everywhere saying “Please Do Not Touch The Merchandise.”
That’s right- if you want to buy yarn, you have to take a number, wait for the salesperson to be free, and then walk around pointing to what you want so they can put it in a bag for you.
Needless to say I am a renegade customer. I touched everything, just like I teach you all to do!
 Also, I’m excited that a new Two-at-a-Time Mittens Video E-Book is also on the verge of being published!
This book is by special request and the mittens are a super-fast project.
It’s winter here, and it gets dang cold riding my bike early every morning to Spanish class.
So I whipped up this pair of mittens in about four hours and they fit JUST right.
Line Break
Learn More About The Two-At-A-Time Mittens Video E-Book Here
Read More of My Journey Through Argentina:
- The Next Post: The Slipped Stitch Heel, and Winter in Mendoza
- From The Beginning: My First Adventures In Argentina
Related Tutorials:
If you liked this tutorial on how to knit a hemmed edge, post in the comments!


19 thoughts on “How to Knit a Hemmed Edge”
Hi Liat. Loved your tutorial, as usual. I was wondering how to adapt the hemmed cast on to regular patterns. Just add the 11 rows then subtract the remaining rows from the pattern? Or just add the hemmed edge as the first 2 rows of the pattern and follow after that? Also, can it be adapted to garter stitch? Thanks. Susie
Hi Susie,
I’m going to be passing your question along to Liat, but I want to let you know that she is currently on maternity leave (she is expecting her baby very soon) and will be taking up to 1-2 weeks to answer.
Thanks so much for your patience and understanding!
Best,
Elias
Hi Susie,
Thank you so much for your patience! I was on maternity leave but I am back now.
To add this edge to projects, work the 11 cast on rows and eliminate 5 rows from the edge of the pattern instructions.
I wouldn’t necessarily use this on garter stitch as that could get pretty bulky although you definitely could do it. I would just use a pretty cast-on that looks great with Garter stitch like the Chinese Waitress Cast-On https://www.knitfreedom.com/blog/chinese-waitress/
Hi Liat, when doing the hemmed stitch in the round is it joined as usual on the cast on, do you rows, however many, then continue with the pattern?
Hi Mildred,
Thanks for your question! To do hemmed cast-on in the round, you cast-on like normal, knit 11 rounds (round 5 is optionally a purl round), then fold the edge and join the cast-on stitches to your live stitches one at a time using k2tog. Then you continue with your pattern.
I hope this helps!
Liat
Mind blown!! First of all, I love your videos. Your voice and inflections are similar to my own, so it’s a nice familiar sound. Second, I’ve been knitting toques, etc for a long time but they always had that homemade look. This takes it to the next level! Thank you so much for this!
Hi Gail,
Hooray!! I’m so glad this technique is going to bring your knitting to the next level. And thank you for your kind words about my voice etc. It’s really important for educational videos that the teacher be easy to listen to! So this is high praise.
Hugs and stay in touch,
Liat
Your tutorial will make my beginner skill knits look really advanced! But being new & ignorant here is my question – if I do this beautiful hemmed edge on a boggan, that I would normally start with ribbing, do I do the ribbing starting after the hemmed edge stocking net stitch section? Or can the hemmed edge be done in ribbing as well? (I don’t think it would look as neat.) we really like our hats / boggans to have ribbing so they stay on really well & don’t “get out of shape”.
Hi!
The link to the Christmas stocking appears to be broken. Is it still available? I love it! Thank you,
Caryn
Liat:
Thank you for your response. I wanted to let you know that I was able to do the hemmed cuff that I wanted for my sweater. Thank you for your help and for all your videos but most of all, thank you for inspiring us beginners to be “fearless” knitters. In that spirit, for this sweater (My second one ever) I will try my luck with the seamless hybrid by Elizabeth Zimmermann and I will try to do a few simple cables which I have never done before. It could all be a disaster but I sure will have fun trying!
Luly
Luly
I’ve been teaching myself how to knit and your tutorial videos have been an awesome help. They are very clear, well lit, great sound and you always pick yarn that is easily visible. Among many other things, I learned “two at a time sleeves” on magic loop with you!
My question today is: How would I knit a folded hem and folded sleeve cuffs for a sweater worked in the round. I’d like to do it in stockinette stitch and with constrasting yarn for the inside hem (The private side) and using circular needles and magic loop for the cuffs. The videos that I have found so far do not explain how to do the joining in the round when using a provisional cast on (The crochet method has not worked well for me so far. I always loose the stitches or can not unravel properly) and later reclaiming the stitches when working in the round, and in the case of the sleeve cuffs working with a small circuference.
Thank you,
Hi Luly,
Thanks for your sweet words!
This is a great question about doing hemmed edges in the round. To do them, just cast on with whatever basic cast-on you like and join in the round for Magic Loop. Knit your 11 stockinette rows.
If you want to do a contrasting color for the seam, just be aware that you’ll see it on the right side of the work, too. If that’s what you want, using the contrasting-color yarn, fold your knitting and begin to pick up the cast-on stitches and place them on your needle and knit them with the live stitches, just as I show in this video.
I hope this helps!
That love absolutely amazing!!! I’ll stick that that from now on. Thank you so much for all these great tutorials, you’re making a Dutch gal very happy! :-)
I am happy that you are happy! You are so welcome for the tutorials. I’m very glad that they’re helpful for you. :)
I love this! I make a lot of hats, and I think this would be great for my winter styles.. and it reminds me of double knitting.
I’m so glad! I am in love with this technique and the look it gives my projects. Let us know how it goes when you try it!
That was a GREAT tutorial. You make things seem much easier for me. Love it ;)
Thanks for the video on hemmed edges. How would you work this on a sweater that is knitted top-down? Would you just roll the edge over and pick up stitches from the body? The hemmed edge would be a perfect finish for the sweater I’m currently working on http://www.ravelry.com/patterns/library/simplicity-cardigan
It would keep the stockinete edges from rolling and give it a neater edge.
Yes, exactly! You could roll the edge over, pick up stitches from the body, and then bind off in the same row! Great question – I’ll do a video on this!