Free Video: German Short Rows
This tutorial shows you how to do German short rows and how to substitute them in patterns that call for a regular wrap and turn.
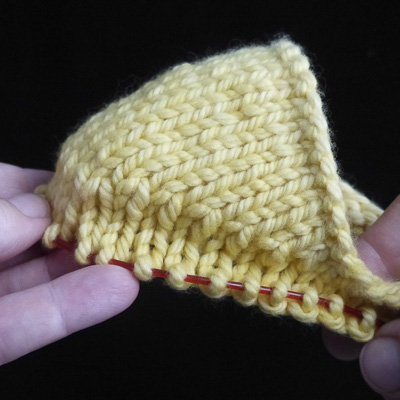
How to Replace Regular Short Rows with German Short Rows
You can substitute German short rows for the wrap-and-turn in any pattern. You just need to work one more stitch than the pattern indicates before creating your “double stitch.” Details below.
Free Video: How to Do German Short Rows
Correct method: On each row, work one extra stitch than the pattern indicates before turning, slipping the stitch, and creating the double stitch.
If your pattern says “K40, W&T, P22, W&T, continue working back and forth, working until one stitch before the wrap and turn, W&T,” you would substitute GSR (German Short Rows) as follows: “K41, turn, slip, create double stitch, P23, turn, slip, create double stitch, work up to next double stitch, turn, slip, create double stitch.”
Step-by-Step Instructions: German Short Rows
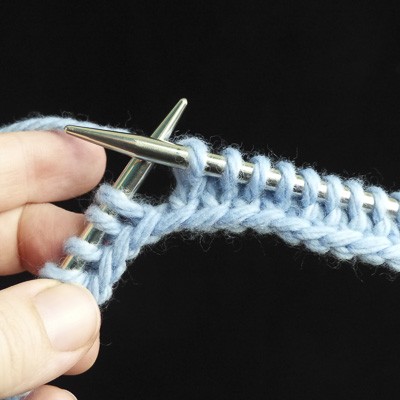
1. Knit one stitch more than where your pattern says to wrap and turn.
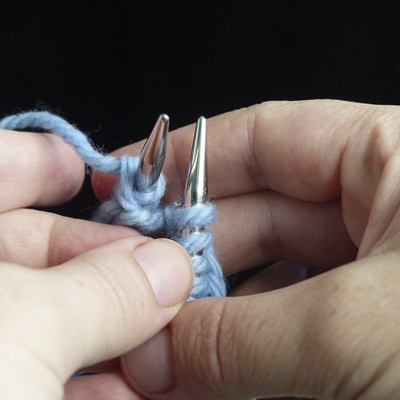
2. Turn your work.
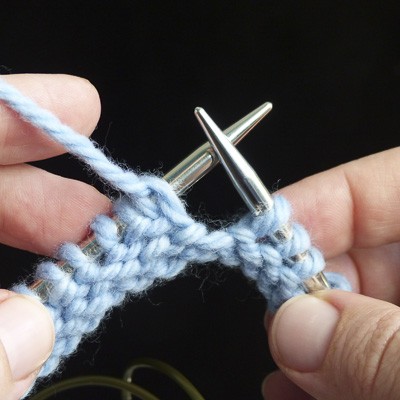
3. Keep the yarn in front.
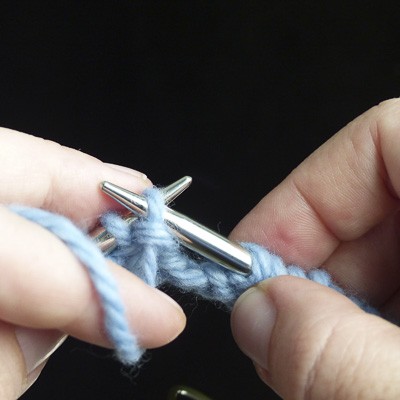
4. Slip the first stitch from the left-hand needle to the right-hand needle purlwise.
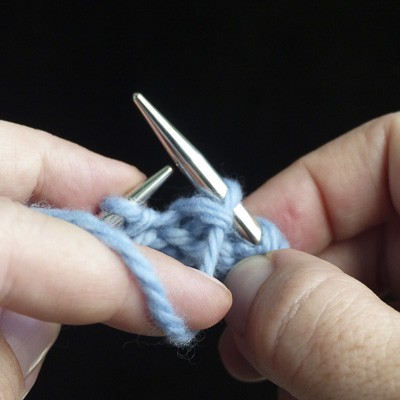
5. The stitch is slipped to the right-hand needle.
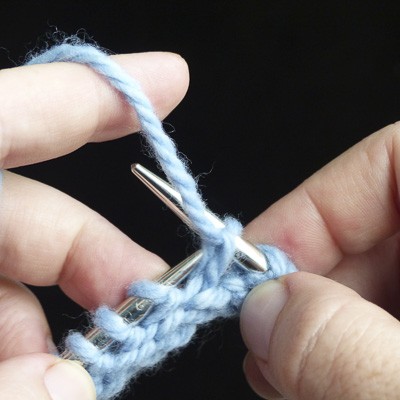
6. Bring the working yarn up and over the back of the right hand needle.
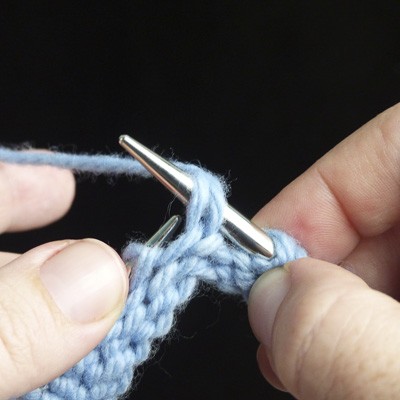
7. Tighten the yarn to the back. The stitch now appears as a double stitch.
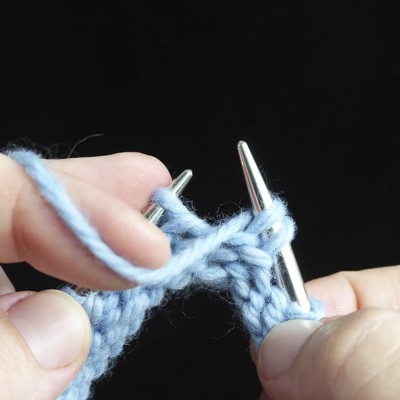
8. Bring the yarn to the front to purl.
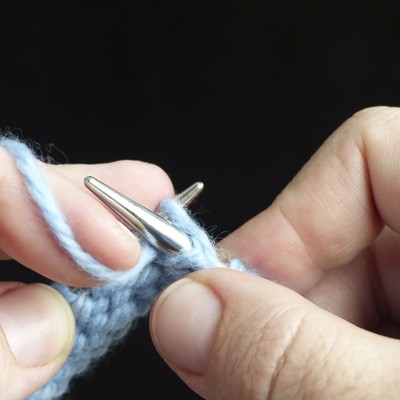
9. Purl across, purling one more stitch than your pattern indicates.
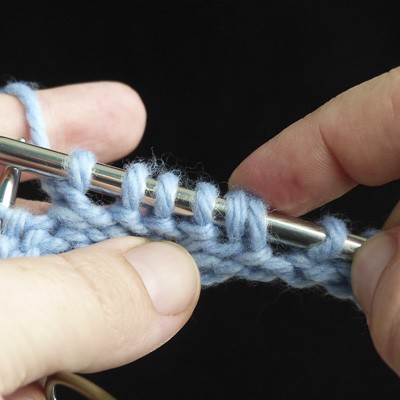
10. When counting how many stitches you’ve purled, be careful not to count the double stitch as the first purled stitch.
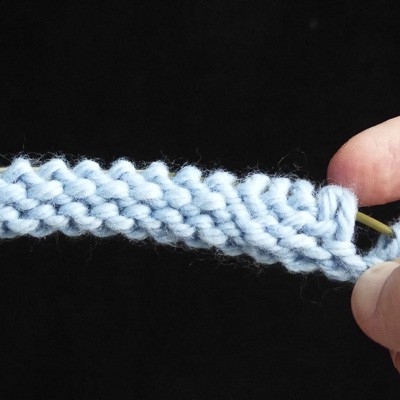
11. Counting your purl stitches. Don’t count the double stitch.
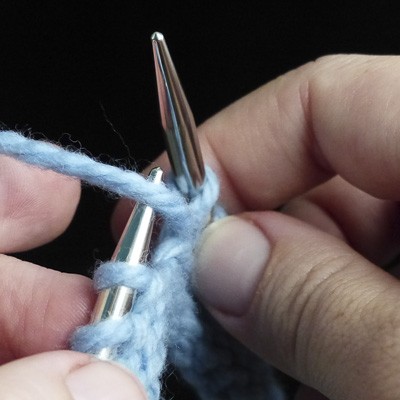
12. After working one purl stitch more than indicated, turn your work.
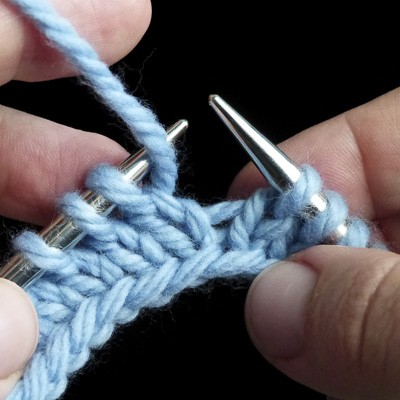
13. Keep the yarn in front or move it to the front if needed.
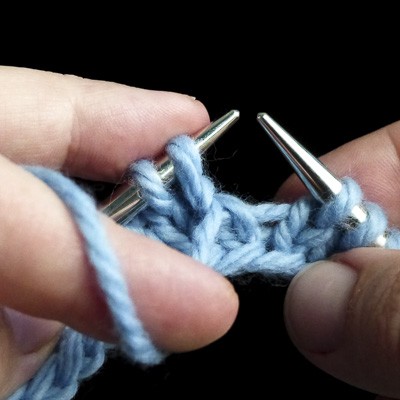
14. Always hold the yarn to the front, on the knit or purl side, before you slip the stitch.
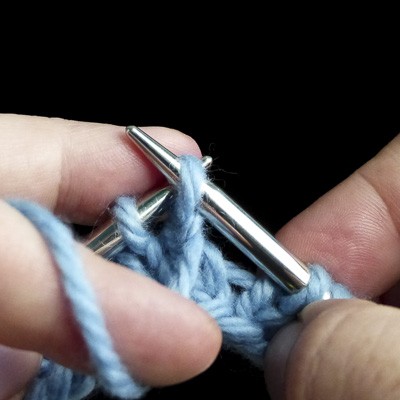
15. Slip the stitch to the right-hand needle purlwise.
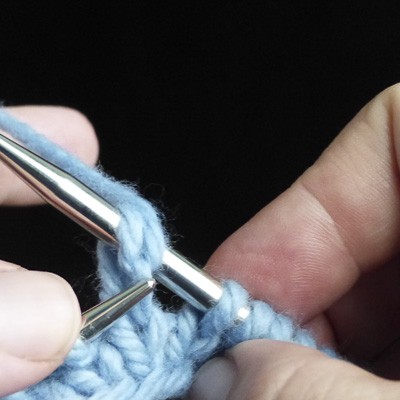
16. Lift the yarn up and over the back of the needle.
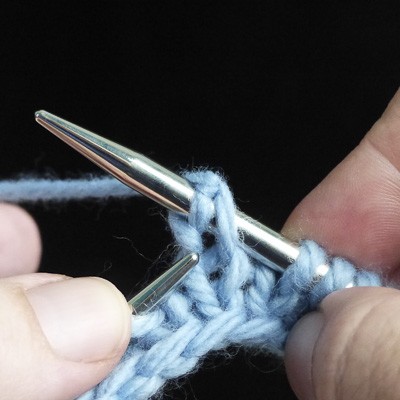
17. Tighten the working yarn until the stitch appears as a double stitch.
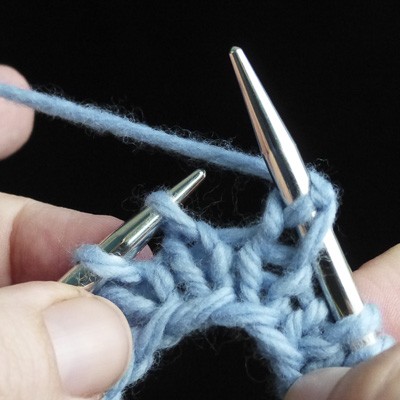
18. Normally your pattern will now tell you to knit to the stitch before the wrapped stitch.
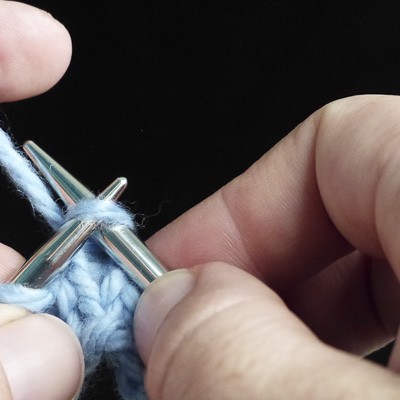
19. In German short rows, you’ll want to knit right up to the double stitch.
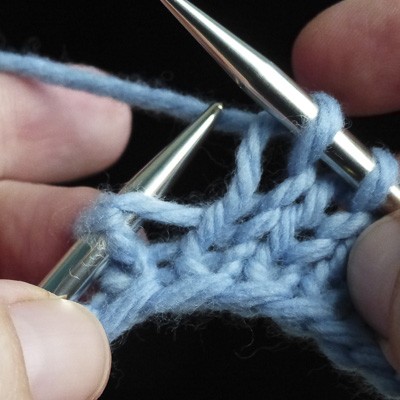
20. Knit until you get to the double stitch.
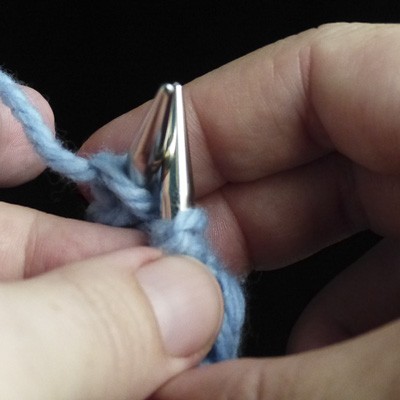
21. Turn.
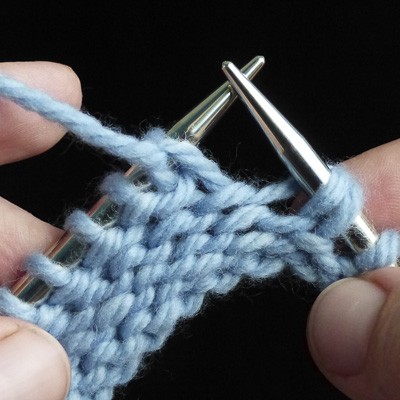
22. Keep the yarn to the front.
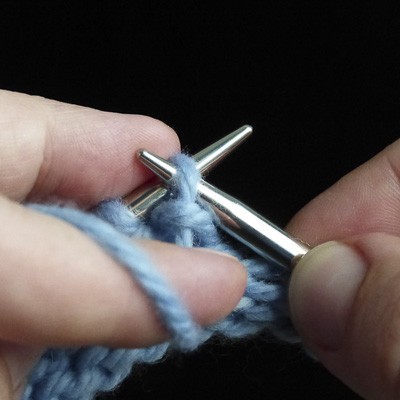
23. Slip the stitch to the right-hand needle.
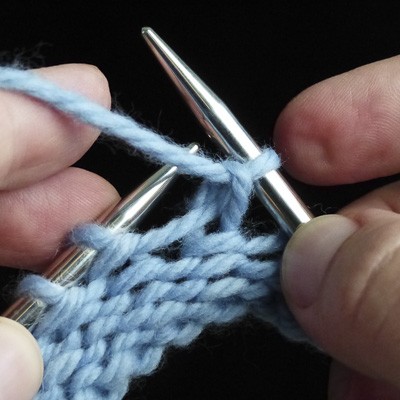
24. The stitch is slipped.
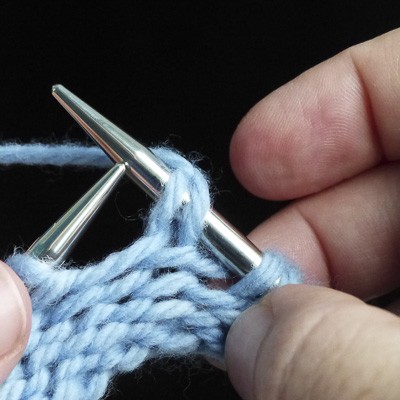
25. Lift the yarn up and over the back of the needle and tighten until the stitch appears as a double stitch.
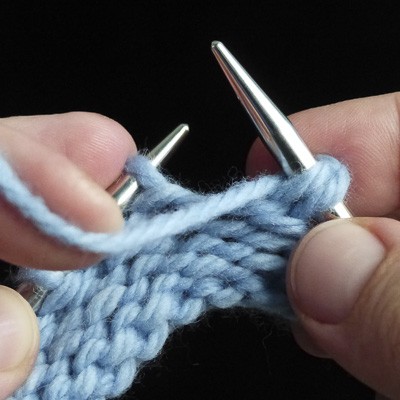
26. Bring the yarn to the front to purl.
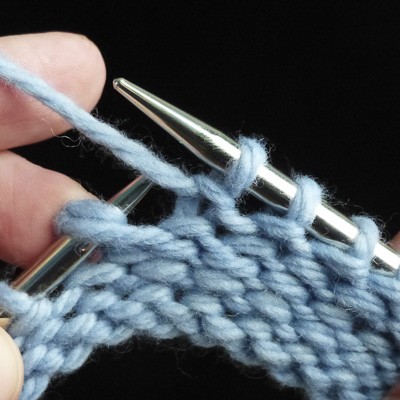
27. Purl until you reach the next double stitch.
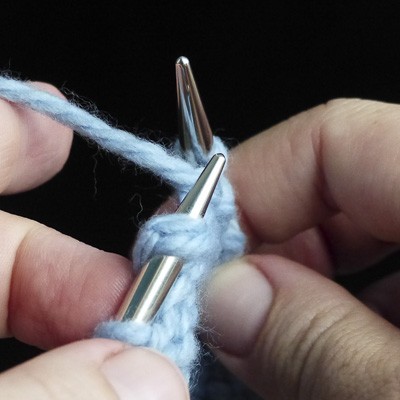
28. Turn your work.
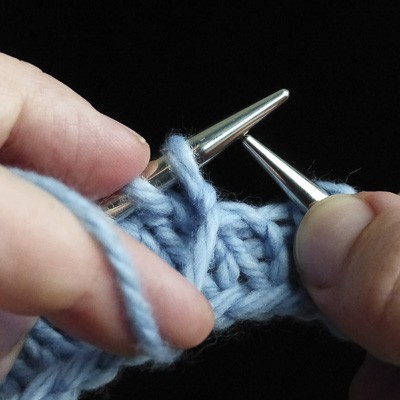
29. Keep the yarn to the front.
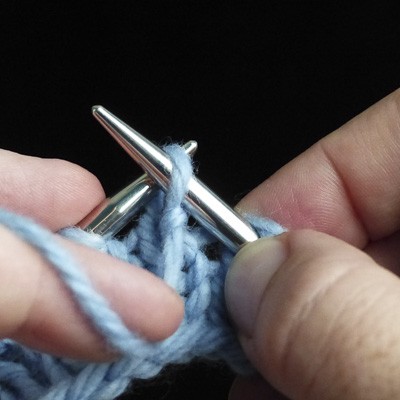
30. Slip the next stitch purlwise.
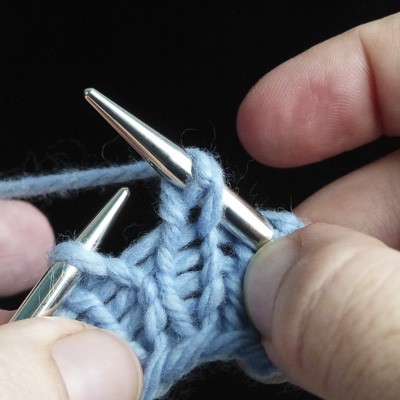
31. Lift the working yarn up and over the back of the needle and tighten to create a double stitch.
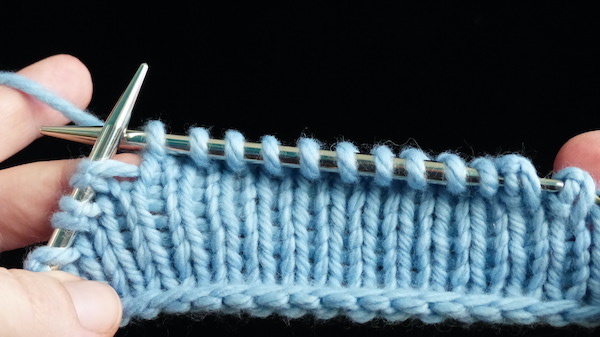
32. Your pattern will usually tell you to continue wrapping and turning until you have a certain number of stitches between the wrapped stitches.
You will continue your German short rows in the same manner until you have that same number of stitches between your double stitches.
Here there are 10 stitches between the “wrapped” (double) stitches.
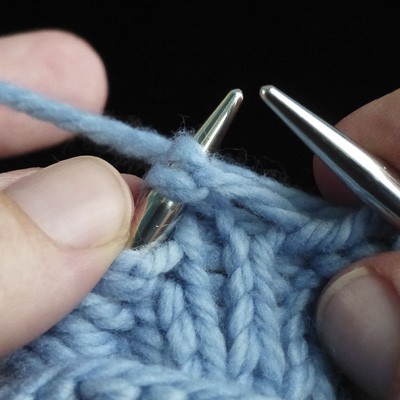
33. Time to hide your double stitches. Work across the knit side until you reach a double stitch.
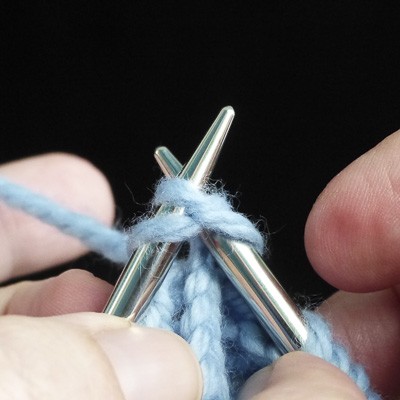
34. Insert your right-hand needle into the middle of the double stitch.
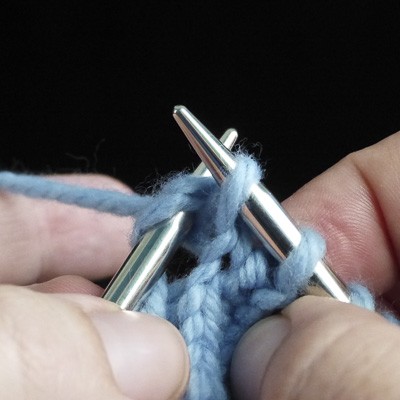
35. Knit the stitch (this feels like a knit two together).
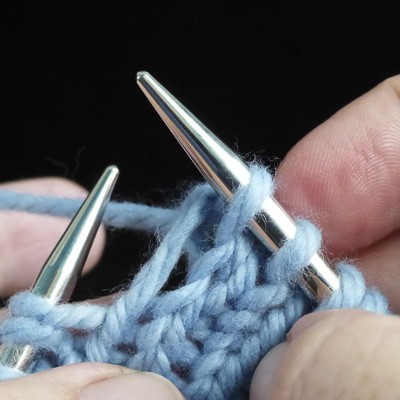
36. The double stitch is hidden.
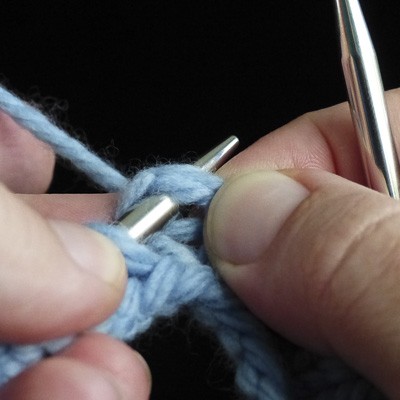
37. A closer look at where you should insert the right-hand needle to hide any double stitch.
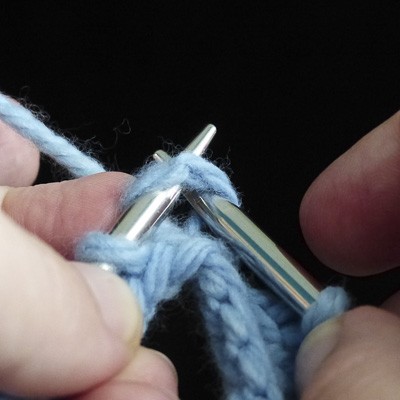
38. Insert the needle right into the middle of the stitch and knit it to hide.
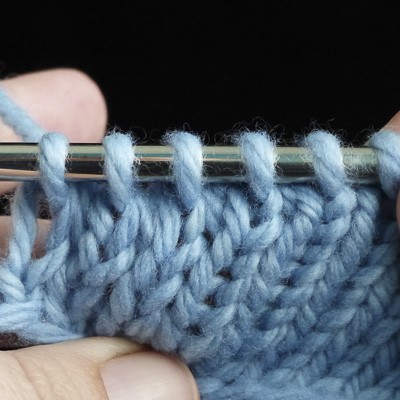
39. Work across the knit side, knitting each double stitch through the middle, to hide all the double stitches on the knit side.
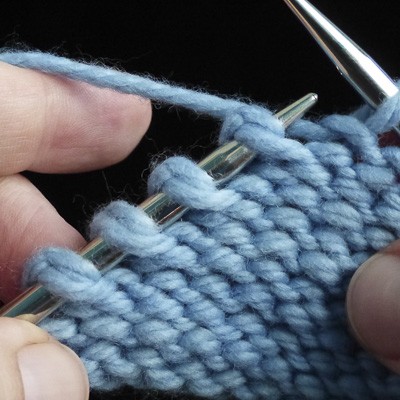
40. Turn and purl across your work until you reach the first double stitch on the purl side.
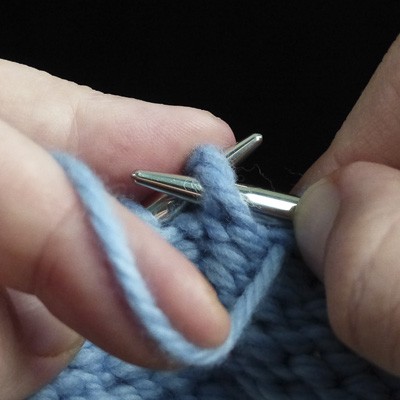
41. With the yarn in front, insert your right-hand needle from back to front into the middle of the double stitch just as you did on the knit side.

42. Purl the double stitch. This feels like doing a purl two together.
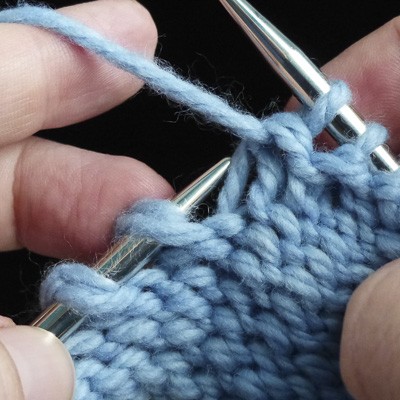
43. Hiding the double stitch on the purl side.
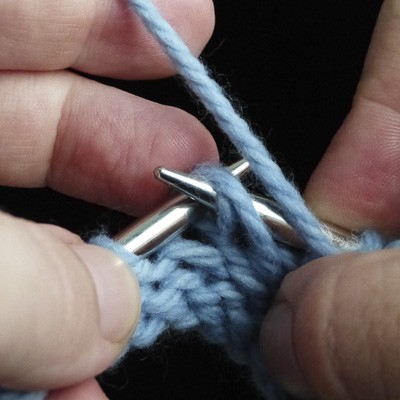
44. Continue working across the purl side, purling each double stitch through the middle as you come to it.
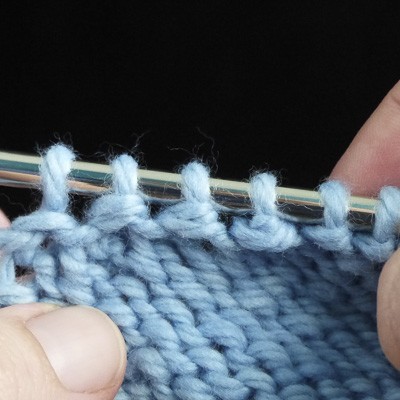
45. The hidden double stitches on the purl side.
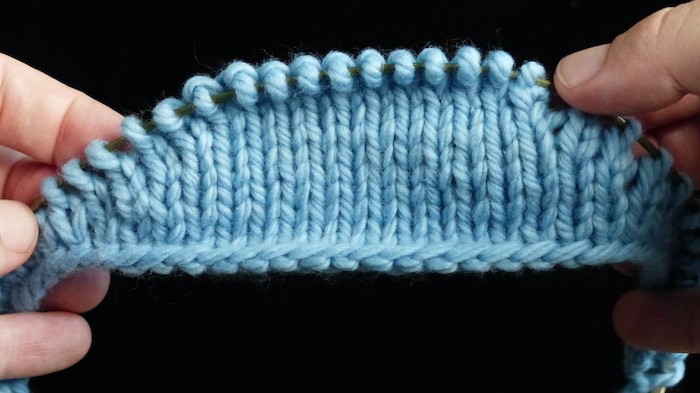
46. The finished German short rows.
…and there you have it! Now you can use German short rows in the place of a regular wrap and turn, and never struggle with being able to see those pesky wraps again!
Family Photos/News
KnitFreedom readers are so lovely in that they ask about what’s going on in my personal life, so here are a few photos.
Also a few notes about upcoming KnitFreedom classes and tutorials:
 I’ve just put the finishing touches on our new Dog Sweater class which I will be officially launching soon, but is actually available now.
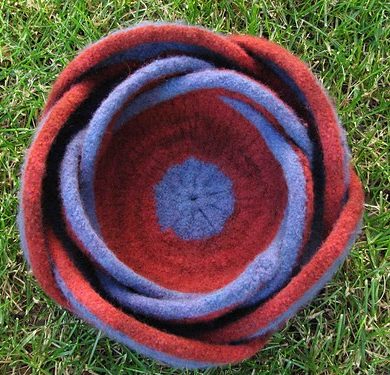 I’ve also just knit one of my fun 5-petal moebius bowls in preparation for a new video class, Felted Moebius Bowl! This is a very quick knit with tons of great techniques that I’m excited to teach.
Personally, I’ve been working on making my house a home with an amazing Feng Shui consultant to help me know what changes are most impactful to make. I might show some before-and-after photos one of these days!
Hugs,
Liat
Leave a Comment
Have any questions? Are you excited to try German short rows? Leave a comment and let me know!

Stop making these common mistakes and knit with confidence
- Avoid Common Mistakes
- Tackle New Projects
- Knit With Confidence

21 thoughts on “Free Video: German Short Rows”
Hi Liat,
I am reaching out because I am working on the collar of Moonflower Tee. My LYS owner for some reason did my collar instead of teaching me. She is an extremely loose knitter and I don’t like the way it looks. I want to do German short rows…unfortunately it written as w&t. The very first stitch of collar was a wrap. Can I do a GSR on the very first stitch?
PLEASE help
Hi Liat,
I have a question: you said to just go up to where it says w&t ,turn and make ds (double stitch).
A lot of other folks say to knit one more stitch then turn and ds. I am a tad confused.
Example..if the pattern says k8, w&t…to convert to German short rows .. k9, turn then ds.
Right now I have just finished the gusset on your sock pattern and I am ready to start the short rows.
Thank you for the help,
Fey
Hi Fey,
You are right! I’m so sorry about this. I’ve fixed my directions above now to reflect the correct way, which is with one extra stitch as the other folks say. Thanks for helping me catch this!
Liat
Thank you Liat for your patience in demonstrating a true step-by-step tutorial on this innovative W&T! What a real skilled and ingenuous perspective from an ever resourceful mind! We are so grateful to you for sharing your wisdom.
This is so motivating and so compelling to get my project out and get going with it👌🏼💟 Malou
Hooray! Thank you so much for your sweet comment Malou! I’m glad this inspired you and that the step-by-step photos were so clear. :) Big hugs,
Liat
Love your teaching style and might have to set down quilting for a bit and dip back into my yarn stash. Love the adorable kid pix. (Im at the age where I especially love other people’s children and puppies!)
Hi Fae,
Thanks so much for your comment! I’m so glad this tutorial inspired you!
I’ll be sure to keep the kid pix coming.
Hugs!
Liat
I can’t wait to make my next pair of sox and try out the German short rows!
And the dog sweater class is loaded with great skills! Just one question…How do you get the seamless sweater on the dog?
PS I love that you tell us which skills you’ve included in each project.
Hi Teresa,
I think you will love it! They’re quite easy, as you can see.
And I’m delighted you’re excited about the dog sweater class, you are certainly right that you will learn a lot. The dog sweater stretches and has a ribbed neck and armholes, so you just slip the sweater on over the dog’s head (just like you slip a turtleneck over your head).
Cheers,
Liat
Brilliant, Thankyou, no more fiddly W&T’s, ’twill be German short rows from here on! I’ve always got aleast 1 pair of socks on the go, and find “picking up the wraps as you go” a real pain.
😊 I love all the great tips on this site. Thankyou. Happy knitting everyone.
P.S. I am in the UK and ‘we’ call the ‘American style ‘ you show us the ‘English way’.☺ ‘We’ prob took our style of knitting, along with our language, over to the states when ‘we’ colonised all those years ago!😅
Hi there, I couldn’t have said it better myself! So glad you’re going to adopt these German short rows.
P.S. In keeping with the irony over countries, in Germany, they do not call this technique “German short rows!” They call it the double-stitch. Lol!
Thank you for all of this great information. “When the student is ready, the teacher will appear” I was just wondering how to do this and you appeared! :)
Milo is very handsome. He looks squeezable!
Karen
Hi Karen,
I’m so glad you got ready because I had been wanting to publish this for a while! Maybe you gave me the cosmic push I needed. :D And thank you about Milo. He is quite adorable. And he smells great, too! Haha. Love it :D
Sweet kiddos!!!! Nice to see the pictures. Include more, please. Love seeing family. Thank you for this new video. Linda
Thank you Linda! I’m happy to include more photos! Although Milo has been making it more difficult recently – every time I get out the camera, he runs around to my side and wants to see the picture – even before I take it! I have to be quite sneaky. :D
Cheers,
Liat
Thank you SO much for the short row help! I was ready to give up on short rows😔. Also, count me in for the felted mobius bowl. It is so good to get news from you.
Pauline
Hi Pauline,
You’re so welcome! I’m glad you were open to learning this new technique. Never wrap and turn again!!
And I’m glad you’re interested in the felted moebius bowl project, that’s great to know! It’s a lot to learn in a little package, I think you’ll love it.
Cheers,
Liat
What a little cutie Milo is!! That was good thinking about “no legs” and can’t walk! Love the felted bowl. Good luck with decorating. Looking forward to seeing the pictures! Hugs, Judy
Thank you Judy! Yes, unfortunately Milo can’t fool me about his legs and he’s VERY heavy to carry everywhere, so this is something we’re working on. But it is awfully cute. I’m looking forward to finishing my Feng Shui journey and posting pictures! (Well I’m not looking forward to sharing the “before” pictures but it will be an amazing transformation.)
Hugs,
Liat
Well, gee, if I had known how easy short rows could be I would have done more of them. Now, I’m going to short row easily! Thanks so much for the technique, which is explained forthrightly in voice and video.
Hi Leslie,
Hooray! I’m delighted you found this technique easy to understand and that you’re going to use it! Thanks for coming here and telling me, it’s so motivating.
Cheers,
Liat